
There’s something irresistibly enchanting about Red Velvet Marble Waffles. Whenever I whip up a batch, I’m transported back to my grandma’s cozy kitchen, where the aroma of freshly baked treats mingled with the laughter of family gathered around the table. These waffles, with their vibrant hue and deliciously marbled texture, encapsulate that same warmth and joy, creating a breakfast experience that feels like a warm hug on a chilly morning. Let’s dive into this delightful recipe that is sure to become a cherished favorite in your home, just as it is in mine.
Why You’ll Love This Red Velvet Marble Waffles
Red Velvet Marble Waffles are not just a feast for the eyes with their striking red and white swirls, but they’re also a delight for the taste buds. The combination of rich cocoa and tangy buttermilk creates a perfect harmony of flavors that is both indulgent and comforting. You’ll love how these waffles transform an ordinary morning into a special occasion, reminiscent of those magical mornings in my grandma’s kitchen where every meal was made with love and creativity.
These waffles are perfect for celebrating life’s little moments, whether it’s a birthday breakfast in bed or a cozy Sunday brunch with loved ones. Every bite brings a bit of nostalgia, reminding me of my grandma’s gentle hands guiding mine as we cooked together, making memories as sweet as the treats we crafted.
Ingredients You’ll Need for This Red Velvet Marble Waffles
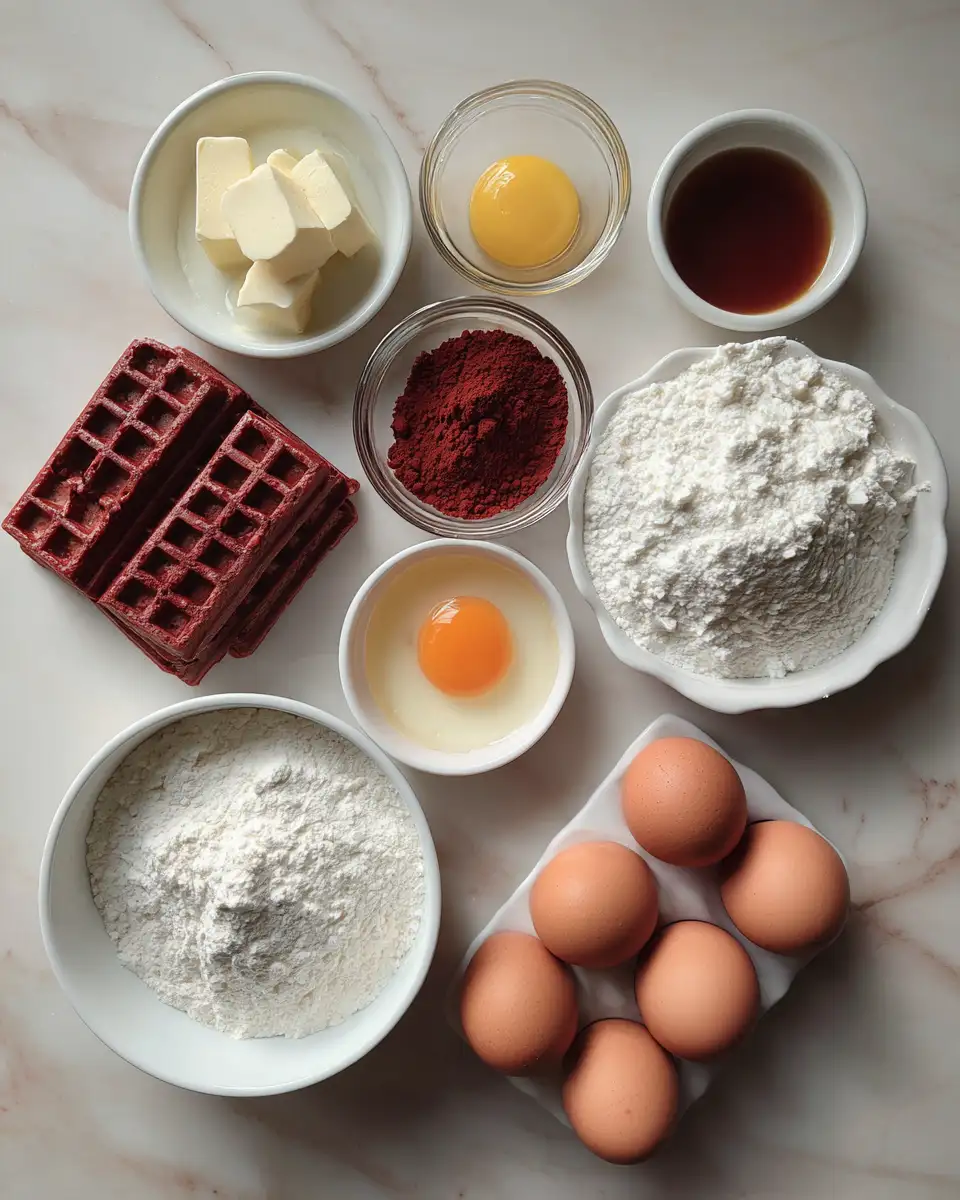
- 2 cups all-purpose flour
- 1/2 cup granulated sugar
- 2 tablespoons unsweetened cocoa powder
- 1 tablespoon baking powder
- 1/2 teaspoon baking soda
- 1/4 teaspoon salt
- 2 large eggs
- 1 and 3/4 cups buttermilk
- 1/2 cup melted unsalted butter
- 2 teaspoons vanilla extract
- 1 tablespoon red food coloring
- Cooking spray or additional melted butter for the waffle iron
If you don’t have buttermilk on hand, my grandma taught me a simple trick: mix 1 tablespoon of lemon juice or white vinegar with enough milk to make 1 cup, and let it sit for a few minutes until it thickens slightly.
Nutrition Facts
- Calories: 320 per serving
- Protein: 7g
- Fat: 14g
- Carbohydrates: 40g
- Fiber: 2g
- Sugar: 16g
- Sodium: 340mg
Swirl into Sweetness: Irresistible Red Velvet Marble Waffles

Learn how to make delicious Red Velvet Marble Waffles. Easy recipe with step-by-step instructions.
- Prep Time: 15 minutes
- Cook Time: 30 minutes
- Total Time: 45 minutes
- Yield: 4 servings
- Category: Main Dish
- Method: Cooking
- Cuisine: International
Ingredients
- 2 cups all-purpose flour
- 1/2 cup granulated sugar
- 2 tablespoons unsweetened cocoa powder
- 1 tablespoon baking powder
- 1/2 teaspoon baking soda
- 1/4 teaspoon salt
- 2 large eggs
- 1 and 3/4 cups buttermilk
- 1/2 cup melted unsalted butter
- 2 teaspoons vanilla extract
- 1 tablespoon red food coloring
- Cooking spray or additional melted butter for the waffle iron
If you don’t have buttermilk on hand, my grandma taught me a simple trick: mix 1 tablespoon of lemon juice or white vinegar with enough milk to make 1 cup, and let it sit for a few minutes until it thickens slightly.
Instructions
- Preheat your waffle iron according to the manufacturer’s instructions. Lightly grease it with cooking spray or melted butter to prevent sticking.
- In a large bowl, whisk together the flour, sugar, cocoa powder, baking powder, baking soda, and salt until well combined.
- In a separate bowl, beat the eggs, then add the buttermilk, melted butter, and vanilla extract. Mix until smooth.
- Gradually add the wet ingredients to the dry ingredients, stirring gently until just combined. Be careful not to overmix; a few lumps are okay.
- Divide the batter into two bowls. Add the red food coloring to one bowl and mix until the color is evenly distributed.
- For each waffle, pour a small amount of red batter into the center of the waffle iron, and then pour a small amount of plain batter on top. Use a toothpick or skewer to gently swirl the batters together, creating a marbled effect.
- Close the waffle iron and cook the waffles until crisp and golden, about 4-5 minutes or until your waffle iron’s indicator shows they are done.
- Carefully remove the waffles and keep them warm in a low oven while you cook the remaining batter.
From my experience, patience is key when swirling the batters. It’s a fun, creative process that reminds me of the times I’d spend experimenting in the kitchen with my grandma, each swirl a new adventure.
Steps to Create Your Red Velvet Marble Waffles
- Preheat your waffle iron according to the manufacturer’s instructions. Lightly grease it with cooking spray or melted butter to prevent sticking.
- In a large bowl, whisk together the flour, sugar, cocoa powder, baking powder, baking soda, and salt until well combined.
- In a separate bowl, beat the eggs, then add the buttermilk, melted butter, and vanilla extract. Mix until smooth.
- Gradually add the wet ingredients to the dry ingredients, stirring gently until just combined. Be careful not to overmix; a few lumps are okay.
- Divide the batter into two bowls. Add the red food coloring to one bowl and mix until the color is evenly distributed.
- For each waffle, pour a small amount of red batter into the center of the waffle iron, and then pour a small amount of plain batter on top. Use a toothpick or skewer to gently swirl the batters together, creating a marbled effect.
- Close the waffle iron and cook the waffles until crisp and golden, about 4-5 minutes or until your waffle iron’s indicator shows they are done.
- Carefully remove the waffles and keep them warm in a low oven while you cook the remaining batter.
From my experience, patience is key when swirling the batters. It’s a fun, creative process that reminds me of the times I’d spend experimenting in the kitchen with my grandma, each swirl a new adventure. Learn more: Sizzle and Spice: Irresistible Grilling Recipes for Summer
Tips for Making the Best Red Velvet Marble Waffles
To ensure your waffles turn out perfectly every time, here are a few tips. First, always preheat your waffle iron thoroughly. A hot iron ensures even cooking and a crispy exterior. Also, avoid overmixing the batter to keep your waffles light and fluffy. Lastly, don’t skip the marbling step; it’s what gives these waffles their unique and beautiful appearance, much like the joyful chaos of cooking with family.
Serving Suggestions and Pairings

Serve your Red Velvet Marble Waffles with a dollop of whipped cream or cream cheese frosting for an extra touch of indulgence. Fresh berries add a delightful tang, while a drizzle of maple syrup or chocolate sauce can elevate the richness of the cocoa. I often top mine with some crushed pecans or walnuts, a nod to my grandma’s penchant for adding a bit of crunch to her sweet treats.
Storage and Reheating Tips
These waffles can be stored in an airtight container in the refrigerator for up to 3 days. For longer storage, place them in a single layer on a baking sheet and freeze until solid, then transfer to a resealable plastic bag, squeezing out as much air as possible. They’ll keep in the freezer for up to 2 months.
To reheat, simply pop them in the toaster or oven at 350°F for about 5 minutes until heated through. This method ensures they remain crispy on the outside and tender on the inside, just as they are when freshly made.
Frequently Asked Questions
What are the main ingredients for Red Velvet Marble Waffles?
The main ingredients for Red Velvet Marble Waffles include the items listed in our ingredients section above. Each ingredient plays a crucial role in achieving the perfect flavor and texture.
How long does it take to make Red Velvet Marble Waffles?
The total time to make Red Velvet Marble Waffles includes both preparation and cooking time. Check the recipe card above for exact timing details.
Can I make Red Velvet Marble Waffles ahead of time?
Yes, Red Velvet Marble Waffles can often be prepared in advance. Store it properly in an airtight container in the refrigerator and consume within the recommended timeframe.
What can I serve with Red Velvet Marble Waffles?
Red Velvet Marble Waffles pairs well with various sides and accompaniments. Consider the serving suggestions mentioned in the recipe for the best dining experience.
Is Red Velvet Marble Waffles suitable for special diets?
Depending on the ingredients used, Red Velvet Marble Waffles may be adapted for various dietary needs. Check the ingredients list and consider substitutions as needed for your dietary requirements.
Final Thoughts
Red Velvet Marble Waffles are more than just a delicious breakfast option; they’re a way to bring a piece of my grandma’s kitchen into your home. Each swirl and bite is filled with nostalgia and love, a testament to the magic that happens when simple ingredients come together in harmony. I hope you enjoy making these waffles as much as I do, and that they bring a smile to your face and warmth to your heart.