

There’s something truly magical about the aroma of warm caramel and ripe apples baking together — it instantly transports me back to my grandma’s cozy kitchen, where she would spend lazy Sunday afternoons creating sweet little delights. Today, I want to share with you my favorite recipe for Caramel Apple Turnovers, a treat that captures that nostalgic warmth and makes any day feel special. These turnovers are perfect for a comforting breakfast, an afternoon snack, or a sweet ending to a cozy dinner. Trust me, once you make them, they’ll become a staple in your home just like they are in mine.
Why You’ll Love This Caramel Apple Turnovers
If you’re anything like me, you love a dessert that’s simple but bursting with flavor. These Caramel Apple Turnovers hit all the right notes — flaky, buttery pastry filled with tender, cinnamon-spiced apples, topped with gooey caramel sauce. They’re irresistible when warm, especially when paired with a dollop of whipped cream or a scoop of vanilla ice cream. I’ve made these dozens of times, tweaking the filling and caramel to get that perfect balance of sweetness and spice. The best part? They’re surprisingly easy to whip up, even on busy mornings or last-minute get-togethers.
My grandma always said that baking is about sharing love and warmth, and these turnovers embody that spirit. They remind me of lazy weekend mornings when the house fills with the smell of cinnamon and caramel, and everyone gathers around the table. Whether you’re baking for yourself or for loved ones, these turnovers bring a cozy, homemade touch that’s hard to beat. Plus, they’re great for using up those extra apples sitting in your produce drawer — a little bit of autumn in every bite.
Ingredients You’ll Need for This Caramel Apple Turnovers
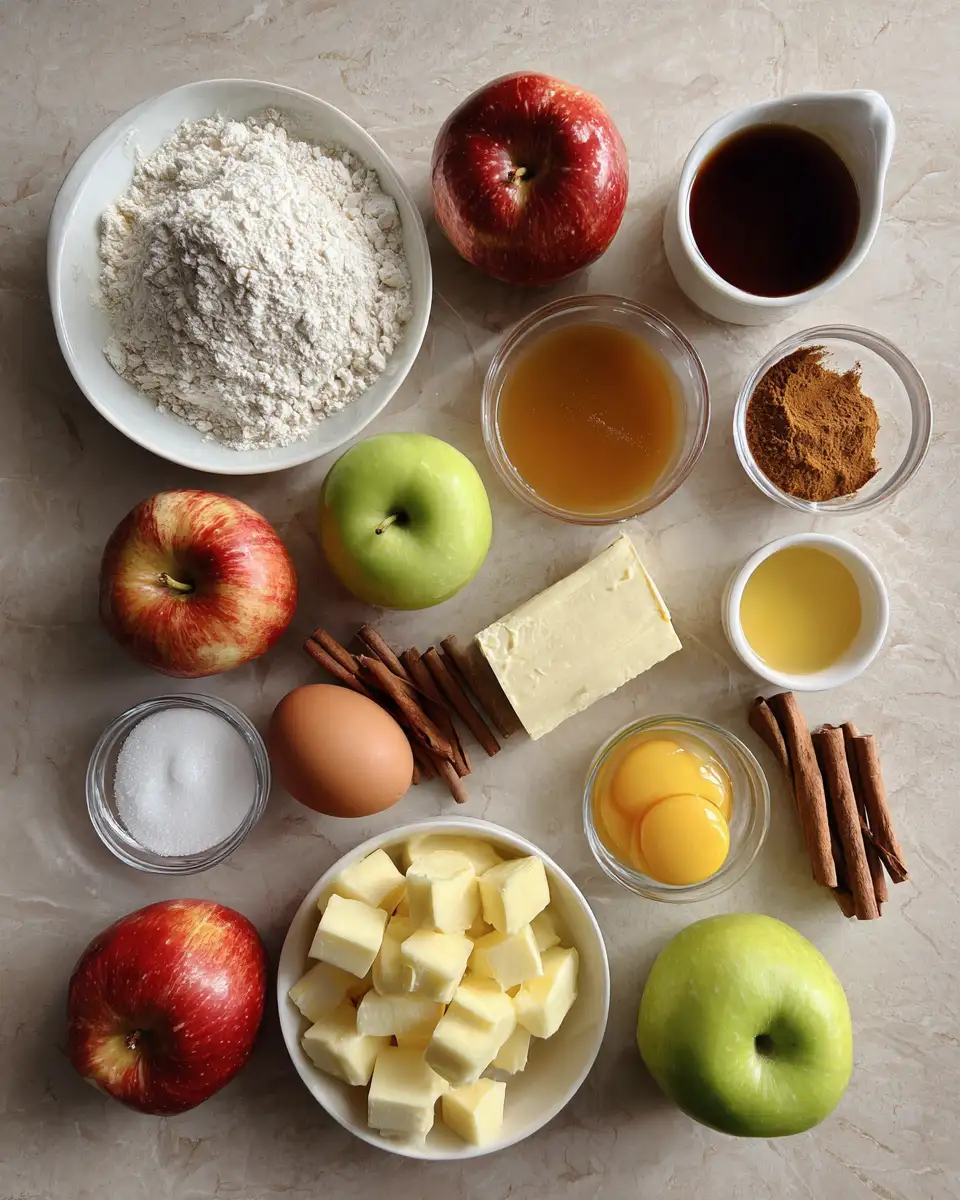
- 2 cups all-purpose flour
- 1/2 teaspoon salt
- 1/2 cup unsalted butter, cold and cubed
- 1/4 cup ice-cold water (more if needed)
- 3 large apples (Granny Smith or Fuji work well), peeled and diced
- 1/2 cup granulated sugar
- 1 teaspoon ground cinnamon
- 1/4 teaspoon ground nutmeg
- 1 tablespoon lemon juice (to prevent apples from browning)
- 1/2 cup caramel sauce (store-bought or homemade)
- 1 egg, beaten (for egg wash)
- Optional: coarse sugar or cinnamon sugar for sprinkling
When I first started baking these, I experimented with different apples. I found that tart varieties like Granny Smith give a beautiful contrast to the sweet caramel, but Fuji or Honeycrisp work just as well if you prefer a sweeter filling. For the caramel sauce, I often keep a jar of homemade caramel in the fridge, but store-bought works perfectly in a pinch — just look for a quality brand with a smooth, rich texture.
Nutrition Facts
- Calories: Approximately 320 per turnover
- Protein: 4g
- Fat: 15g
- Carbohydrates: 45g
- Fiber: 3g
- Sugar: 20g
- Sodium: 150mg
These figures are based on one turnover, and of course, toppings like extra caramel or whipped cream can add to the calorie count. I always remind myself that food is about joy and sharing, not counting every calorie — but it’s good to have a sense of what’s in your treats, especially if you’re mindful of dietary needs. Learn more: Sweet and Crispy Strawberry Oreo Cups Your New Favorite Dessert
PrintDeliciously Crispy Caramel Apple Turnovers You Can’t Resist

Learn how to make delicious Caramel Apple Turnovers. Easy recipe with step-by-step instructions.
- Prep Time: 15 minutes
- Cook Time: 30 minutes
- Total Time: 45 minutes
- Yield: 4 servings
- Category: Main Dish
- Method: Cooking
- Cuisine: International
Ingredients
- 2 cups all-purpose flour
- 1/2 teaspoon salt
- 1/2 cup unsalted butter, cold and cubed
- 1/4 cup ice-cold water (more if needed)
- 3 large apples (Granny Smith or Fuji work well), peeled and diced
- 1/2 cup granulated sugar
- 1 teaspoon ground cinnamon
- 1/4 teaspoon ground nutmeg
- 1 tablespoon lemon juice (to prevent apples from browning)
- 1/2 cup caramel sauce (store-bought or homemade)
- 1 egg, beaten (for egg wash)
- Optional: coarse sugar or cinnamon sugar for sprinkling
When I first started baking these, I experimented with different apples. I found that tart varieties like Granny Smith give a beautiful contrast to the sweet caramel, but Fuji or Honeycrisp work just as well if you prefer a sweeter filling. For the caramel sauce, I often keep a jar of homemade caramel in the fridge, but store-bought works perfectly in a pinch — just look for a quality brand with a smooth, rich texture.
Instructions
- Preheat your oven to 400°F (200°C) and line a baking sheet with parchment paper. I like to set my oven early and get everything ready so I can work calmly, much like my grandma did — she believed that patience is key to good baking.
- Start by making the pastry: in a large mixing bowl, combine the flour and salt. Add the cold, cubed butter and use a pastry cutter or your fingertips to work the butter into the flour until the mixture resembles coarse crumbs. I find that handling the dough quickly and gently keeps it flaky, just like my grandma’s secret.
- Gradually add the ice-cold water, one tablespoon at a time, mixing gently until the dough just comes together. Avoid overworking it — I always tell myself that less is more. Shape the dough into a flat disk, wrap with plastic wrap, and refrigerate for at least 30 minutes.
- While the dough chills, prepare the apple filling. In a bowl, toss the diced apples with lemon juice, sugar, cinnamon, and nutmeg. I love adding a splash of vanilla or a pinch of ginger for extra warmth, just like Grandma used to do. Set aside to let the flavors meld.
- Once the dough is chilled, roll it out on a lightly floured surface to about 1/8 inch thickness. Cut into squares or circles, depending on your preference. I prefer squares because they’re easier to fold and seal, but circles look extra charming.
- Place a generous spoonful of apple filling in the center of each pastry piece. Drizzle a little caramel sauce over the apples for that rich, gooey texture. Be careful not to overfill — I’ve learned from experience that too much filling can be tricky to seal.
- Brush the edges of each pastry with beaten egg, then fold over to form a turnover. Use a fork to press down and seal the edges securely. This step is important to keep the filling inside while baking — I often double-check my seals to avoid any surprises.
- Arrange the turnovers on the prepared baking sheet. Brush the tops with more beaten egg for a shiny, golden finish. If you like, sprinkle with coarse sugar or a cinnamon-sugar mixture for extra crunch and flavor.
- Bake for 20-25 minutes, or until the turnovers are golden brown and puffed. Keep an eye on them — I always set a timer and peek in around the 20-minute mark, because oven temperatures can vary. When they’re ready, they should look irresistibly flaky and inviting.
- Remove from the oven and let them cool slightly before serving. I like to serve these warm, with a drizzle of extra caramel or a scoop of vanilla ice cream on the side. Nothing beats the first bite — crispy pastry, warm apples, and gooey caramel all at once.
Steps to Create Your Caramel Apple Turnovers
- Preheat your oven to 400°F (200°C) and line a baking sheet with parchment paper. I like to set my oven early and get everything ready so I can work calmly, much like my grandma did — she believed that patience is key to good baking.
- Start by making the pastry: in a large mixing bowl, combine the flour and salt. Add the cold, cubed butter and use a pastry cutter or your fingertips to work the butter into the flour until the mixture resembles coarse crumbs. I find that handling the dough quickly and gently keeps it flaky, just like my grandma’s secret.
- Gradually add the ice-cold water, one tablespoon at a time, mixing gently until the dough just comes together. Avoid overworking it — I always tell myself that less is more. Shape the dough into a flat disk, wrap with plastic wrap, and refrigerate for at least 30 minutes.
- While the dough chills, prepare the apple filling. In a bowl, toss the diced apples with lemon juice, sugar, cinnamon, and nutmeg. I love adding a splash of vanilla or a pinch of ginger for extra warmth, just like Grandma used to do. Set aside to let the flavors meld.
- Once the dough is chilled, roll it out on a lightly floured surface to about 1/8 inch thickness. Cut into squares or circles, depending on your preference. I prefer squares because they’re easier to fold and seal, but circles look extra charming.
- Place a generous spoonful of apple filling in the center of each pastry piece. Drizzle a little caramel sauce over the apples for that rich, gooey texture. Be careful not to overfill — I’ve learned from experience that too much filling can be tricky to seal.
- Brush the edges of each pastry with beaten egg, then fold over to form a turnover. Use a fork to press down and seal the edges securely. This step is important to keep the filling inside while baking — I often double-check my seals to avoid any surprises.
- Arrange the turnovers on the prepared baking sheet. Brush the tops with more beaten egg for a shiny, golden finish. If you like, sprinkle with coarse sugar or a cinnamon-sugar mixture for extra crunch and flavor.
- Bake for 20-25 minutes, or until the turnovers are golden brown and puffed. Keep an eye on them — I always set a timer and peek in around the 20-minute mark, because oven temperatures can vary. When they’re ready, they should look irresistibly flaky and inviting.
- Remove from the oven and let them cool slightly before serving. I like to serve these warm, with a drizzle of extra caramel or a scoop of vanilla ice cream on the side. Nothing beats the first bite — crispy pastry, warm apples, and gooey caramel all at once.
Tips for Making the Best Caramel Apple Turnovers
- Use cold ingredients: Keeping your butter and water cold ensures a flaky crust. I always pop my butter in the fridge before baking — it’s a small step that makes a big difference.
- Don’t overmix the dough: Mix just until the ingredients come together. Overworking the dough can make it tough, and that’s not what we want for a light, flaky crust.
- Choose the right apples: Tart apples like Granny Smith hold their shape and balance the sweetness of the caramel. If you prefer sweeter filling, Fuji or Honeycrisp are excellent choices.
- Seal the edges well: Use a fork to press the edges tightly. This keeps the filling inside and prevents leaks during baking.
- Customize your toppings: A sprinkle of cinnamon sugar before baking adds a lovely crunch and extra flavor. I often play with adding chopped nuts or a dusting of powdered sugar once cooled.
- Serve warm: These turnovers are best enjoyed warm, straight from the oven. Reheating briefly in the microwave or oven keeps them deliciously fresh.
Serving Suggestions and Pairings
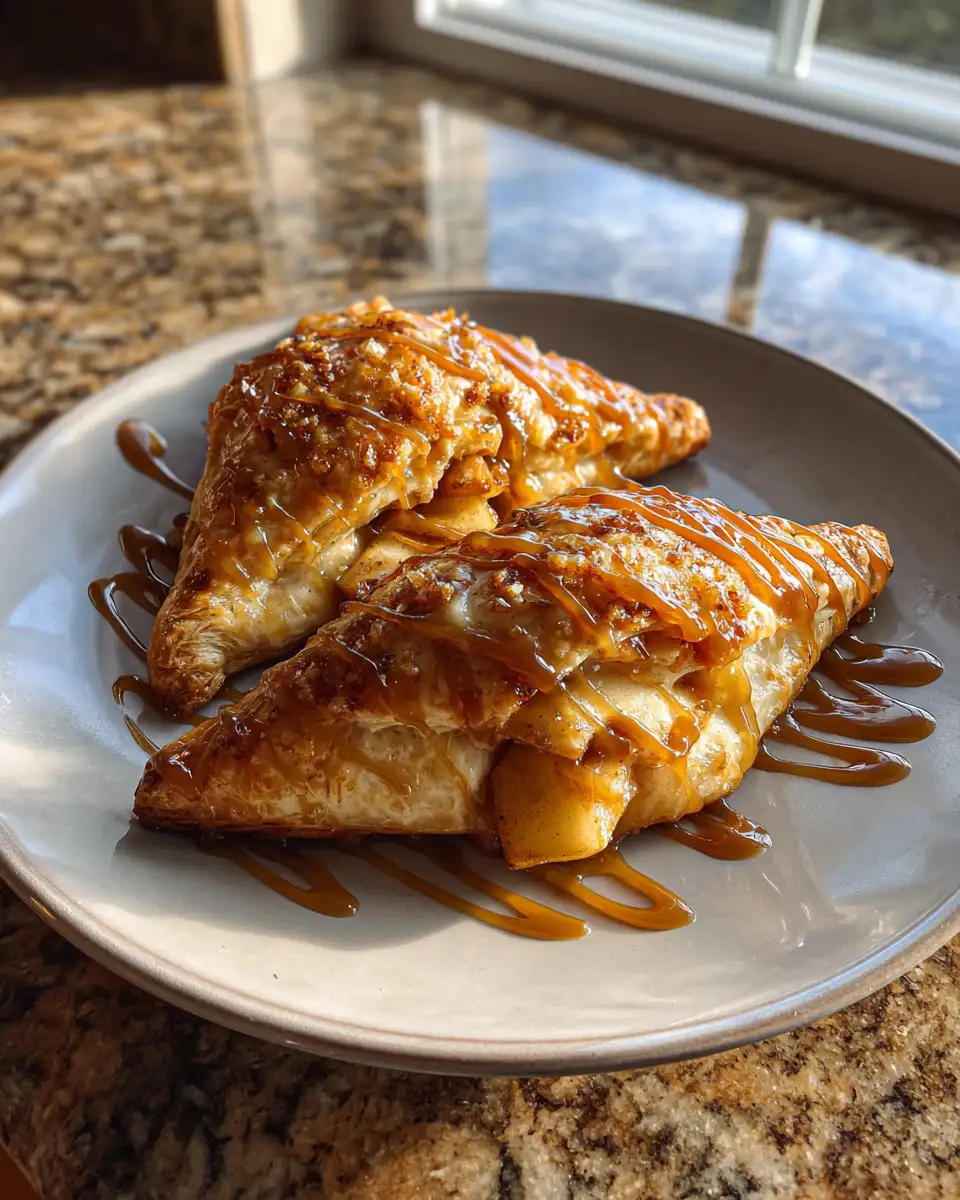
There’s something about these Caramel Apple Turnovers that makes them perfect for sharing. I love serving them on a rustic plate, accompanied by a dollop of whipped cream or a scoop of vanilla ice cream. A drizzle of caramel sauce over the top elevates the experience — it’s like a mini apple-pie-in-a-pocket.
For a cozy brunch, pair these turnovers with a hot cup of cinnamon-spiced tea or a strong cup of coffee. If you’re entertaining, consider offering a side of fresh fruit or a simple green salad to balance out the sweetness. I’ve also served these turnovers as part of a dessert platter, alongside biscotti and chocolate-covered almonds, for a casual gathering that feels warm and inviting.
Storage and Reheating Tips
If you happen to have leftovers (which I doubt, because they disappear quickly in my house), store the turnovers in an airtight container at room temperature for up to one day. For longer storage, place them in the fridge — just be aware that the pastry might lose some of its crispness. To reheat, warm them gently in the oven at 350°F for about 10 minutes until they’re heated through and the pastry is still flaky. I’ve also reheated in the microwave, but be cautious — the pastry can become a bit soft and less crisp.
For best results, I recommend enjoying these turnovers fresh or within the day of baking. That’s when they’re at their most delightful — warm, flaky, and oozing with caramel goodness.
Frequently Asked Questions
What are the main ingredients for Caramel Apple Turnovers?
The main ingredients for Caramel Apple Turnovers include the items listed in our ingredients section above. Each ingredient plays a crucial role in achieving the perfect flavor and texture.
How long does it take to make Caramel Apple Turnovers?
The total time to make Caramel Apple Turnovers includes both preparation and cooking time. Check the recipe card above for exact timing details.
Can I make Caramel Apple Turnovers ahead of time?
Yes, Caramel Apple Turnovers can often be prepared in advance. Store it properly in an airtight container in the refrigerator and consume within the recommended timeframe.
What can I serve with Caramel Apple Turnovers?
Caramel Apple Turnovers pairs well with various sides and accompaniments. Consider the serving suggestions mentioned in the recipe for the best dining experience.
Is Caramel Apple Turnovers suitable for special diets?
Depending on the ingredients used, Caramel Apple Turnovers may be adapted for various dietary needs. Check the ingredients list and consider substitutions as needed for your dietary requirements.
Final Thoughts
Making these Caramel Apple Turnovers is like a little journey back to my grandma’s kitchen, where love and simple ingredients created magic. They’re a perfect example of how a few humble components — fresh apples, buttery pastry, and rich caramel — can come together to create something truly special. Whether you’re baking for family, friends, or just yourself on a quiet weekend, I promise these turnovers will bring comfort, joy, and a touch of nostalgia to your table. So, gather your ingredients, roll up your sleeves, and enjoy the sweet, warm aroma filling your home — just like grandma used to do.