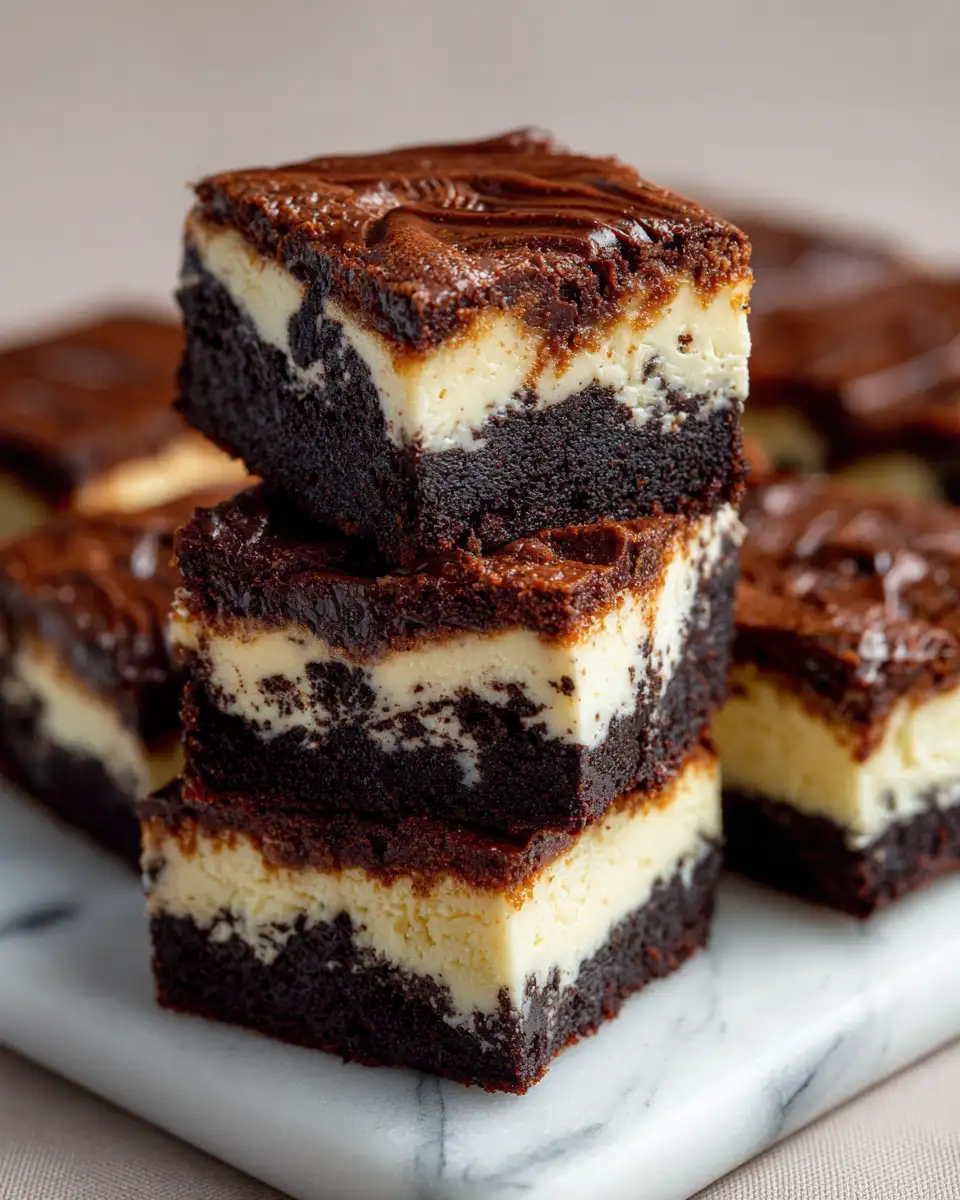
There’s something truly special about combining the rich, fudgy goodness of brownies with the creamy, tangy allure of cheesecake. When I first stumbled upon the idea of Oreo Cheesecake Brownie Bars, I knew it was a dessert that would make any occasion feel a little more magical. As someone who grew up in my grandma’s kitchen, I’ve always believed that baking is about more than just ingredients—it’s about creating memories, sharing love, and bringing warmth to the table. These bars are no exception. They’re a little indulgent, a little nostalgic, and absolutely irresistible. Whether you’re baking for a family gathering or just want a sweet treat to brighten your day, I promise these will become a new favorite in your recipe collection.
Why You’ll Love This Oreo Cheesecake Brownie Bars
If you’re anything like me, you love desserts that combine multiple textures and flavors into one decadent bite. Oreo Cheesecake Brownie Bars do just that—they meld the dense, chocolatey richness of brownies with the velvety smoothness of cheesecake, all topped with crunchy Oreo cookie pieces. I remember the first time I made these, I was in my cozy kitchen, reminiscing about my grandma’s love for simple, honest ingredients. The process is straightforward, but the results are extraordinary. These bars are perfect for sharing because they’re rich enough to satisfy even the most serious sweet tooth, yet easy enough to whip up on a weekend afternoon. Plus, the combination of creamy cheesecake and fudgy brownie layers makes each bite a delightful surprise that keeps everyone coming back for more.
Ingredients You’ll Need for This Oreo Cheesecake Brownie Bars
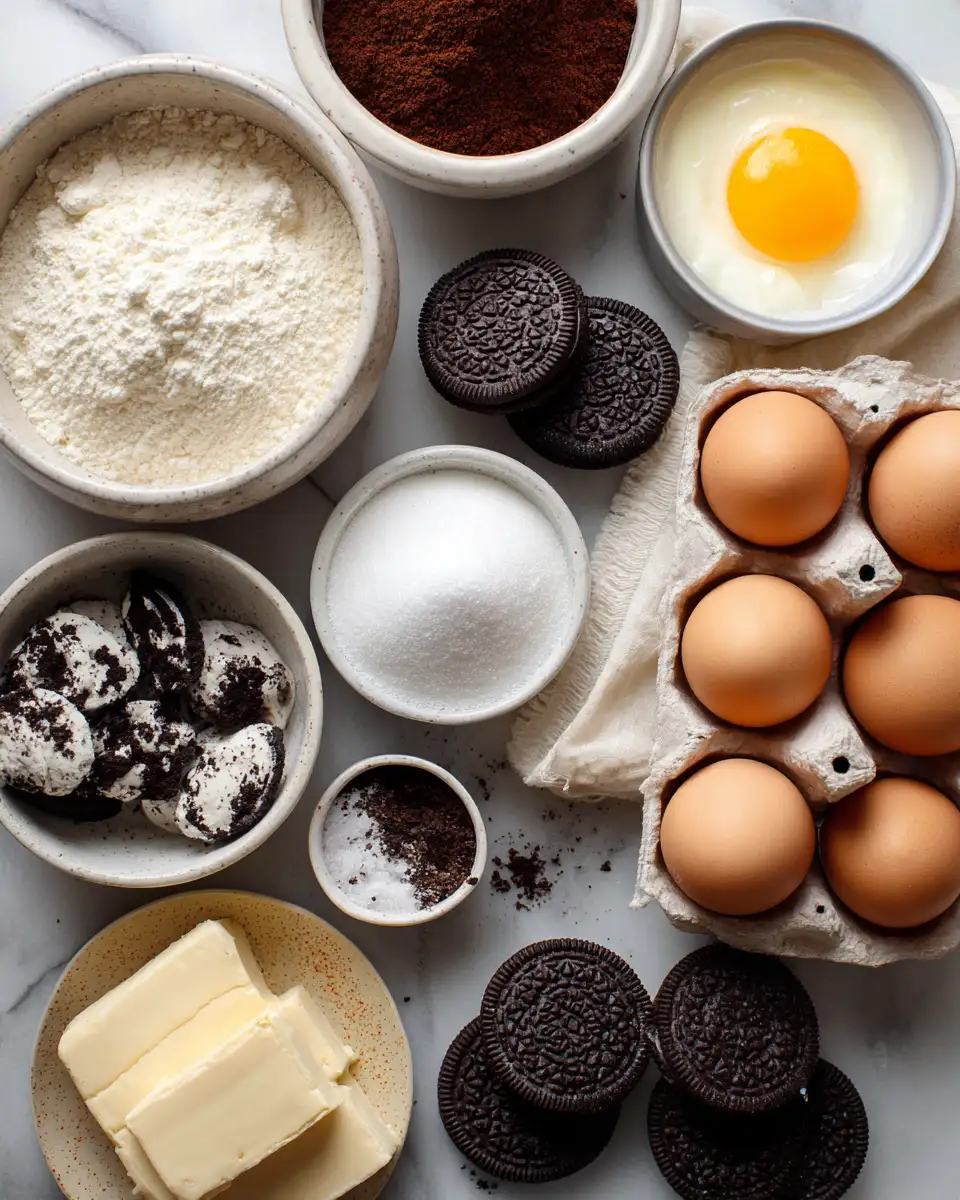
Making these bars is like creating a little love letter to chocolate and cream cheese. I always keep these ingredients handy because they’re staples in my baking repertoire, and I love how versatile they are. When I first developed this recipe, I experimented with different types of chocolate and Oreo variations, but I found that classic ingredients work best for that perfect balance of flavors.
- 1 cup unsalted butter, melted (or 3/4 cup coconut oil as a dairy-free alternative)
- 1 1/2 cups granulated sugar
- 3 large eggs
- 2 teaspoons vanilla extract
- 1 cup all-purpose flour
- 1/2 cup unsweetened cocoa powder
- 1/2 teaspoon baking powder
- 1/4 teaspoon salt
- 8 oz cream cheese, softened (for a dairy-free version, try vegan cream cheese)
- 1/2 cup powdered sugar
- 1 teaspoon vanilla extract
- 15 Oreo cookies, chopped (or any chocolate sandwich cookies you prefer)
- Additional whole Oreos for topping (optional but highly recommended)
Sometimes, I like to swap out regular Oreos for double-stuffed or even golden Oreos for a fun twist. The beauty of this recipe is its flexibility—feel free to experiment with different cookie flavors or add a handful of chocolate chips into the brownie layer for extra richness.
Nutrition Facts
- Calories: Approximately 350 per serving
- Protein: 5g
- Fat: 20g
- Carbohydrates: 45g
- Fiber: 2g
- Sugar: 30g
- Sodium: 150mg
Now, I’ll admit, I don’t make these bars every day—they’re more of a special treat or a show-stopping dessert for gatherings. But if you’re mindful of portion sizes, you can enjoy them without guilt. I always remind myself that a little indulgence, especially made with love, is good for the soul.
PrintIrresistible Oreo Cheesecake Brownie Bars You Must Try
Learn how to make delicious Oreo Cheesecake Brownie Bars. Easy recipe with step-by-step instructions.
- Prep Time: 15 minutes
- Cook Time: 30 minutes
- Total Time: 45 minutes
- Yield: 4 servings
- Category: Main Dish
- Method: Cooking
- Cuisine: International
Ingredients
Making these bars is like creating a little love letter to chocolate and cream cheese. I always keep these ingredients handy because they’re staples in my baking repertoire, and I love how versatile they are. When I first developed this recipe, I experimented with different types of chocolate and Oreo variations, but I found that classic ingredients work best for that perfect balance of flavors.
- 1 cup unsalted butter, melted (or 3/4 cup coconut oil as a dairy-free alternative)
- 1 1/2 cups granulated sugar
- 3 large eggs
- 2 teaspoons vanilla extract
- 1 cup all-purpose flour
- 1/2 cup unsweetened cocoa powder
- 1/2 teaspoon baking powder
- 1/4 teaspoon salt
- 8 oz cream cheese, softened (for a dairy-free version, try vegan cream cheese)
- 1/2 cup powdered sugar
- 1 teaspoon vanilla extract
- 15 Oreo cookies, chopped (or any chocolate sandwich cookies you prefer)
- Additional whole Oreos for topping (optional but highly recommended)
Sometimes, I like to swap out regular Oreos for double-stuffed or even golden Oreos for a fun twist. The beauty of this recipe is its flexibility—feel free to experiment with different cookie flavors or add a handful of chocolate chips into the brownie layer for extra richness.
Instructions
- Preheat your oven to 350°F (175°C). Line a 9×13 inch baking pan with parchment paper, leaving an overhang on the sides for easy removal. This was a trick I learned from my grandma—clean edges make all the difference.
- In a large mixing bowl, whisk together the melted butter and sugar until well combined. I love how this step fills my kitchen with a warm, chocolatey aroma that reminds me of lazy Sunday afternoons in grandma’s house.
- Add the eggs one at a time, beating well after each addition. Stir in the vanilla extract. The batter will become glossy and smooth, which always makes me smile because it’s a sign that I’ve got the perfect base.
- In a separate bowl, sift together the flour, cocoa powder, baking powder, and salt. Gradually add the dry ingredients to the wet mixture, folding gently until just combined. Overmixing can make the brownies dense, so I always mix until just incorporated, a tip I learned from my grandma to keep everything light and tender.
- Pour the brownie batter into the prepared pan, spreading it evenly with a spatula. Bake for 20-25 minutes, or until a toothpick inserted into the center comes out with moist crumbs. I always check a few minutes early; overbaking can dry out these bars, and I want them fudgy and irresistible.
- While the brownies are baking, prepare the cheesecake layer. In a medium bowl, beat the softened cream cheese with powdered sugar and vanilla until smooth and creamy. I like to do this by hand if I have time—it’s a soothing step that connects me to my grandma’s gentle touch in the kitchen.
- Once the brownie base has cooled slightly, spread the cream cheese mixture evenly over the top. Then sprinkle the chopped Oreos over the cheesecake layer, pressing them gently into the surface for that irresistible crunch.
- If you like, arrange whole Oreos on top for a decorative finish. They add a lovely visual touch and extra flavor—trust me, they’re a crowd favorite.
- Pop the entire pan into the fridge for at least 2 hours, or until the cheesecake layer is set. Chilling really helps the layers meld together and makes slicing easier. I always find that a little patience makes for cleaner, more beautiful bars.
- When ready to serve, lift the bars out of the pan using the parchment overhang and cut into squares. Serve chilled or at room temperature—either way, they’re divine.
Steps to Create Your Oreo Cheesecake Brownie Bars
- Preheat your oven to 350°F (175°C). Line a 9×13 inch baking pan with parchment paper, leaving an overhang on the sides for easy removal. This was a trick I learned from my grandma—clean edges make all the difference.
- In a large mixing bowl, whisk together the melted butter and sugar until well combined. I love how this step fills my kitchen with a warm, chocolatey aroma that reminds me of lazy Sunday afternoons in grandma’s house.
- Add the eggs one at a time, beating well after each addition. Stir in the vanilla extract. The batter will become glossy and smooth, which always makes me smile because it’s a sign that I’ve got the perfect base.
- In a separate bowl, sift together the flour, cocoa powder, baking powder, and salt. Gradually add the dry ingredients to the wet mixture, folding gently until just combined. Overmixing can make the brownies dense, so I always mix until just incorporated, a tip I learned from my grandma to keep everything light and tender.
- Pour the brownie batter into the prepared pan, spreading it evenly with a spatula. Bake for 20-25 minutes, or until a toothpick inserted into the center comes out with moist crumbs. I always check a few minutes early; overbaking can dry out these bars, and I want them fudgy and irresistible.
- While the brownies are baking, prepare the cheesecake layer. In a medium bowl, beat the softened cream cheese with powdered sugar and vanilla until smooth and creamy. I like to do this by hand if I have time—it’s a soothing step that connects me to my grandma’s gentle touch in the kitchen.
- Once the brownie base has cooled slightly, spread the cream cheese mixture evenly over the top. Then sprinkle the chopped Oreos over the cheesecake layer, pressing them gently into the surface for that irresistible crunch.
- If you like, arrange whole Oreos on top for a decorative finish. They add a lovely visual touch and extra flavor—trust me, they’re a crowd favorite.
- Pop the entire pan into the fridge for at least 2 hours, or until the cheesecake layer is set. Chilling really helps the layers meld together and makes slicing easier. I always find that a little patience makes for cleaner, more beautiful bars.
- When ready to serve, lift the bars out of the pan using the parchment overhang and cut into squares. Serve chilled or at room temperature—either way, they’re divine.
Tips for Making the Best Oreo Cheesecake Brownie Bars
Over the years, I’ve learned a few tricks to elevate these bars from good to unforgettable. One thing I always emphasize is the quality of your ingredients. Fresh cream cheese, good cocoa powder, and crunchy Oreo cookies make all the difference. I remember spending a rainy afternoon in my grandma’s kitchen, carefully crushing Oreos by hand because I loved the texture that only fresh, chunky pieces provide. Learn more: Irresistible Gooey Caramel Cheesecake Bars You Must Try
Another tip is to let the bars chill thoroughly. This step is crucial for clean slicing and for the flavors to fully develop. I usually make them the night before a gathering—I find that the flavors deepen overnight, and it also gives me a little extra time to tidy up my kitchen. Plus, a chilled dessert is always more refreshing, especially in warmer weather.
If you want to add a little extra decadence, drizzle melted chocolate over the top before serving, or swirl some caramel into the cream cheese layer. My grandma always used to say, “A little bit of sweetness makes everything better,” and I find that to be so true in baking.
Serving Suggestions and Pairings
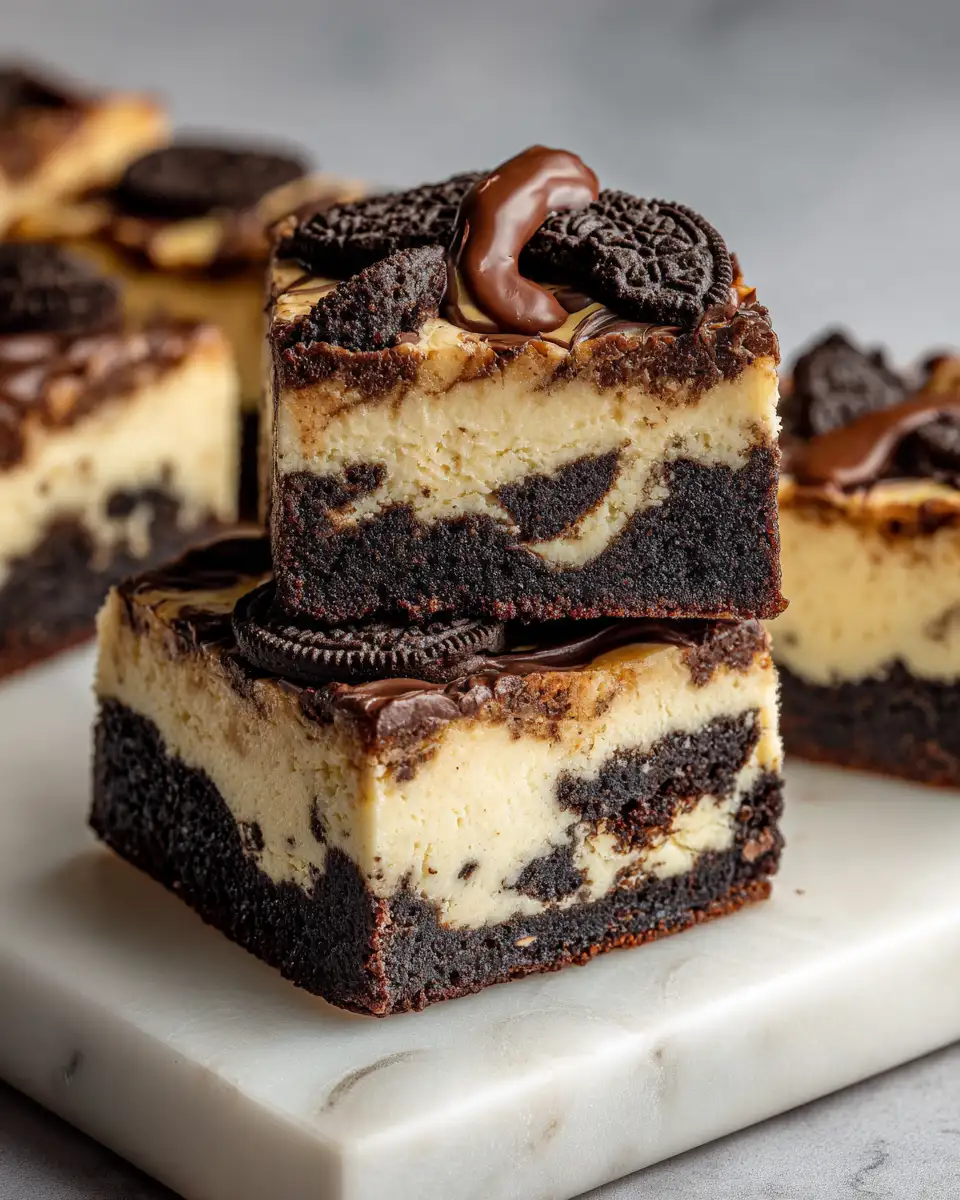
I love serving these Oreo Cheesecake Brownie Bars with a cold glass of milk or a steaming cup of coffee. When I first made these, I remember sitting on my porch with a slice in hand, watching the sunset, feeling grateful for simple pleasures like good food and cozy evenings. For a special touch, add fresh berries or a dollop of whipped cream on the side. The berries add a refreshing tartness that balances the richness of the bars, and they remind me of summer afternoons spent with my grandma picking berries in the backyard.
These bars are also fantastic for potlucks, picnics, or holiday gatherings. Their layered texture and familiar flavor profile make them a guaranteed hit. I’ve even packed them into lunchboxes for a sweet surprise during busy weekdays—because sometimes, a little homemade treat can turn a regular day into something special.
Storage and Reheating Tips
Once you’ve sliced these bars, store leftovers in an airtight container in the refrigerator. They’ll stay fresh for up to 4 days, but I recommend enjoying them sooner rather than later—nothing beats the freshness of a just-made treat. When I have leftovers, I like to let them sit at room temperature for about 10 minutes before serving. The flavors are more pronounced, and they’re just as delicious.
If you want to reheat a slice, do so in the microwave for about 15-20 seconds, just enough to soften the cheesecake layer and warm the brownie. But honestly, I find these bars are best enjoyed chilled or at room temperature—kind of like the way I love sharing stories with friends over a slice of cake in my grandma’s cozy kitchen.
Frequently Asked Questions
What are the main ingredients for Oreo Cheesecake Brownie Bars?
The main ingredients for Oreo Cheesecake Brownie Bars include the items listed in our ingredients section above. Each ingredient plays a crucial role in achieving the perfect flavor and texture.
How long does it take to make Oreo Cheesecake Brownie Bars?
The total time to make Oreo Cheesecake Brownie Bars includes both preparation and cooking time. Check the recipe card above for exact timing details.
Can I make Oreo Cheesecake Brownie Bars ahead of time?
Yes, Oreo Cheesecake Brownie Bars can often be prepared in advance. Store it properly in an airtight container in the refrigerator and consume within the recommended timeframe.
What can I serve with Oreo Cheesecake Brownie Bars?
Oreo Cheesecake Brownie Bars pairs well with various sides and accompaniments. Consider the serving suggestions mentioned in the recipe for the best dining experience.
Is Oreo Cheesecake Brownie Bars suitable for special diets?
Depending on the ingredients used, Oreo Cheesecake Brownie Bars may be adapted for various dietary needs. Check the ingredients list and consider substitutions as needed for your dietary requirements.
Final Thoughts
This recipe for Oreo Cheesecake Brownie Bars is one of those desserts that feels like a warm hug in every bite. It’s a perfect blend of textures and flavors that brings me back to my childhood, sitting at my grandma’s kitchen table, feeling loved and cared for. I hope you find as much joy in making and sharing these as I do. Baking, for me, is about more than just creating something sweet—it’s about creating moments, memories, and a little bit of magic in your everyday life. So gather your ingredients, embrace the process, and enjoy every delicious bite. Happy baking!