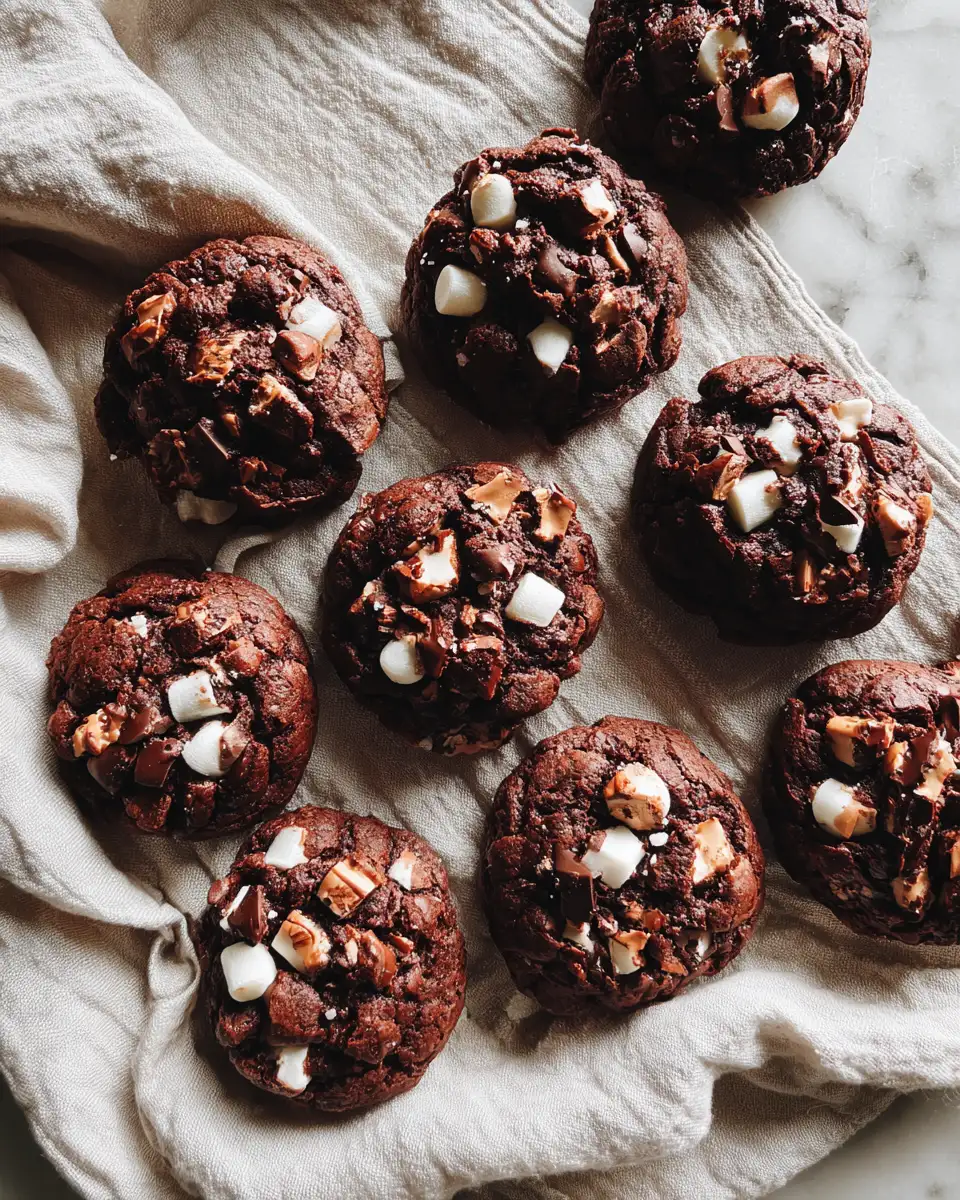
There’s something truly nostalgic about biting into a warm, gooey cookie packed with chocolate, marshmallows, and nuts. When I first tried Levain Bakery Rocky Road Cookies, I was transported back to my grandma’s kitchen—where love, good ingredients, and a little bit of magic made every treat special. I’ve spent years trying to recreate that magic at home, experimenting with recipes and ingredients, and I’m thrilled to finally share a version that captures all that warmth and decadence. Whether you’re a seasoned baker or just looking for a sweet comfort, these cookies will quickly become a favorite in your home, just as they are in mine.
Why You’ll Love This Levain Bakery Rocky Road Cookies
First off, these cookies aren’t just any cookies—they’re a celebration of textures and flavors. The outside is slightly crisp, giving way to a chewy, gooey center loaded with chunks of chocolate, toasted nuts, and fluffy marshmallows. Every bite offers a perfect balance of richness and sweetness, reminiscent of those cozy afternoons baking with my grandma. I love how versatile they are: you can tweak the ingredients to suit your taste or what you have in your pantry. Plus, they’re surprisingly easy to make, even if you’ve never baked cookies from scratch before.
What makes Levain Bakery Rocky Road Cookies truly special is the way they evoke feelings of comfort and nostalgia. As someone who grew up in a kitchen filled with the aroma of baking bread and sweet treats, I know that good food is about more than just ingredients—it’s about creating memories. These cookies are my way of sharing that warmth, step by step, with anyone willing to indulge in a little bit of homemade magic.
Ingredients You’ll Need for This Levain Bakery Rocky Road Cookies
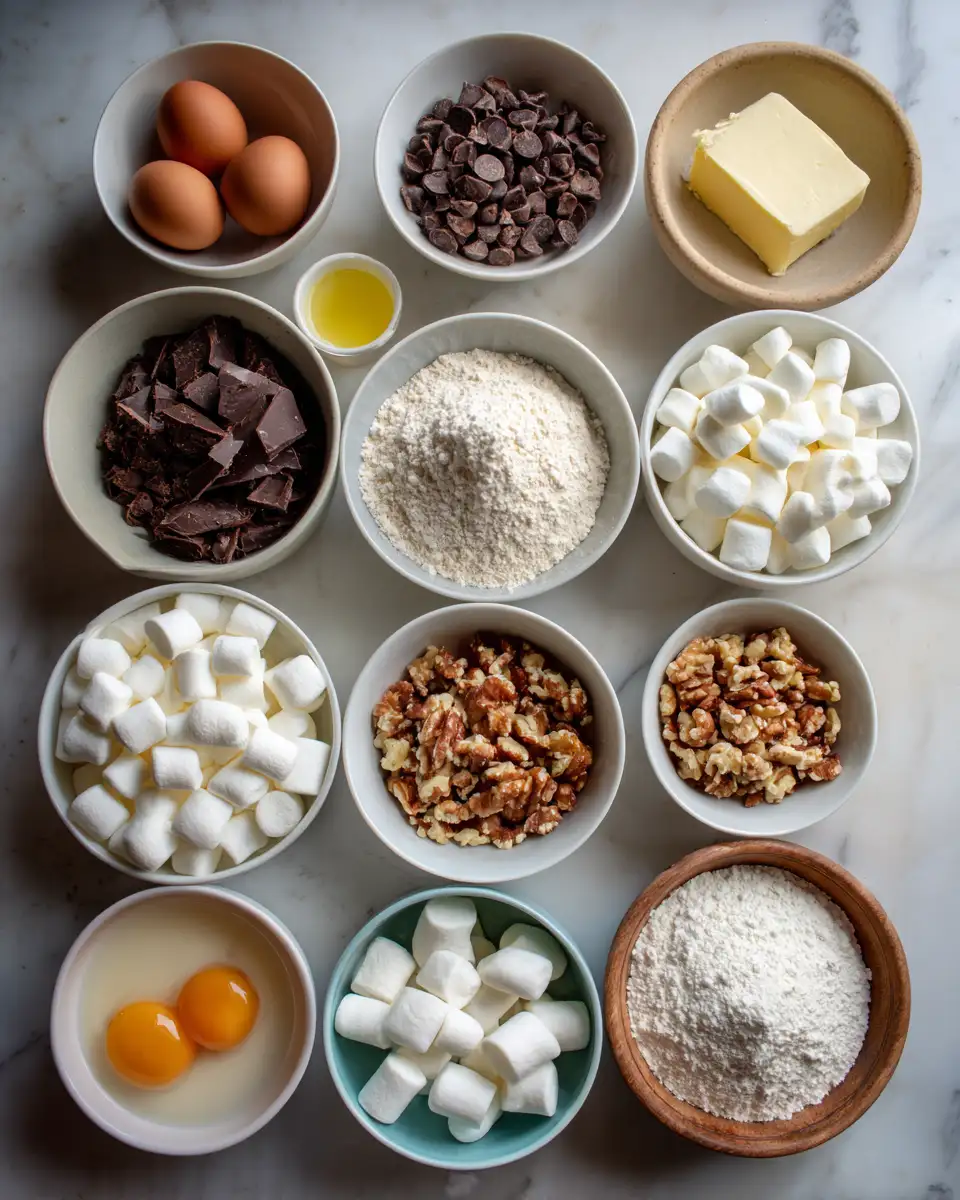
- 1 cup (2 sticks) unsalted butter, softened
- 1 cup packed light brown sugar
- 1/2 cup granulated sugar
- 2 large eggs
- 2 teaspoons vanilla extract
- 2 1/4 cups all-purpose flour (for a gluten-free option, try almond flour or gluten-free blend)
- 1 teaspoon baking soda
- 1/2 teaspoon salt
- 1 1/2 cups semi-sweet chocolate chips
- 1 cup chopped toasted walnuts or pecans (substitute with macadamia nuts or leave out for nut-free)
- 1 cup mini marshmallows (feel free to use larger marshmallows, chopped into smaller pieces)
- Optional: 1/2 cup shredded coconut for extra texture and flavor
When I first started baking these cookies, I found that using high-quality chocolate and fresh marshmallows really makes a difference. I often buy good dark chocolate and chop it into chunks for that uneven, melt-in-your-mouth experience. Toasting the nuts beforehand adds a warm, caramelized flavor that elevates the cookies to a whole new level—something I learned from my grandma’s secret tips in the kitchen.
Nutrition Facts
- Calories: Approximately 250-300 per cookie (based on 12 cookies per batch)
- Protein: 4-5g
- Fat: 15-20g
- Carbohydrates: 30-35g
- Fiber: 2-3g
- Sugar: 15-20g
- Sodium: 150-200mg
I like to keep the nutrition info in perspective—these cookies are definitely an indulgence, but made with real ingredients and shared with loved ones, they’re worth every bite. Plus, baking these from scratch allows me to tweak the ingredients to make them a little healthier if I want, like using less sugar or adding oats for extra fiber. Learn more: Golden Delight: Discover the Magic of Caramelized Apple Waffle Pastries
PrintDiscover the Decadence of Levain Bakery Rocky Road Cookies
Learn how to make delicious Levain Bakery Rocky Road Cookies. Easy recipe with step-by-step instructions.
- Prep Time: 15 minutes
- Cook Time: 30 minutes
- Total Time: 45 minutes
- Yield: 4 servings
- Category: Main Dish
- Method: Cooking
- Cuisine: International
Ingredients
- 1 cup (2 sticks) unsalted butter, softened
- 1 cup packed light brown sugar
- 1/2 cup granulated sugar
- 2 large eggs
- 2 teaspoons vanilla extract
- 2 1/4 cups all-purpose flour (for a gluten-free option, try almond flour or gluten-free blend)
- 1 teaspoon baking soda
- 1/2 teaspoon salt
- 1 1/2 cups semi-sweet chocolate chips
- 1 cup chopped toasted walnuts or pecans (substitute with macadamia nuts or leave out for nut-free)
- 1 cup mini marshmallows (feel free to use larger marshmallows, chopped into smaller pieces)
- Optional: 1/2 cup shredded coconut for extra texture and flavor
When I first started baking these cookies, I found that using high-quality chocolate and fresh marshmallows really makes a difference. I often buy good dark chocolate and chop it into chunks for that uneven, melt-in-your-mouth experience. Toasting the nuts beforehand adds a warm, caramelized flavor that elevates the cookies to a whole new level—something I learned from my grandma’s secret tips in the kitchen.
Instructions
- Preheat your oven to 350°F (175°C) and line a baking sheet with parchment paper. I always do this early—I find that a warm kitchen makes for better baking, especially when I’m channeling my grandma’s love for warm cookies.
- In a large mixing bowl, cream together the softened butter, brown sugar, and granulated sugar until the mixture is light and fluffy. This usually takes about 3-4 minutes with an electric mixer. I remember watching my grandma do this by hand, but honestly, a mixer makes it easier and faster.
- Add in the eggs one at a time, beating well after each addition. Then stir in the vanilla extract. I love smelling that vanilla—reminds me of baking days spent with my family.
- In a separate bowl, whisk together the flour, baking soda, and salt. Gradually add this dry mixture to the wet ingredients, mixing just until combined. Be careful not to overmix, or your cookies might turn out dense instead of chewy.
- Fold in the chocolate chips, toasted nuts, marshmallows, and shredded coconut (if using). I like to gently press some of the marshmallows into the dough so they stay gooey inside while baking.
- Scoop the dough onto your prepared baking sheet using a cookie scoop or two spoons, spacing them about 2 inches apart. I prefer to make them a little larger—about 3 tablespoons each—so every bite is a satisfying chunk of goodness.
- Bake for about 12-15 minutes, or until the edges are golden brown but the centers still look soft. The smell that fills the kitchen during the last few minutes is pure happiness.
- Remove the cookies from the oven and let them cool on the baking sheet for 5 minutes. Then transfer to a wire rack to cool completely. I find that waiting a little longer makes them easier to handle and helps set that perfect chewy texture.
Steps to Create Your Levain Bakery Rocky Road Cookies
- Preheat your oven to 350°F (175°C) and line a baking sheet with parchment paper. I always do this early—I find that a warm kitchen makes for better baking, especially when I’m channeling my grandma’s love for warm cookies.
- In a large mixing bowl, cream together the softened butter, brown sugar, and granulated sugar until the mixture is light and fluffy. This usually takes about 3-4 minutes with an electric mixer. I remember watching my grandma do this by hand, but honestly, a mixer makes it easier and faster.
- Add in the eggs one at a time, beating well after each addition. Then stir in the vanilla extract. I love smelling that vanilla—reminds me of baking days spent with my family.
- In a separate bowl, whisk together the flour, baking soda, and salt. Gradually add this dry mixture to the wet ingredients, mixing just until combined. Be careful not to overmix, or your cookies might turn out dense instead of chewy.
- Fold in the chocolate chips, toasted nuts, marshmallows, and shredded coconut (if using). I like to gently press some of the marshmallows into the dough so they stay gooey inside while baking.
- Scoop the dough onto your prepared baking sheet using a cookie scoop or two spoons, spacing them about 2 inches apart. I prefer to make them a little larger—about 3 tablespoons each—so every bite is a satisfying chunk of goodness.
- Bake for about 12-15 minutes, or until the edges are golden brown but the centers still look soft. The smell that fills the kitchen during the last few minutes is pure happiness.
- Remove the cookies from the oven and let them cool on the baking sheet for 5 minutes. Then transfer to a wire rack to cool completely. I find that waiting a little longer makes them easier to handle and helps set that perfect chewy texture.
Tips for Making the Best Levain Bakery Rocky Road Cookies
- Use high-quality chocolate and fresh marshmallows—this makes a noticeable difference in flavor and texture. I always keep a stash of good chocolate bars for baking; it’s worth it.
- Toast your nuts beforehand to deepen their flavor. I do this in the oven at 350°F for about 8 minutes, then let them cool before chopping. It’s a step my grandma always did, and it adds so much warmth to the cookies.
- If you prefer chewier cookies, slightly underbake them. They will firm up as they cool. Conversely, bake a minute or two longer for crispier edges.
- Chop the marshmallows into smaller pieces if you want more gooey pockets throughout the cookie. I like to chop them finely so every bite has that melt-in-your-mouth texture.
- Store the dough in the fridge for an hour or overnight before baking. This helps develop the flavors and results in a more uniform texture.
- For an extra special touch, sprinkle a little flaky sea salt on top right after baking. It balances the sweetness and adds a sophisticated flavor—something I learned from my grandma’s subtle culinary tricks.
Serving Suggestions and Pairings
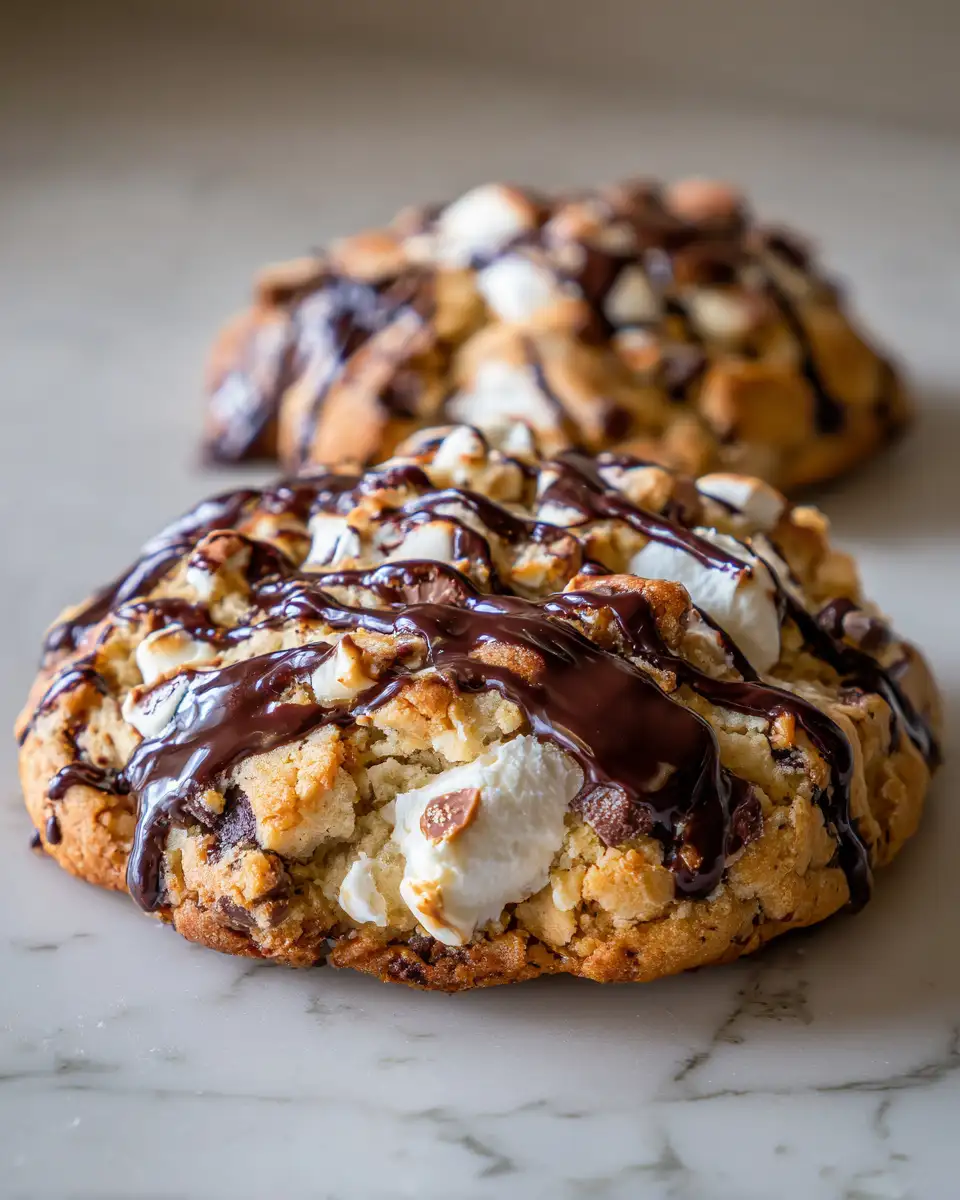
These Levain Bakery Rocky Road Cookies are perfect on their own, fresh out of the oven or after they’ve cooled. I love serving them with a tall glass of cold milk—whether it’s dairy or almond, soy, or oat milk, it’s all about that classic combo. Sometimes, I pair them with a cup of rich coffee or a hot chocolate—perfect for cozy evenings or weekend afternoons.
If I’m feeling fancy, I like to plate a couple of cookies alongside a scoop of vanilla ice cream or even a dollop of whipped cream. The warm, gooey cookies paired with cold cream is practically heaven. They’re also fantastic for sharing at family gatherings or brunches, where everyone’s eyes light up when they see these indulgent treats.
Over the years, I’ve hosted many cookie swaps, and these Rocky Road cookies are always a crowd favorite. They remind everyone of childhood and bring a sense of home and love to the table, which is exactly what I aim for when baking from my grandma’s cherished recipes.
Storage and Reheating Tips
- Store leftover cookies in an airtight container at room temperature for up to 3 days. For longer storage, place them in a sealed container and refrigerate for up to a week.
- If your cookies have lost some of their gooey charm, you can refresh them by heating in the microwave for about 10-15 seconds. They’ll be just as indulgent as when they first came out of the oven.
- For a softer texture, store cookies with a slice of bread or a damp paper towel in the container—this helps keep them moist and chewy.
- Freeze the cookies in an airtight container or freezer bag for up to 3 months. To enjoy, thaw at room temperature or warm briefly in the microwave for that just-baked feel.
Frequently Asked Questions
What are the main ingredients for Levain Bakery Rocky Road Cookies?
The main ingredients for Levain Bakery Rocky Road Cookies include the items listed in our ingredients section above. Each ingredient plays a crucial role in achieving the perfect flavor and texture.
How long does it take to make Levain Bakery Rocky Road Cookies?
The total time to make Levain Bakery Rocky Road Cookies includes both preparation and cooking time. Check the recipe card above for exact timing details.
Can I make Levain Bakery Rocky Road Cookies ahead of time?
Yes, Levain Bakery Rocky Road Cookies can often be prepared in advance. Store it properly in an airtight container in the refrigerator and consume within the recommended timeframe.
What can I serve with Levain Bakery Rocky Road Cookies?
Levain Bakery Rocky Road Cookies pairs well with various sides and accompaniments. Consider the serving suggestions mentioned in the recipe for the best dining experience.
Is Levain Bakery Rocky Road Cookies suitable for special diets?
Depending on the ingredients used, Levain Bakery Rocky Road Cookies may be adapted for various dietary needs. Check the ingredients list and consider substitutions as needed for your dietary requirements.
Final Thoughts
Making Levain Bakery Rocky Road Cookies at home has become one of my favorite ways to reconnect with those cherished baking memories from my grandma’s kitchen. Each batch is a little labor of love, filled with personal touches and the joy of creating something truly special. I believe that good food is about more than just ingredients—it’s about sharing moments, making memories, and adding a sprinkle of love to every bite.
If you’re looking to bring that same warmth into your home, I encourage you to try this recipe. Feel free to customize it—add more marshmallows, swap nuts, or even experiment with different chocolates. The most important thing is to enjoy the process and share these delightful Rocky Road Cookies with those you love. Happy baking!