
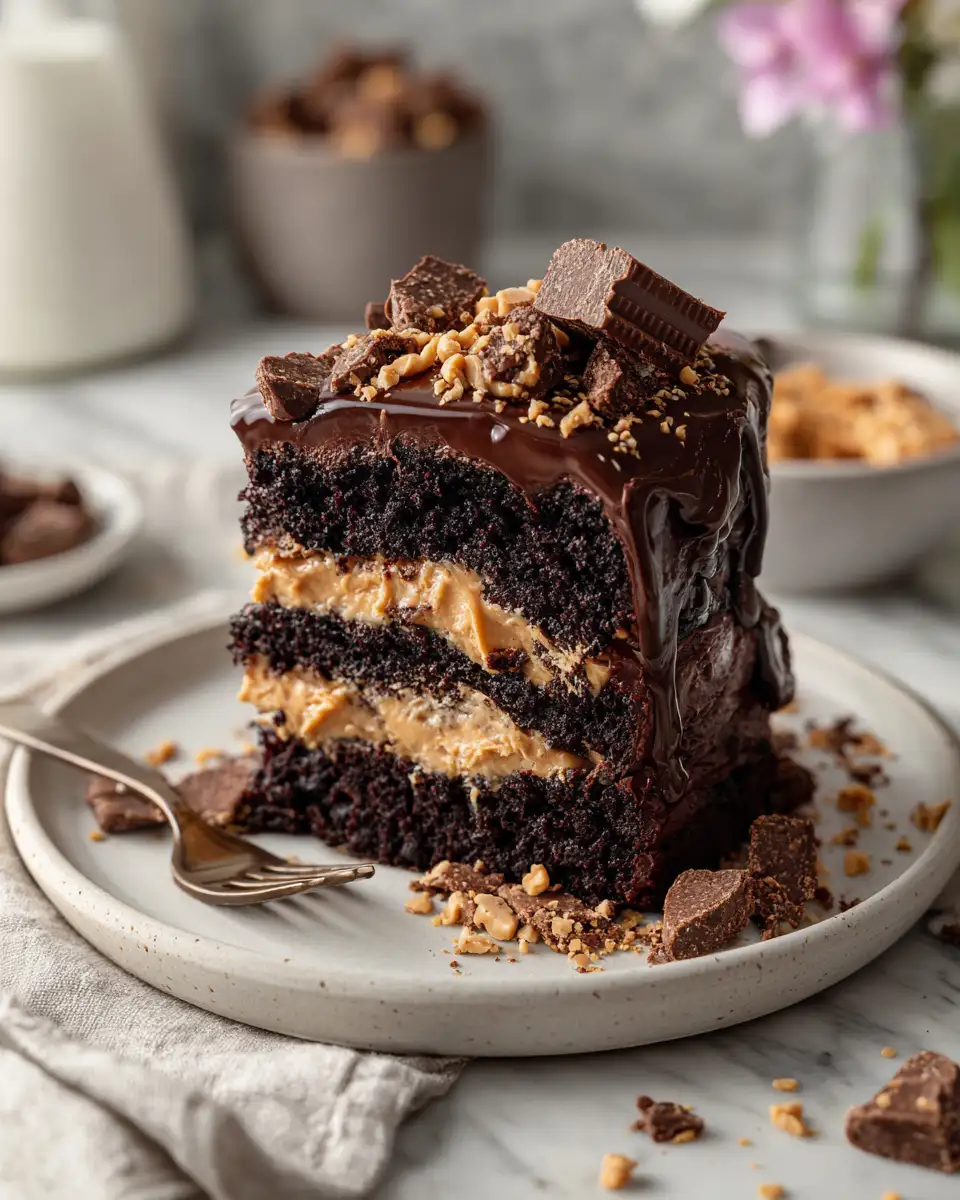
There’s something truly irresistible about a dessert that combines the rich, velvety goodness of chocolate with the smooth, nutty comfort of peanut butter. That’s exactly what I think when I hear “Chocolate Peanut Butter Ruckus,” and I bet you’ll feel the same once you try this recipe. I’ve been experimenting with different sweet treats in my kitchen, inspired by my grandma’s timeless love of fresh ingredients and honest, hearty flavors. This particular creation is a celebration of everything I cherish about baking—simple ingredients, a touch of love, and a whole lot of joy. Whether you’re a seasoned baker or just someone looking to satisfy a sweet craving, this ruckus of chocolate and peanut butter is guaranteed to bring a smile to your face and warmth to your home.
Why You’ll Love This Chocolate Peanut Butter Ruckus
This Chocolate Peanut Butter Ruckus isn’t just a dessert; it’s a delightful experience that combines textures and flavors in the most comforting way. I still remember the first time I made it, tinkering with the ingredients in my cozy kitchen, feeling like I was channeling my grandma’s magic touch. It’s a recipe that’s both forgiving and versatile, perfect for a quick treat or a special occasion. The best part? It’s loaded with familiar flavors that remind me of childhood afternoons spent in my grandma’s kitchen, baking cookies and sharing stories over cups of milk.
What makes this ruckus stand out is the way the chocolate and peanut butter meld together, creating a creamy, gooey center that’s downright addictive. Plus, it has that homemade charm—no fancy gadgets needed, just good ingredients and a little love. Whether you’re sharing it with family or enjoying it solo with a cup of coffee, I promise this recipe will become a beloved staple in your dessert lineup. It’s comfort food at its finest, with a nostalgic twist that keeps me coming back for more.
Ingredients You’ll Need for This Chocolate Peanut Butter Ruckus
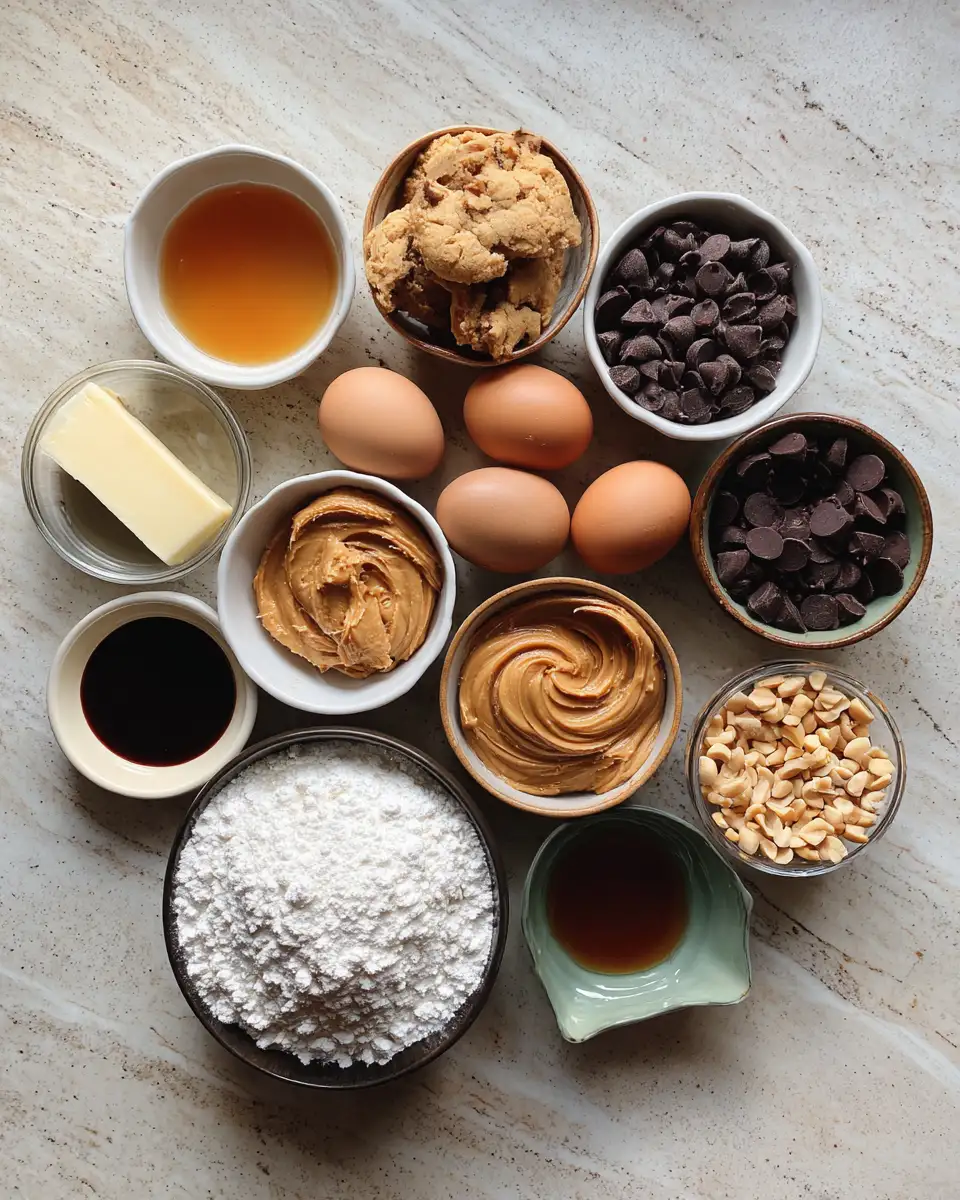
As someone who grew up in a kitchen filled with the aroma of baking bread and melting chocolate, I always emphasize quality ingredients. Here’s what you’ll need to create your own Chocolate Peanut Butter Ruckus. Feel free to experiment—substitutions are welcome, especially if you prefer natural sweeteners or dairy-free options.
- 1 1/2 cups all-purpose flour
- 1/2 teaspoon baking powder
- 1/4 teaspoon salt
- 1/2 cup unsalted butter, softened (substitute with coconut oil for dairy-free)
- 1 cup packed brown sugar
- 1/2 cup creamy peanut butter (natural or store-bought)
- 2 large eggs
- 1 teaspoon vanilla extract
- 3/4 cup semi-sweet chocolate chips (or dark chocolate chips)
- 1/2 cup chopped peanuts (optional, for added crunch)
- For the filling: 1 cup creamy peanut butter and 1/2 cup powdered sugar
- Optional drizzle: melted chocolate or caramel for topping
When I first started making this recipe, I discovered that using high-quality chocolate chips made a noticeable difference. My grandma always told me that the secret to great baking is love and good ingredients—something I’ve carried into every batch I make.
Nutrition Facts
While I believe food should be enjoyed without guilt, it’s good to have an idea of what you’re indulging in. Here’s an approximate nutritional breakdown for a typical serving of this Chocolate Peanut Butter Ruckus—based on a standard slice or portion.
- Calories: 380 per serving
- Protein: 8g
- Fat: 22g
- Carbohydrates: 45g
- Fiber: 4g
- Sugar: 20g
- Sodium: 150mg
This isn’t a light dessert, but it’s one that’s made with wholesome ingredients and honest flavors. Whenever I indulge, I remind myself of the simple joys of baking—sharing stories, creating memories, and savoring each bite. Learn more: Indulge in Bliss: Chocolate Berry Swirl Waffle Cone Bowl Delight
PrintIndulge in the Ultimate Chocolate Peanut Butter Ruckus Experience
Learn how to make delicious Chocolate Peanut Butter Ruckus. Easy recipe with step-by-step instructions.
- Prep Time: 15 minutes
- Cook Time: 30 minutes
- Total Time: 45 minutes
- Yield: 4 servings
- Category: Main Dish
- Method: Cooking
- Cuisine: International
Ingredients
As someone who grew up in a kitchen filled with the aroma of baking bread and melting chocolate, I always emphasize quality ingredients. Here’s what you’ll need to create your own Chocolate Peanut Butter Ruckus. Feel free to experiment—substitutions are welcome, especially if you prefer natural sweeteners or dairy-free options.
- 1 1/2 cups all-purpose flour
- 1/2 teaspoon baking powder
- 1/4 teaspoon salt
- 1/2 cup unsalted butter, softened (substitute with coconut oil for dairy-free)
- 1 cup packed brown sugar
- 1/2 cup creamy peanut butter (natural or store-bought)
- 2 large eggs
- 1 teaspoon vanilla extract
- 3/4 cup semi-sweet chocolate chips (or dark chocolate chips)
- 1/2 cup chopped peanuts (optional, for added crunch)
- For the filling: 1 cup creamy peanut butter and 1/2 cup powdered sugar
- Optional drizzle: melted chocolate or caramel for topping
When I first started making this recipe, I discovered that using high-quality chocolate chips made a noticeable difference. My grandma always told me that the secret to great baking is love and good ingredients—something I’ve carried into every batch I make.
Instructions
- Preheat your oven to 350°F (175°C). Line a 9-inch square baking pan with parchment paper, leaving some overhang for easy removal.
- In a medium bowl, whisk together the flour, baking powder, and salt. Set aside.
- In a large mixing bowl, cream the softened butter and brown sugar together using a hand or stand mixer on medium speed for about 3-4 minutes until light and fluffy. I always tell myself that good creaming is the secret to soft cookies and bars—my grandma’s tip that never fails.
- Add the peanut butter and eggs to the butter-sugar mixture. Beat until well combined, about 2 minutes. Stir in vanilla extract.
- Gradually add the dry ingredients to the wet, mixing just until combined. Overmixing can make the texture dense—something I learned from years of baking with my grandma’s gentle guidance.
- Fold in the chocolate chips and chopped peanuts if using. These add texture and extra flavor that makes each bite exciting.
- Spread half of the batter into the prepared baking pan, smoothing the surface with a spatula. Drop dollops of the peanut butter filling over the batter, then gently spread the remaining batter on top, sealing in the filling as best as you can.
- Bake in the preheated oven for 25-30 minutes, or until the edges are golden and a toothpick inserted in the center comes out with moist crumbs. Keep an eye on it—I’ve learned to check a little early if my oven runs hot!
- Allow the baked goods to cool in the pan for about 10 minutes, then lift out using the parchment overhang and transfer to a wire rack to cool completely. Patience is key here; I always remind myself that good things take time.
- If desired, drizzle melted chocolate or caramel over the cooled bars for an extra layer of indulgence. I love doing this as a finishing touch—it makes the dessert feel special, even if it’s just for my family’s Sunday night movie.
Steps to Create Your Chocolate Peanut Butter Ruckus
- Preheat your oven to 350°F (175°C). Line a 9-inch square baking pan with parchment paper, leaving some overhang for easy removal.
- In a medium bowl, whisk together the flour, baking powder, and salt. Set aside.
- In a large mixing bowl, cream the softened butter and brown sugar together using a hand or stand mixer on medium speed for about 3-4 minutes until light and fluffy. I always tell myself that good creaming is the secret to soft cookies and bars—my grandma’s tip that never fails.
- Add the peanut butter and eggs to the butter-sugar mixture. Beat until well combined, about 2 minutes. Stir in vanilla extract.
- Gradually add the dry ingredients to the wet, mixing just until combined. Overmixing can make the texture dense—something I learned from years of baking with my grandma’s gentle guidance.
- Fold in the chocolate chips and chopped peanuts if using. These add texture and extra flavor that makes each bite exciting.
- Spread half of the batter into the prepared baking pan, smoothing the surface with a spatula. Drop dollops of the peanut butter filling over the batter, then gently spread the remaining batter on top, sealing in the filling as best as you can.
- Bake in the preheated oven for 25-30 minutes, or until the edges are golden and a toothpick inserted in the center comes out with moist crumbs. Keep an eye on it—I’ve learned to check a little early if my oven runs hot!
- Allow the baked goods to cool in the pan for about 10 minutes, then lift out using the parchment overhang and transfer to a wire rack to cool completely. Patience is key here; I always remind myself that good things take time.
- If desired, drizzle melted chocolate or caramel over the cooled bars for an extra layer of indulgence. I love doing this as a finishing touch—it makes the dessert feel special, even if it’s just for my family’s Sunday night movie.
Tips for Making the Best Chocolate Peanut Butter Ruckus
Over the years, I’ve picked up a few tricks that help me create consistently delicious baked goods—especially this chocolate and peanut butter ruckus. Here are some of my favorites:
- Use room temperature ingredients. Softened butter and eggs at room temperature blend more smoothly and give you that airy, tender crumb I love.
- Don’t overmix the batter once you add the dry ingredients. Overmixing can lead to dense, tough baked goods—something I learned early on from my grandma’s gentle baking philosophy.
- For a gooey center, don’t be afraid to add extra peanut butter or chocolate chips. I always keep a stash of both in my pantry for spontaneous baking moments.
- If you want a crispier crust, bake a few extra minutes, but keep a close eye to prevent burning. Every oven is different, and I’ve learned to trust my nose and eye over the timer.
- Chill the dough if you have time—it helps develop flavor and makes handling easier. Plus, I find that chilled dough results in thicker, chewier bars.
- For a more decadent touch, sprinkle sea salt on top before baking. It balances the sweetness and enhances the flavors—something I picked up from a bakery in town that made the best salted caramel chocolate bars.
Serving Suggestions and Pairings
This Chocolate Peanut Butter Ruckus is versatile enough to serve in a variety of ways. I love cutting it into squares and sharing with family and friends, especially during cozy weekend gatherings. It pairs beautifully with a tall glass of cold milk, a cup of strong coffee, or even a scoop of vanilla ice cream for an indulgent dessert.
For a special touch, serve it alongside fresh fruit like sliced strawberries or bananas. The fruity acidity cuts through the richness of the chocolate and peanut butter, creating a balanced bite. I’ve also enjoyed crumbling pieces over Greek yogurt for a quick, satisfying breakfast that tastes like dessert.
If you’re hosting a party or bringing a treat to a potluck, consider wrapping individual bars in decorative paper or cellophane with a bow. It’s a simple way to make your homemade creation feel extra special.
Storage and Reheating Tips
To keep your Chocolate Peanut Butter Ruckus fresh, store it in an airtight container at room temperature for up to three days. If you want to keep it longer, refrigerate for up to a week—just be sure to let it come to room temperature before serving, as chilling can make it a bit firmer.
If you’re craving that warm, gooey goodness again, gently reheat individual pieces in the microwave for about 10-15 seconds. I love doing this, especially when I want a little comfort after a long day. Just be careful not to overheat, or the chocolate might get too melty.
For freezing, wrap bars individually in plastic wrap, then place in a zip-top bag or airtight container. They can last up to three months. Thaw at room temperature or warm slightly in the microwave when ready to enjoy.
Frequently Asked Questions
What are the main ingredients for Chocolate Peanut Butter Ruckus?
The main ingredients for Chocolate Peanut Butter Ruckus include the items listed in our ingredients section above. Each ingredient plays a crucial role in achieving the perfect flavor and texture.
How long does it take to make Chocolate Peanut Butter Ruckus?
The total time to make Chocolate Peanut Butter Ruckus includes both preparation and cooking time. Check the recipe card above for exact timing details.
Can I make Chocolate Peanut Butter Ruckus ahead of time?
Yes, Chocolate Peanut Butter Ruckus can often be prepared in advance. Store it properly in an airtight container in the refrigerator and consume within the recommended timeframe.
What can I serve with Chocolate Peanut Butter Ruckus?
Chocolate Peanut Butter Ruckus pairs well with various sides and accompaniments. Consider the serving suggestions mentioned in the recipe for the best dining experience.
Is Chocolate Peanut Butter Ruckus suitable for special diets?
Depending on the ingredients used, Chocolate Peanut Butter Ruckus may be adapted for various dietary needs. Check the ingredients list and consider substitutions as needed for your dietary requirements.
Final Thoughts
Creating this Chocolate Peanut Butter Ruckus has become a personal favorite of mine—it’s a recipe that’s rooted in childhood memories and the comfort of my grandma’s kitchen. Every bite reminds me of lazy Sunday afternoons, the smell of freshly baked goodies filling the air, and the simple joy of sharing homemade treats with loved ones. I hope you find as much happiness in making and tasting this dessert as I have over the years. Remember, the best recipes are the ones made with love, patience, and a little bit of that magic that only home baking can bring. So gather your ingredients, roll up your sleeves, and enjoy every step of this delicious journey. Happy baking!

2 thoughts on “Indulge in the Ultimate Chocolate Peanut Butter Ruckus Experience”