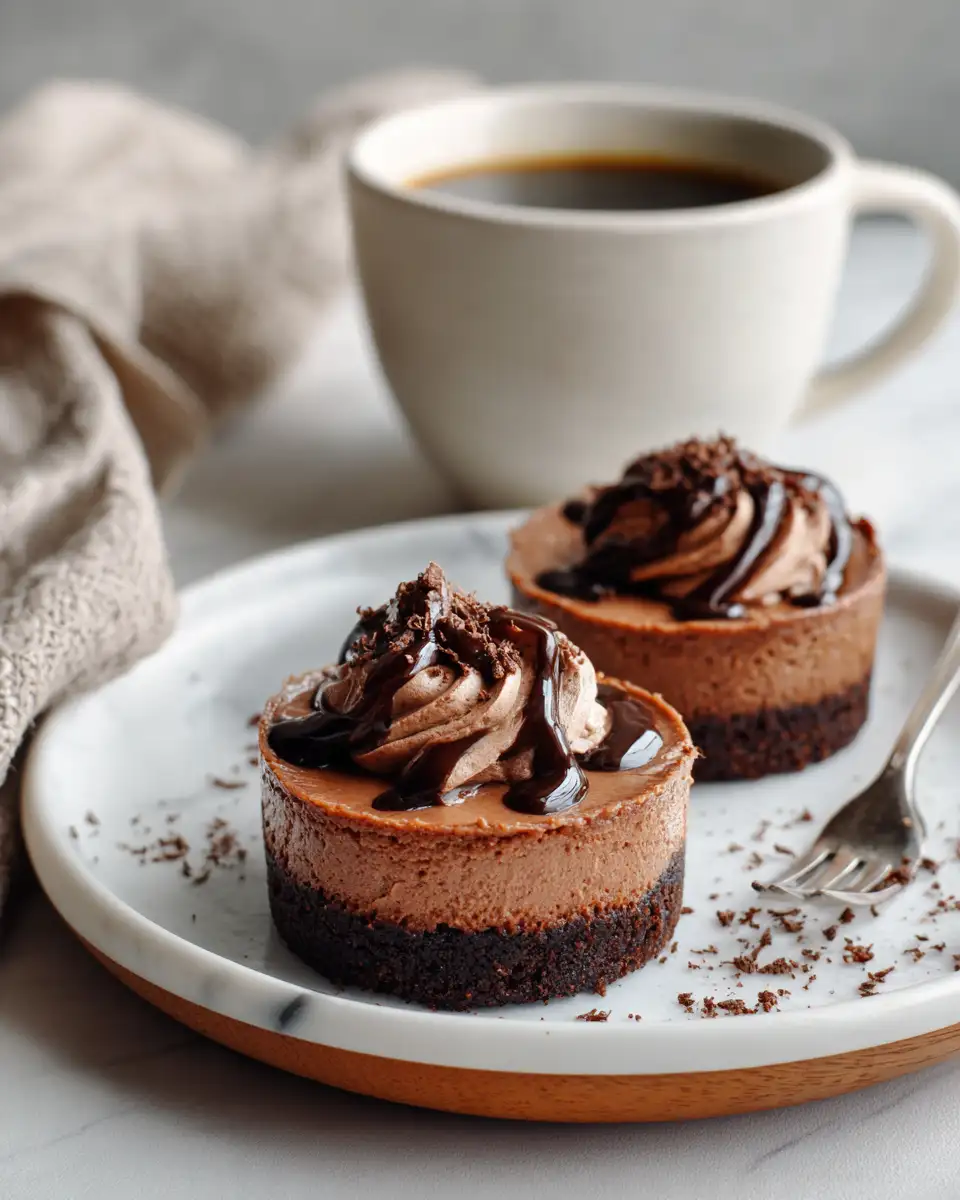
There’s something undeniably comforting about bite-sized desserts that combine rich chocolate, creamy cheesecake, and a touch of fudge. That’s exactly what you get with these Chocolate Fudge Cheesecake Cups—little jars of indulgence that feel like a warm hug in every spoonful. I still remember the first time I crafted a version of these after a long day in my grandma’s kitchen, where the aroma of melting chocolate and freshly whipped cream always made everything feel right. Making these cups is like capturing a moment of that magic and sharing it with loved ones. Whether you’re celebrating a special occasion or simply craving a sweet pick-me-up, these luscious cups bring joy and comfort in every layer. And trust me, once you dive into making them, they’ll become a cherished part of your dessert repertoire, just like they are in my home.
Why You’ll Love This Chocolate Fudge Cheesecake Cups
There’s a special charm to these Chocolate Fudge Cheesecake Cups that keeps me coming back to them. For starters, they’re incredibly easy to make — no fancy equipment required. I love how they allow me to serve a decadent, restaurant-quality dessert right from my own kitchen, all in adorable individual portions. As someone who grew up baking with my grandma, I’ve learned that small touches make a big difference, and these cups are no exception. The combination of smooth cheesecake, rich fudge, and a crumbly crust hits all the right notes — sweet, fudgy, and velvety. Plus, they’re perfect for sharing or enjoying solo, and because they’re served in cups, they look just as beautiful on a dessert table as they taste. I find that these little treats always turn any gathering into a celebration, and they’re guaranteed to impress even the most discerning sweet tooth. Making them feels like a warm, nostalgic act—like bringing a bit of grandma’s kitchen into your own home.
Ingredients You’ll Need for This Chocolate Fudge Cheesecake Cups
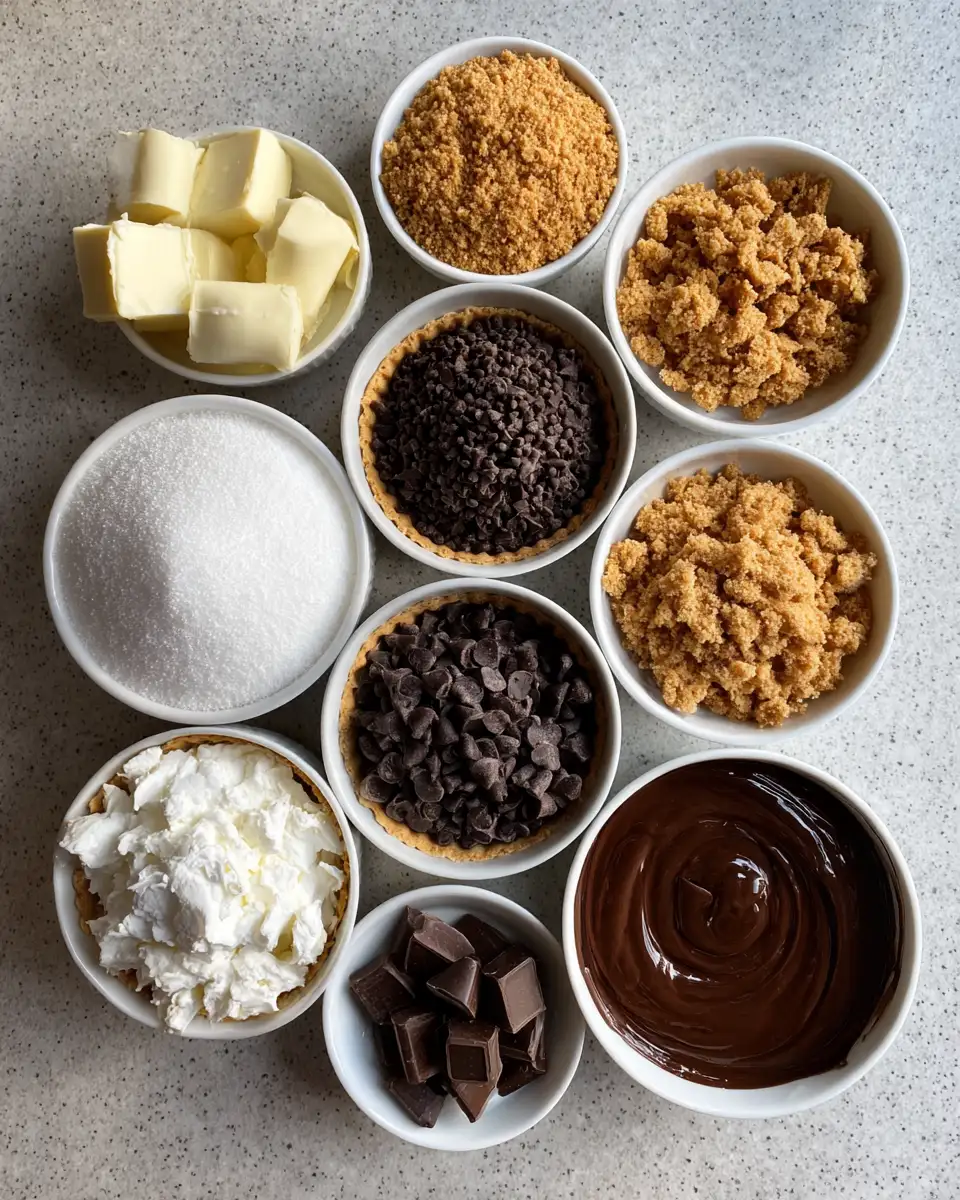
When I set out to create these luscious cups, I rely on simple, quality ingredients that I often keep stocked in my pantry and fridge. Over the years, I’ve learned that the best desserts come from honest, straightforward components. Here’s what you’ll need:
- 1 1/2 cups graham cracker crumbs (or digestive biscuits, crushed)
- 1/4 cup granulated sugar
- 1/2 cup unsalted butter, melted
- 16 oz (around 2 cups) cream cheese, softened (full-fat for the best texture)
- 1 cup powdered sugar (you can substitute with honey or maple syrup for a natural sweetness)
- 1 teaspoon vanilla extract
- 1 1/2 cups heavy whipping cream
- 1 cup semi-sweet chocolate chips or chopped chocolate
- 1/2 cup sweetened condensed milk (for extra creaminess and fudge richness)
- Optional: a pinch of sea salt to enhance the chocolate flavor
When I first started experimenting with these, I found that using good-quality chocolate really elevates the fudge layer. If you prefer a dairy-free version, coconut milk and dairy-free chocolate chips work beautifully as substitutes. I also love adding a sprinkle of flaky sea salt on top before serving—it balances the sweetness and adds a lovely crunch. Trust me, these small tweaks make a big difference and turn good into unforgettable.
Nutrition Facts
- Calories: Approximately 350-400 per serving
- Protein: 5-6g
- Fat: 25-30g
- Carbohydrates: 30-35g
- Fiber: 2-3g
- Sugar: 20-25g
- Sodium: 150-200mg
These numbers are based on making six generous cups, using full-fat ingredients. I always remind myself that desserts like this are about savoring and sharing, so I embrace the richness as part of the experience. When I first made these for a family gathering, I was surprised how quickly they disappeared—proof that a little indulgence goes a long way!
PrintDecadent Chocolate Fudge Cheesecake Cups Your New Favorite Dessert
Learn how to make delicious Chocolate Fudge Cheesecake Cups. Easy recipe with step-by-step instructions.
- Prep Time: 15 minutes
- Cook Time: 30 minutes
- Total Time: 45 minutes
- Yield: 4 servings
- Category: Main Dish
- Method: Cooking
- Cuisine: International
Ingredients
When I set out to create these luscious cups, I rely on simple, quality ingredients that I often keep stocked in my pantry and fridge. Over the years, I’ve learned that the best desserts come from honest, straightforward components. Here’s what you’ll need:
- 1 1/2 cups graham cracker crumbs (or digestive biscuits, crushed)
- 1/4 cup granulated sugar
- 1/2 cup unsalted butter, melted
- 16 oz (around 2 cups) cream cheese, softened (full-fat for the best texture)
- 1 cup powdered sugar (you can substitute with honey or maple syrup for a natural sweetness)
- 1 teaspoon vanilla extract
- 1 1/2 cups heavy whipping cream
- 1 cup semi-sweet chocolate chips or chopped chocolate
- 1/2 cup sweetened condensed milk (for extra creaminess and fudge richness)
- Optional: a pinch of sea salt to enhance the chocolate flavor
When I first started experimenting with these, I found that using good-quality chocolate really elevates the fudge layer. If you prefer a dairy-free version, coconut milk and dairy-free chocolate chips work beautifully as substitutes. I also love adding a sprinkle of flaky sea salt on top before serving—it balances the sweetness and adds a lovely crunch. Trust me, these small tweaks make a big difference and turn good into unforgettable.
Instructions
-
Start by preparing the crust. In a mixing bowl, combine the graham cracker crumbs and sugar. Pour in the melted butter and stir until the mixture is evenly coated and resembles wet sand. Divide this mixture evenly into your serving cups or jars, pressing gently to form a firm base. Chill in the refrigerator while you prepare the filling.
-
Next, make the cheesecake filling. In a large bowl, beat the softened cream cheese with powdered sugar and vanilla extract until smooth and creamy. I find that softening the cream cheese beforehand makes this step much easier and smoother, reminiscent of the times I’d help my grandma whip up simple, comforting desserts.
-
In a separate bowl, whip the heavy cream until stiff peaks form. Carefully fold the whipped cream into the cream cheese mixture, using a gentle folding motion to keep it light and airy. This step is my favorite because it reminds me of the times I’d sit by the window, softly whisking cream while listening to old family stories.
-
Now for the fudge. In a microwave-safe bowl, melt the chocolate chips with the sweetened condensed milk in 30-second intervals, stirring between each until smooth and glossy. Let the fudge cool slightly—it should still be pourable but not hot. Pour about a third of this fudge over the cheesecake layer and gently swirl it in with a toothpick or skewer for a marbled effect. Repeat with the remaining fudge, creating beautiful layers and ribbons of fudge throughout.
-
Once assembled, refrigerate the cups for at least 4 hours, or better yet, overnight. This resting time allows the flavors to meld beautifully and the layers to set firm enough to hold their shape when served. I always find that patience pays off—these are worth the wait!
-
Before serving, you can garnish each cup with whipped cream, chocolate shavings, or a sprinkle of sea salt. I love adding a small piece of chocolate on top or a few crushed cookies for texture. These tiny finishing touches make each cup feel special, just like the ones my grandma would carefully decorate with love.
Steps to Create Your Chocolate Fudge Cheesecake Cups
Start by preparing the crust. In a mixing bowl, combine the graham cracker crumbs and sugar. Pour in the melted butter and stir until the mixture is evenly coated and resembles wet sand. Divide this mixture evenly into your serving cups or jars, pressing gently to form a firm base. Chill in the refrigerator while you prepare the filling.
Next, make the cheesecake filling. In a large bowl, beat the softened cream cheese with powdered sugar and vanilla extract until smooth and creamy. I find that softening the cream cheese beforehand makes this step much easier and smoother, reminiscent of the times I’d help my grandma whip up simple, comforting desserts.
In a separate bowl, whip the heavy cream until stiff peaks form. Carefully fold the whipped cream into the cream cheese mixture, using a gentle folding motion to keep it light and airy. This step is my favorite because it reminds me of the times I’d sit by the window, softly whisking cream while listening to old family stories.
Now for the fudge. In a microwave-safe bowl, melt the chocolate chips with the sweetened condensed milk in 30-second intervals, stirring between each until smooth and glossy. Let the fudge cool slightly—it should still be pourable but not hot. Pour about a third of this fudge over the cheesecake layer and gently swirl it in with a toothpick or skewer for a marbled effect. Repeat with the remaining fudge, creating beautiful layers and ribbons of fudge throughout.
Once assembled, refrigerate the cups for at least 4 hours, or better yet, overnight. This resting time allows the flavors to meld beautifully and the layers to set firm enough to hold their shape when served. I always find that patience pays off—these are worth the wait!
Before serving, you can garnish each cup with whipped cream, chocolate shavings, or a sprinkle of sea salt. I love adding a small piece of chocolate on top or a few crushed cookies for texture. These tiny finishing touches make each cup feel special, just like the ones my grandma would carefully decorate with love.
Tips for Making the Best Chocolate Fudge Cheesecake Cups
Remember, the secret to perfect cheesecake cups is patience and quality ingredients. Don’t rush the chilling time, and always use real cream cheese and good chocolate for that rich, authentic flavor. And most importantly, have fun with it—these are treats meant to be enjoyed and shared, just like the desserts I grew up making with my grandma.
- Use room temperature ingredients: This makes mixing smoother and prevents lumps, especially when creaming the cheese.
- Chill the crust: Pressing the crust into the cups and refrigerating it before adding the filling creates a sturdier base.
- Gently fold whipped cream: To keep the filling airy, fold gently rather than stirring vigorously.
- Adjust sweetness: Taste the fudge before pouring; if you like it sweeter, add a touch more condensed milk.
- Decorate just before serving: To keep toppings fresh and visually appealing, add them right before presenting the cups.
Serving Suggestions and Pairings
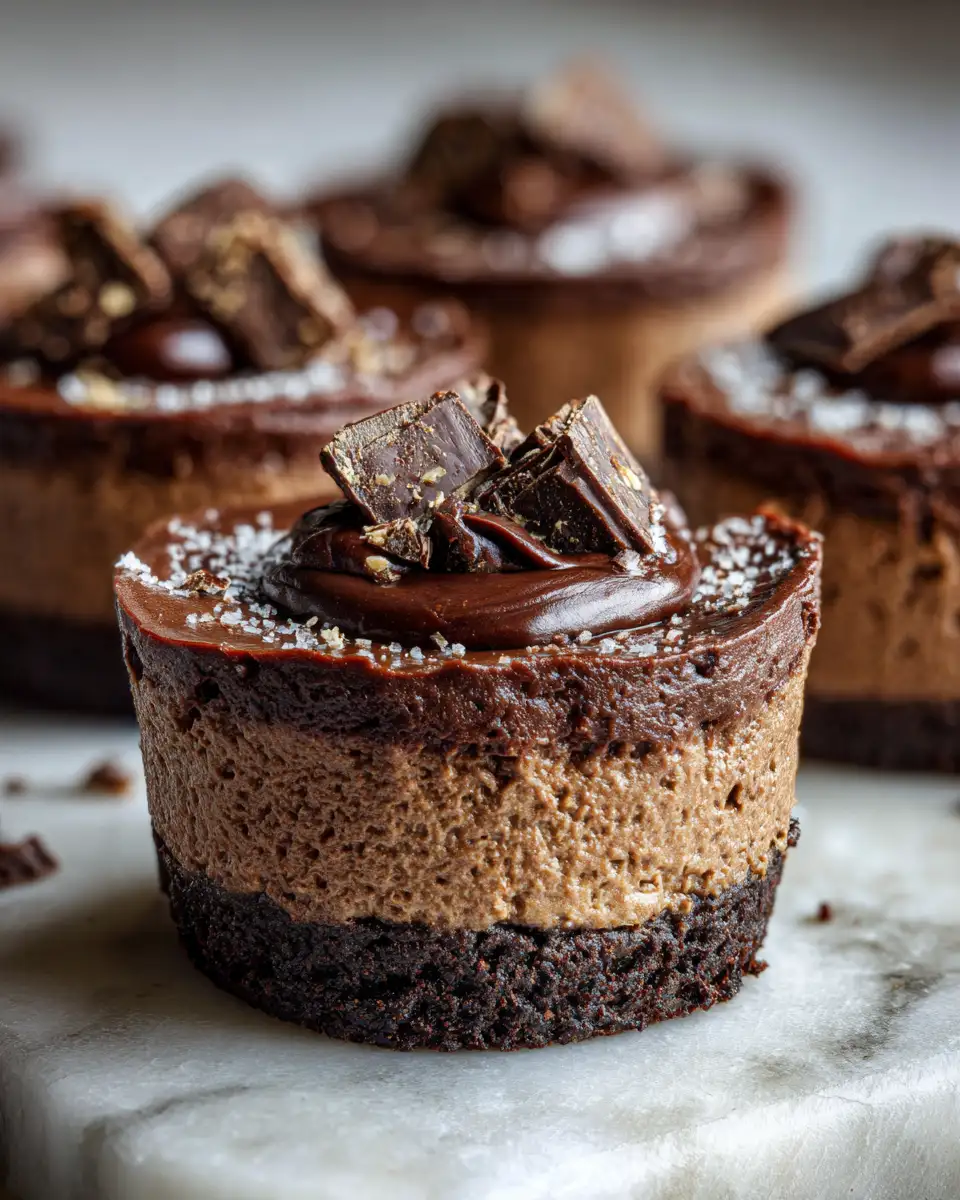
These Chocolate Fudge Cheesecake Cups are versatile enough to be served at any gathering, from casual family dinners to fancy parties. I love to pair them with a cup of strong coffee or a glass of cold milk—nothing beats the combination of rich chocolate and creamy cheesecake for a satisfying treat. If you’re feeling adventurous, a drizzle of caramel or a dusting of cocoa powder adds an extra layer of indulgence. Learn more: Decadent Chocolate Hazelnut Cheesecake Bites That Will Melt Your Heart
For a more sophisticated presentation, serve these cups alongside fresh berries or a sprig of mint. I once made a batch for a brunch, garnishing each with a raspberry and a tiny sprig of thyme—looked beautiful and tasted divine. Their small size makes them perfect for sampling multiple desserts, so don’t hesitate to set up a mini dessert bar with different toppings or accompaniments.
Storage and Reheating Tips
Leftovers are rare in my house, but if you do have any, keep the Chocolate Fudge Cheesecake Cups covered tightly and refrigerated. They stay fresh for up to three days, though I recommend enjoying them sooner rather than later to savor the creamy texture and fudge layers at their best.
If you prefer your dessert slightly warmer or softer, you can gently reheat the cups in the microwave for about 10-15 seconds. Just be careful not to overdo it—melting the fudge too much can change the texture. I like to reheat them just enough to make the chocolate gooey and inviting again. Alternatively, you can let them sit out at room temperature for a few minutes before serving if they’ve been chilled for a long time.
Frequently Asked Questions
What are the main ingredients for Chocolate Fudge Cheesecake Cups?
The main ingredients for Chocolate Fudge Cheesecake Cups include the items listed in our ingredients section above. Each ingredient plays a crucial role in achieving the perfect flavor and texture.
How long does it take to make Chocolate Fudge Cheesecake Cups?
The total time to make Chocolate Fudge Cheesecake Cups includes both preparation and cooking time. Check the recipe card above for exact timing details.
Can I make Chocolate Fudge Cheesecake Cups ahead of time?
Yes, Chocolate Fudge Cheesecake Cups can often be prepared in advance. Store it properly in an airtight container in the refrigerator and consume within the recommended timeframe.
What can I serve with Chocolate Fudge Cheesecake Cups?
Chocolate Fudge Cheesecake Cups pairs well with various sides and accompaniments. Consider the serving suggestions mentioned in the recipe for the best dining experience.
Is Chocolate Fudge Cheesecake Cups suitable for special diets?
Depending on the ingredients used, Chocolate Fudge Cheesecake Cups may be adapted for various dietary needs. Check the ingredients list and consider substitutions as needed for your dietary requirements.
Final Thoughts
Creating these Chocolate Fudge Cheesecake Cups is a delightful journey back to the cozy, loving kitchen of my childhood. Each step is an act of love—mixing, layering, waiting—and the reward is a dessert that feels both indulgent and comforting. I believe that good food has the power to bring people together, and these cups are a perfect example of that. They’re simple enough to make on a weeknight but special enough to serve for celebrations or just because. Trust me, once you try making these, they’ll become a favorite in your home too, a little jar of happiness that you’ll want to share again and again.