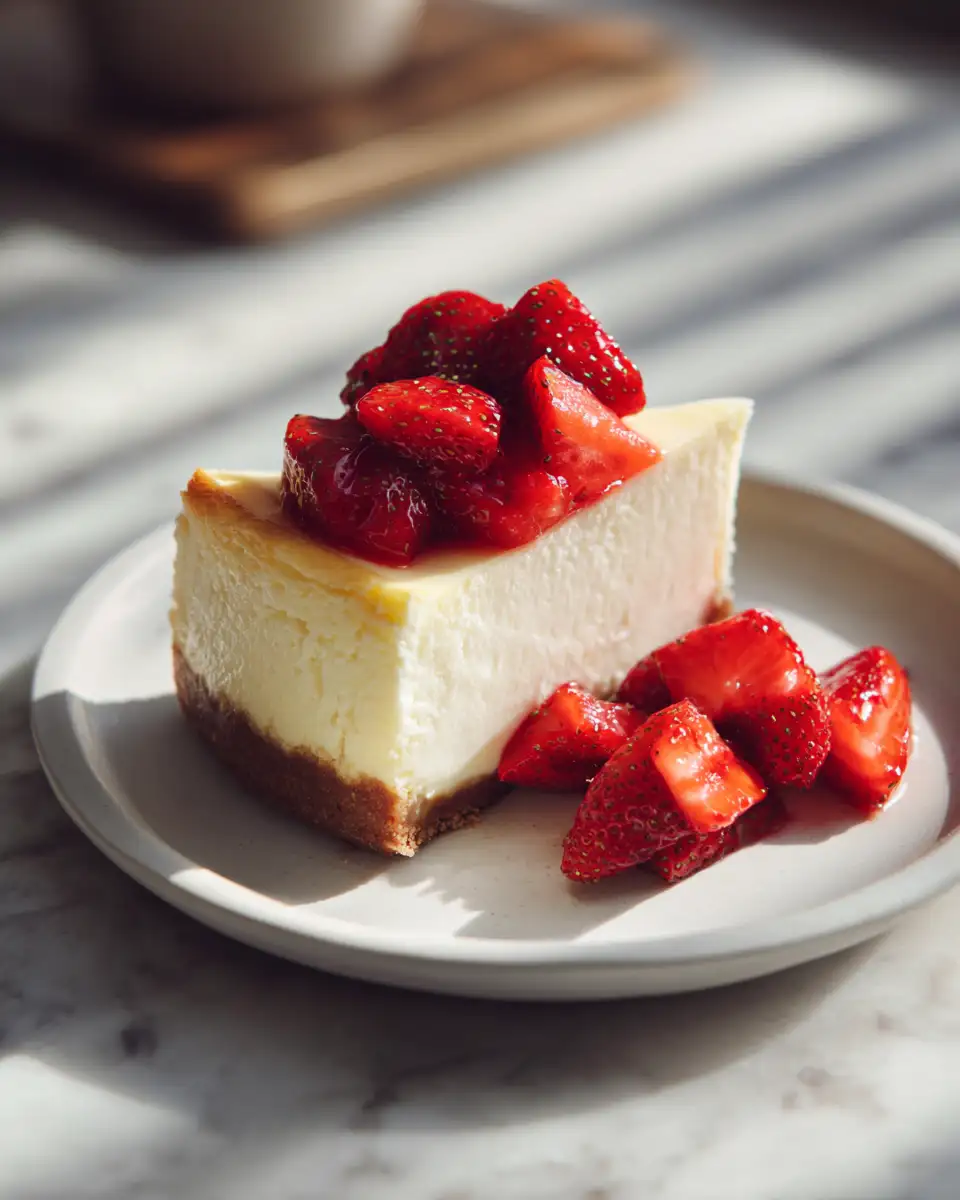
There’s something truly special about a slice of Classic New York Cheesecake. It’s the kind of dessert that brings back warm memories of family gatherings, Sunday dinners, and my grandma’s loving touch in the kitchen. Growing up, I watched her carefully craft her cheesecake, patiently blending cream cheese with sugar, and gently folding in eggs. Those moments of watching her work, feeling the aroma of vanilla and fresh lemons filling the air, became the foundation of my love for baking. Today, I want to share that same magic with you—because nothing beats a homemade cheesecake that’s rich, creamy, and perfectly balanced. So, roll up your sleeves and let’s create a cheesecake that’s as comforting as grandma’s hug.
Why You’ll Love This Classic New York Cheesecake
This Classic New York Cheesecake is a true showstopper. It’s dense yet smooth, with a velvety texture that melts in your mouth. I’ve always believed that a good cheesecake should be rich but not overly sweet, letting the tang of the cream cheese shine through. My grandma’s secret was using high-quality cream cheese and balancing the sweetness with just a hint of lemon zest. Over the years, I’ve adapted her recipe to make it foolproof, so even if you’re new to baking, you’ll find this cheesecake surprisingly simple to master. Whether you’re celebrating a special occasion or just craving a luscious dessert to end your meal, this cheesecake is guaranteed to impress. Plus, it’s versatile—you can top it with fresh berries, a drizzle of chocolate, or keep it classic with a simple sour cream topping. It’s a timeless dessert that’s been a part of my family for generations, and I can’t wait for you to experience that same joy.
Ingredients You’ll Need for This Classic New York Cheesecake
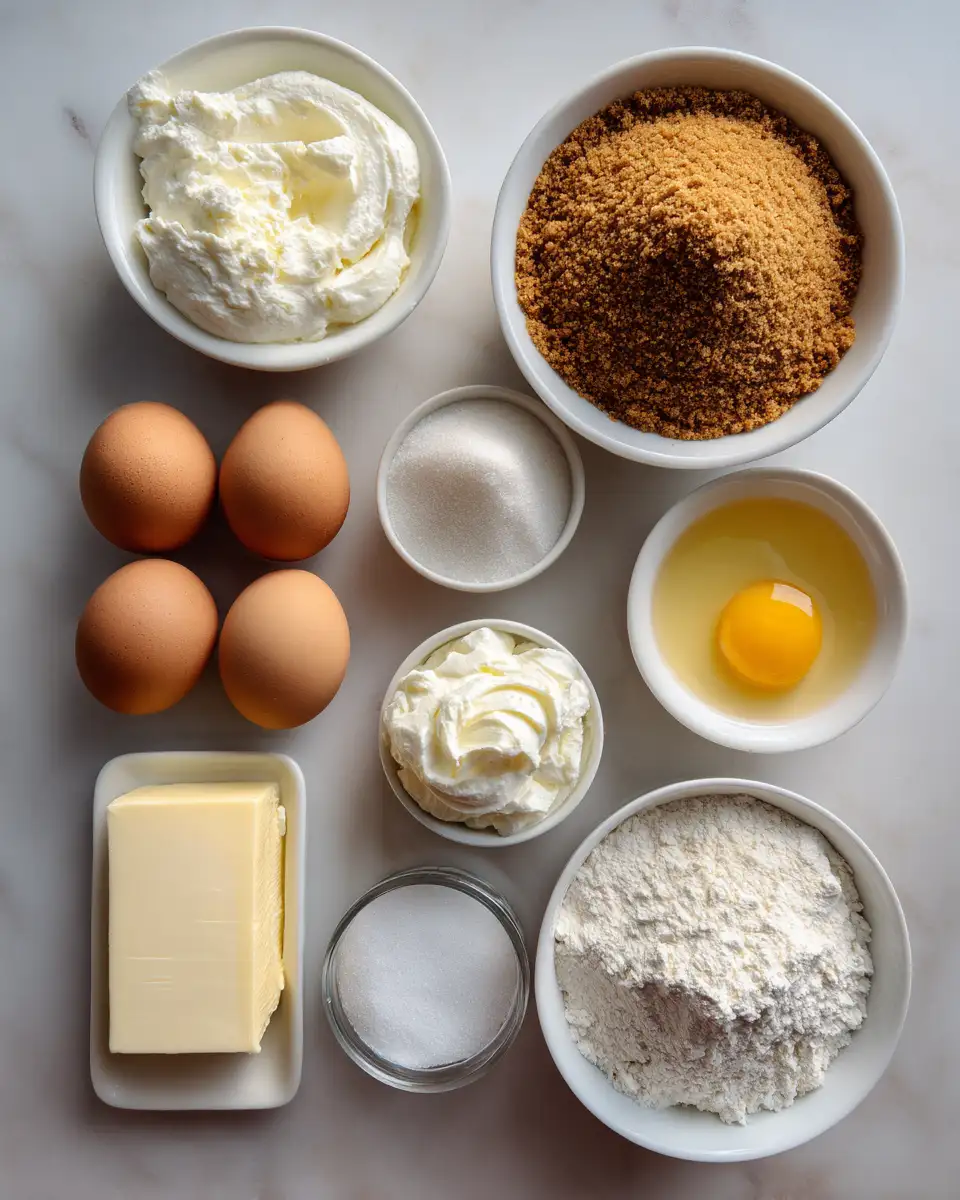
- 2 ½ cups (about 20 oz) cream cheese, softened (preferably full-fat for richness)
- 1 cup granulated sugar
- 3 large eggs
- 1 teaspoon vanilla extract
- ¼ cup sour cream (for added creaminess)
- 2 tablespoons all-purpose flour (helps stabilize the texture)
- 1 tablespoon lemon zest (optional but adds a lovely brightness)
- ½ teaspoon salt
- Graham cracker crust (see below for ingredients)
For the crust:
- 1 ½ cups graham cracker crumbs
- ¼ cup granulated sugar
- ½ cup unsalted butter, melted
Substitution suggestions: If you’re dairy-sensitive, you might try cream cheese alternatives, but note that the texture and flavor won’t be quite the same. For a gluten-free crust, use almond flour or gluten-free graham crackers. Learn more: Zesty Delight: Indulge in the Ultimate No-Bake Lemon Cheesecake
Nutrition Facts
- Calories: approximately 420 per slice (1/12th of the cheesecake)
- Protein: 7g
- Fat: 30g
- Carbohydrates: 30g
- Fiber: 1g
- Sugar: 18g
- Sodium: 180mg
This creamy treat is indulgent, but I believe in enjoying dessert with mindfulness. The recipe balances decadence with a touch of lightness thanks to the sour cream and lemon zest. I’ve always found that a modest slice satisfies my sweet tooth without feeling heavy, especially when paired with a cup of hot coffee or tea.
PrintIndulge in the Ultimate Classic New York Cheesecake Experience
Learn how to make delicious Classic New York Cheesecake. Easy recipe with step-by-step instructions.
- Prep Time: 15 minutes
- Cook Time: 30 minutes
- Total Time: 45 minutes
- Yield: 4 servings
- Category: Main Dish
- Method: Cooking
- Cuisine: International
Ingredients
- 2 ½ cups (about 20 oz) cream cheese, softened (preferably full-fat for richness)
- 1 cup granulated sugar
- 3 large eggs
- 1 teaspoon vanilla extract
- ¼ cup sour cream (for added creaminess)
- 2 tablespoons all-purpose flour (helps stabilize the texture)
- 1 tablespoon lemon zest (optional but adds a lovely brightness)
- ½ teaspoon salt
- Graham cracker crust (see below for ingredients)
For the crust:
- 1 ½ cups graham cracker crumbs
- ¼ cup granulated sugar
- ½ cup unsalted butter, melted
Substitution suggestions: If you’re dairy-sensitive, you might try cream cheese alternatives, but note that the texture and flavor won’t be quite the same. For a gluten-free crust, use almond flour or gluten-free graham crackers.
Instructions
- Preheat your oven to 350°F (175°C). Prepare a 9-inch springform pan by lightly greasing it or lining the bottom with parchment paper.
- Make the crust: In a medium bowl, combine graham cracker crumbs and sugar. Pour in the melted butter and stir until the mixture resembles wet sand. Press evenly into the bottom of the prepared pan, using the back of a spoon or your fingers to create a firm, even layer. Bake for 8-10 minutes to set the crust, then remove from oven and let cool slightly.
- In a large mixing bowl, beat the softened cream cheese with an electric mixer on medium speed until smooth and creamy, about 2-3 minutes. This step is crucial for a silky texture, and I always take my time here, especially because I learned from my grandma that patience makes perfect.
- Add sugar gradually, beating until well combined. Incorporate eggs one at a time, mixing after each addition to ensure a smooth batter. Stir in vanilla, sour cream, lemon zest, flour, and salt, mixing just until combined. Do not overmix—overworking the batter can cause cracks later.
- Pour the batter over the cooled crust, smoothing the top with a spatula. Tap the pan gently on the counter to release any air bubbles.
- Place the springform pan on a baking sheet to catch any drips. Bake for about 50-60 minutes, or until the edges are set but the center still has a slight jiggle. My grandma always told me to trust my instincts here—if it jiggles just a little, it’s perfect. Overbaking can lead to cracks, so keep an eye on it.
- Once baked, turn off the oven and crack the door open slightly. Let the cheesecake cool in the oven for an hour—this helps prevent cracks and ensures even cooling. Afterward, refrigerate for at least 4 hours, ideally overnight, to let the flavors meld and the texture set beautifully.
Steps to Create Your Classic New York Cheesecake
- Preheat your oven to 350°F (175°C). Prepare a 9-inch springform pan by lightly greasing it or lining the bottom with parchment paper.
- Make the crust: In a medium bowl, combine graham cracker crumbs and sugar. Pour in the melted butter and stir until the mixture resembles wet sand. Press evenly into the bottom of the prepared pan, using the back of a spoon or your fingers to create a firm, even layer. Bake for 8-10 minutes to set the crust, then remove from oven and let cool slightly.
- In a large mixing bowl, beat the softened cream cheese with an electric mixer on medium speed until smooth and creamy, about 2-3 minutes. This step is crucial for a silky texture, and I always take my time here, especially because I learned from my grandma that patience makes perfect.
- Add sugar gradually, beating until well combined. Incorporate eggs one at a time, mixing after each addition to ensure a smooth batter. Stir in vanilla, sour cream, lemon zest, flour, and salt, mixing just until combined. Do not overmix—overworking the batter can cause cracks later.
- Pour the batter over the cooled crust, smoothing the top with a spatula. Tap the pan gently on the counter to release any air bubbles.
- Place the springform pan on a baking sheet to catch any drips. Bake for about 50-60 minutes, or until the edges are set but the center still has a slight jiggle. My grandma always told me to trust my instincts here—if it jiggles just a little, it’s perfect. Overbaking can lead to cracks, so keep an eye on it.
- Once baked, turn off the oven and crack the door open slightly. Let the cheesecake cool in the oven for an hour—this helps prevent cracks and ensures even cooling. Afterward, refrigerate for at least 4 hours, ideally overnight, to let the flavors meld and the texture set beautifully.
Tips for Making the Best Classic New York Cheesecake
- Use high-quality ingredients: The flavor of your cheesecake depends heavily on the cream cheese. I always opt for full-fat, brick-style cream cheese for richness and better melting qualities.
- Room temperature ingredients: Make sure your cream cheese, eggs, and sour cream are at room temperature. This makes mixing much easier and results in a smoother batter.
- Prevent cracks: Baking at a moderate temperature and avoiding overmixing are key. Also, placing a pan of hot water in the oven can create a humid environment that helps prevent cracks—my grandma swears by this trick.
- Patience is key: Don’t rush the cooling process. Cooling slowly in the oven first, then chilling in the fridge, ensures your cheesecake remains crack-free and perfectly creamy.
- Customize toppings: I love topping my cheesecake with fresh berries or a drizzle of homemade fruit compote. A dollop of freshly whipped cream also adds a lovely finishing touch.
Serving Suggestions and Pairings
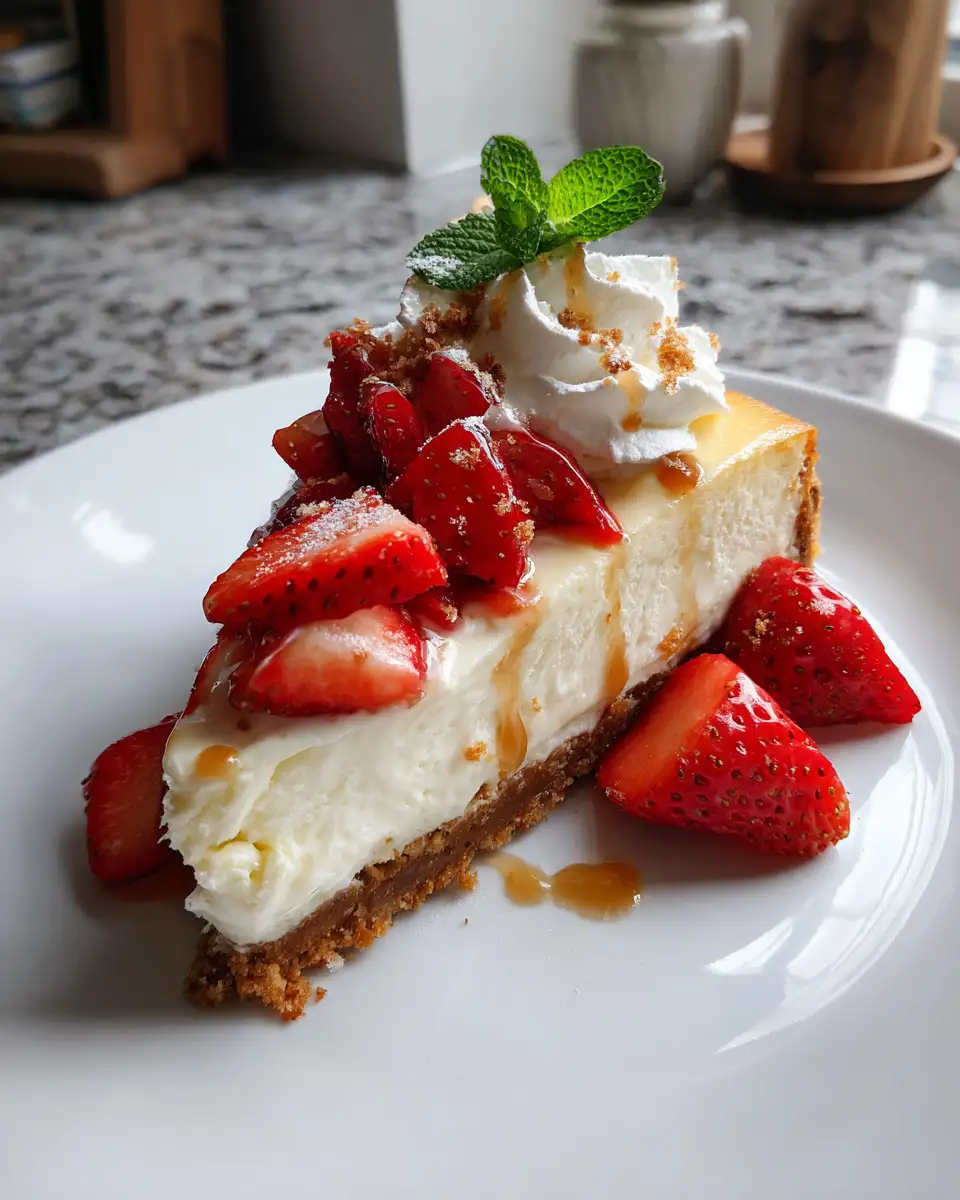
This cheesecake is a versatile crowd-pleaser. For a classic presentation, serve it plain with a sprinkle of lemon zest or a few fresh berries on top. I often pair it with a cup of strong coffee or a glass of dessert wine—something that complements its richness without overpowering it. If you’re feeling festive, a drizzle of chocolate sauce or a dusting of powdered sugar turns it into a show-stopping dessert for special occasions. I remember serving slices at my family’s Sunday dinners, and each time, it was gone in minutes. Don’t be shy to get creative—this cheesecake is a blank canvas that invites your personal touch.
Storage and Reheating Tips
To keep your Classic New York Cheesecake fresh, cover it loosely with plastic wrap or aluminum foil and store it in the refrigerator for up to 4 days. I find that the flavors deepen overnight, making it even more delicious the next day. If you want to prepare it ahead of time for a gathering, you can freeze individual slices wrapped tightly in plastic wrap and stored in an airtight container for up to a month. To reheat, thaw slices in the fridge overnight, then serve chilled or let sit at room temperature for about 10-15 minutes for a softer, warmer experience. I’ve learned from years of baking that cheesecake, like a good hug, only gets better with a little patience and gentle handling.
Frequently Asked Questions
What are the main ingredients for Classic New York Cheesecake?
The main ingredients for Classic New York Cheesecake include the items listed in our ingredients section above. Each ingredient plays a crucial role in achieving the perfect flavor and texture.
How long does it take to make Classic New York Cheesecake?
The total time to make Classic New York Cheesecake includes both preparation and cooking time. Check the recipe card above for exact timing details.
Can I make Classic New York Cheesecake ahead of time?
Yes, Classic New York Cheesecake can often be prepared in advance. Store it properly in an airtight container in the refrigerator and consume within the recommended timeframe.
What can I serve with Classic New York Cheesecake?
Classic New York Cheesecake pairs well with various sides and accompaniments. Consider the serving suggestions mentioned in the recipe for the best dining experience.
Is Classic New York Cheesecake suitable for special diets?
Depending on the ingredients used, Classic New York Cheesecake may be adapted for various dietary needs. Check the ingredients list and consider substitutions as needed for your dietary requirements.
Final Thoughts
There’s something inherently comforting about a well-made Classic New York Cheesecake. It embodies the love and care that my grandma poured into her baking, and now I get to share that with you. Whether it’s for a quiet weekend treat or a festive celebration, this cheesecake never fails to bring smiles and warm memories. Remember, baking is about patience, attention to detail, and a little bit of love—just like grandma’s kitchen. I hope you enjoy making and savoring this timeless dessert as much as I do. Happy baking, and may your kitchen be filled with joy and sweet moments!