
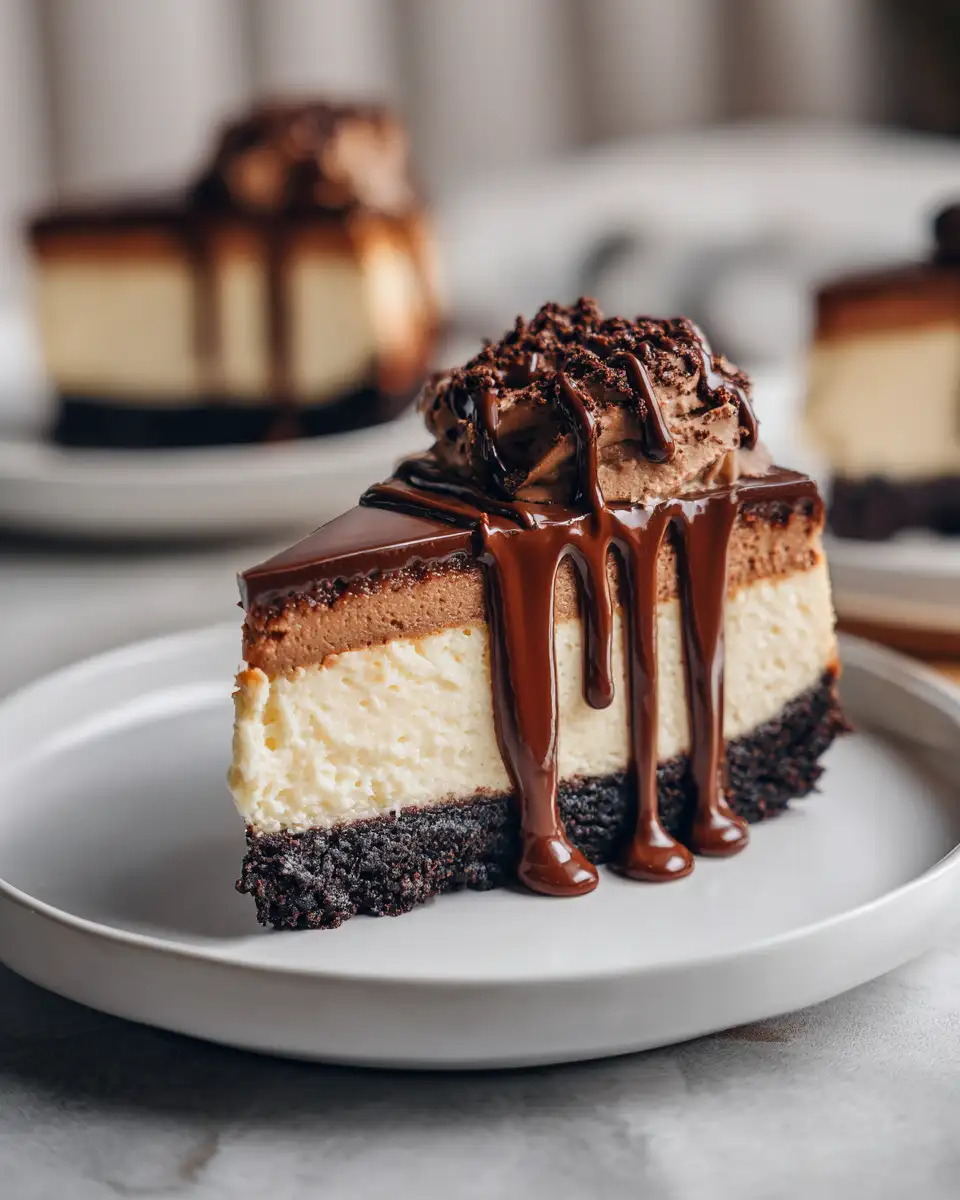
There’s something truly magical about creamy cheesecake desserts—those luscious, velvety bites that bring comfort and joy in every spoonful. As someone who grew up watching my grandma whip up simple ingredients into unforgettable treats, I’ve come to appreciate how a good cheesecake can turn any occasion into a special memory. Today, I’m excited to share a recipe that’s close to my heart—creamy, dreamy, and absolutely divine. Whether you’re celebrating a family gathering, a quiet weekend, or just craving something sweet, this cheesecake will quickly become a favorite in your home. Let’s dive into creating a dessert that’s rich in flavor and full of love—just like grandma used to make.
Why You’ll Love This Creamy Cheesecake Desserts
There’s a certain magic in the way cream cheese and fresh ingredients come together to create a dessert that feels both indulgent and comforting. I remember the first time I tried a homemade cheesecake, and how it immediately transported me back to my grandma’s kitchen, where the air was filled with the aroma of vanilla and baked goodness. This recipe is perfect for anyone who loves a smooth, rich texture paired with just the right balance of sweetness and tang.
What makes these creamy cheesecake desserts so special? For starters, they’re incredibly versatile. You can dress them up with fresh berries, drizzle with chocolate, or keep it simple with a sprinkle of powdered sugar. Plus, they’re surprisingly easy to make, even if you’re new to baking. I’ve included tips from my personal experience to help you achieve that perfect, creamy consistency that melts in your mouth. Trust me, nothing beats the feeling of slicing into a homemade cheesecake and sharing it with loved ones, knowing you made it from scratch with love.
Ingredients You’ll Need for This Creamy Cheesecake Desserts
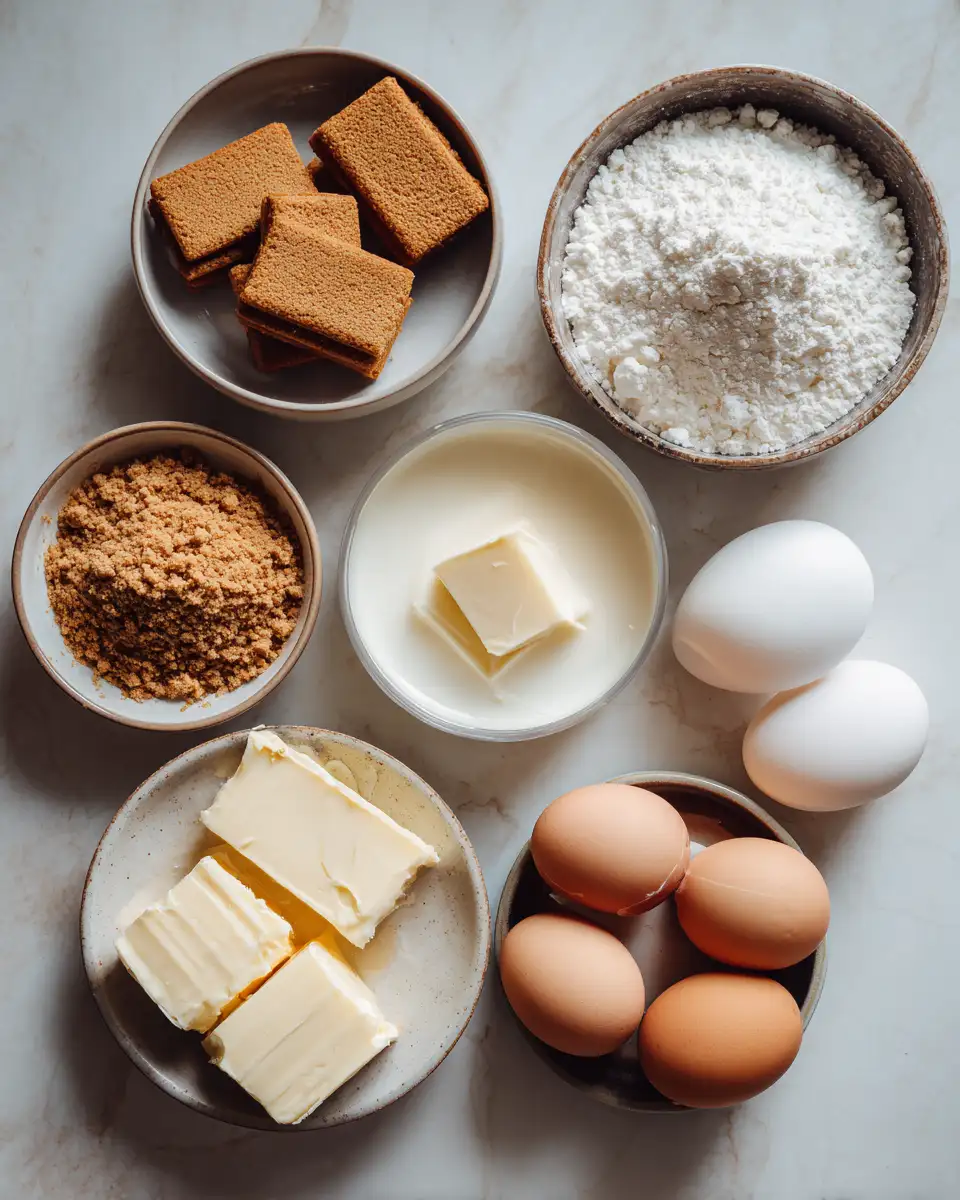
When I set out to create this recipe, I wanted ingredients that would bring out the best in the cheesecake’s texture and flavor. I’ve kept it simple but flavorful, using ingredients I always keep in my pantry and fridge—just like my grandma did. Here’s what you’ll need:
- 2 cups graham cracker crumbs (or digestive biscuits if you prefer a slightly different flavor)
- 1/2 cup unsalted butter, melted
- 3 (8-ounce) packages cream cheese, softened
- 1 cup granulated sugar
- 1 teaspoon pure vanilla extract
- 3 large eggs
- 1 cup sour cream (for extra creaminess)
- 1 tablespoon all-purpose flour (optional, for stability)
If you don’t have graham cracker crumbs, you can easily make your own by crushing plain crackers or digestive biscuits in a plastic bag with a rolling pin. For a dairy-free version, substitute the cream cheese with a plant-based cream cheese alternative, and use coconut milk or coconut cream instead of sour cream. I love experimenting in the kitchen, and these small substitutions keep the process fun and flexible.
Nutrition Facts
- Calories: Approximately 350 per slice (assuming 12 slices)
- Protein: 6g
- Fat: 25g
- Carbohydrates: 30g
- Fiber: 1g
- Sugar: 18g
- Sodium: 150mg
These estimates are based on a standard cheesecake recipe cut into 12 slices. As someone who loves enjoying dessert without overindulging, I always remind myself that sharing a slice with family or friends makes it all the more special. Plus, this recipe balances richness with a touch of lightness thanks to the sour cream and minimal flour, so it’s a treat you can enjoy without guilt. Learn more: Indulge in Bliss: Irresistible Chocolate Desserts You Must Try
PrintDecadent Creamy Cheesecake Desserts You Must Try Today
Learn how to make delicious Creamy Cheesecake Desserts. Easy recipe with step-by-step instructions.
- Prep Time: 15 minutes
- Cook Time: 30 minutes
- Total Time: 45 minutes
- Yield: 4 servings
- Category: Main Dish
- Method: Cooking
- Cuisine: International
Ingredients
When I set out to create this recipe, I wanted ingredients that would bring out the best in the cheesecake’s texture and flavor. I’ve kept it simple but flavorful, using ingredients I always keep in my pantry and fridge—just like my grandma did. Here’s what you’ll need:
- 2 cups graham cracker crumbs (or digestive biscuits if you prefer a slightly different flavor)
- 1/2 cup unsalted butter, melted
- 3 (8-ounce) packages cream cheese, softened
- 1 cup granulated sugar
- 1 teaspoon pure vanilla extract
- 3 large eggs
- 1 cup sour cream (for extra creaminess)
- 1 tablespoon all-purpose flour (optional, for stability)
If you don’t have graham cracker crumbs, you can easily make your own by crushing plain crackers or digestive biscuits in a plastic bag with a rolling pin. For a dairy-free version, substitute the cream cheese with a plant-based cream cheese alternative, and use coconut milk or coconut cream instead of sour cream. I love experimenting in the kitchen, and these small substitutions keep the process fun and flexible.
Instructions
- Preheat your oven to 325°F (160°C). Line the bottom of a 9-inch springform pan with parchment paper. I find that a springform pan makes slicing and serving so much easier, especially for that perfect, clean presentation.
- Prepare the crust: In a medium bowl, combine the graham cracker crumbs with the melted butter. Mix until the crumbs are evenly coated and resemble wet sand. Press this mixture firmly into the bottom of the prepared pan, using the back of a spoon or a flat-bottomed glass to create an even layer. Bake for 10 minutes to set the crust, then remove from the oven and let it cool slightly.
- In a large mixing bowl, beat the softened cream cheese and sugar together using a hand or stand mixer on medium speed. I like to do this until the mixture is smooth, creamy, and free of lumps—this step is crucial for that silky texture I love.
- Add the vanilla extract and flour (if using), and mix until just combined. Then, add the eggs one at a time, beating gently after each addition. Be careful not to overmix; I’ve learned that overmixing can introduce air bubbles, which might cause cracks in the cheesecake during baking.
- Fold in the sour cream gently with a spatula until incorporated. The sour cream adds such a lovely tang and creaminess that reminds me of the homemade desserts my grandma used to serve at family gatherings.
- Pour the batter over the cooled crust and smooth the top with a spatula. Tap the pan gently on the counter to release any air bubbles.
- Bake in the preheated oven for about 55-60 minutes, or until the edges are set and the center is slightly jiggly but not liquid. I’ve found that a slight jiggle is perfect—once you turn off the oven, the residual heat will finish setting the center.
- Turn off the oven and leave the cheesecake inside with the door slightly ajar for about an hour. This slow cooling helps prevent cracks and ensures a creamy, smooth surface. Once cooled, refrigerate for at least 4 hours or overnight for the best flavor and texture.
- Before serving, run a knife around the edges and gently remove the springform ring. Top with fresh berries, whipped cream, or a drizzle of chocolate—whatever makes your heart happy. I love adding a few sprigs of mint or a dusting of powdered sugar for that extra special touch.
Steps to Create Your Creamy Cheesecake Desserts
- Preheat your oven to 325°F (160°C). Line the bottom of a 9-inch springform pan with parchment paper. I find that a springform pan makes slicing and serving so much easier, especially for that perfect, clean presentation.
- Prepare the crust: In a medium bowl, combine the graham cracker crumbs with the melted butter. Mix until the crumbs are evenly coated and resemble wet sand. Press this mixture firmly into the bottom of the prepared pan, using the back of a spoon or a flat-bottomed glass to create an even layer. Bake for 10 minutes to set the crust, then remove from the oven and let it cool slightly.
- In a large mixing bowl, beat the softened cream cheese and sugar together using a hand or stand mixer on medium speed. I like to do this until the mixture is smooth, creamy, and free of lumps—this step is crucial for that silky texture I love.
- Add the vanilla extract and flour (if using), and mix until just combined. Then, add the eggs one at a time, beating gently after each addition. Be careful not to overmix; I’ve learned that overmixing can introduce air bubbles, which might cause cracks in the cheesecake during baking.
- Fold in the sour cream gently with a spatula until incorporated. The sour cream adds such a lovely tang and creaminess that reminds me of the homemade desserts my grandma used to serve at family gatherings.
- Pour the batter over the cooled crust and smooth the top with a spatula. Tap the pan gently on the counter to release any air bubbles.
- Bake in the preheated oven for about 55-60 minutes, or until the edges are set and the center is slightly jiggly but not liquid. I’ve found that a slight jiggle is perfect—once you turn off the oven, the residual heat will finish setting the center.
- Turn off the oven and leave the cheesecake inside with the door slightly ajar for about an hour. This slow cooling helps prevent cracks and ensures a creamy, smooth surface. Once cooled, refrigerate for at least 4 hours or overnight for the best flavor and texture.
- Before serving, run a knife around the edges and gently remove the springform ring. Top with fresh berries, whipped cream, or a drizzle of chocolate—whatever makes your heart happy. I love adding a few sprigs of mint or a dusting of powdered sugar for that extra special touch.
Tips for Making the Best Creamy Cheesecake Desserts
Over the years, I’ve learned a few tricks from my grandma’s kitchen that help me achieve that perfect creamy texture every time. Here are my favorite tips:
- Room temperature ingredients: Always make sure your cream cheese, eggs, and sour cream are at room temperature before mixing. This helps everything blend smoothly and prevents lumps.
- Quality ingredients: Since this dessert is all about the creaminess and flavor, use the best quality cream cheese you can find. I swear by full-fat, high-quality brands—they make all the difference.
- Avoid overmixing: Mix just until ingredients are combined. Overmixing introduces air that can cause cracks or a light, airy texture instead of the dense, velvety feel I love.
- Slow baking: Baking at a lower temperature and gradually cooling in the oven helps prevent cracks and keeps the cheesecake smooth and creamy.
- Chill thoroughly: Patience is key. Let it chill for at least 4 hours or overnight. This allows the flavors to meld and the texture to set perfectly.
Serving Suggestions and Pairings
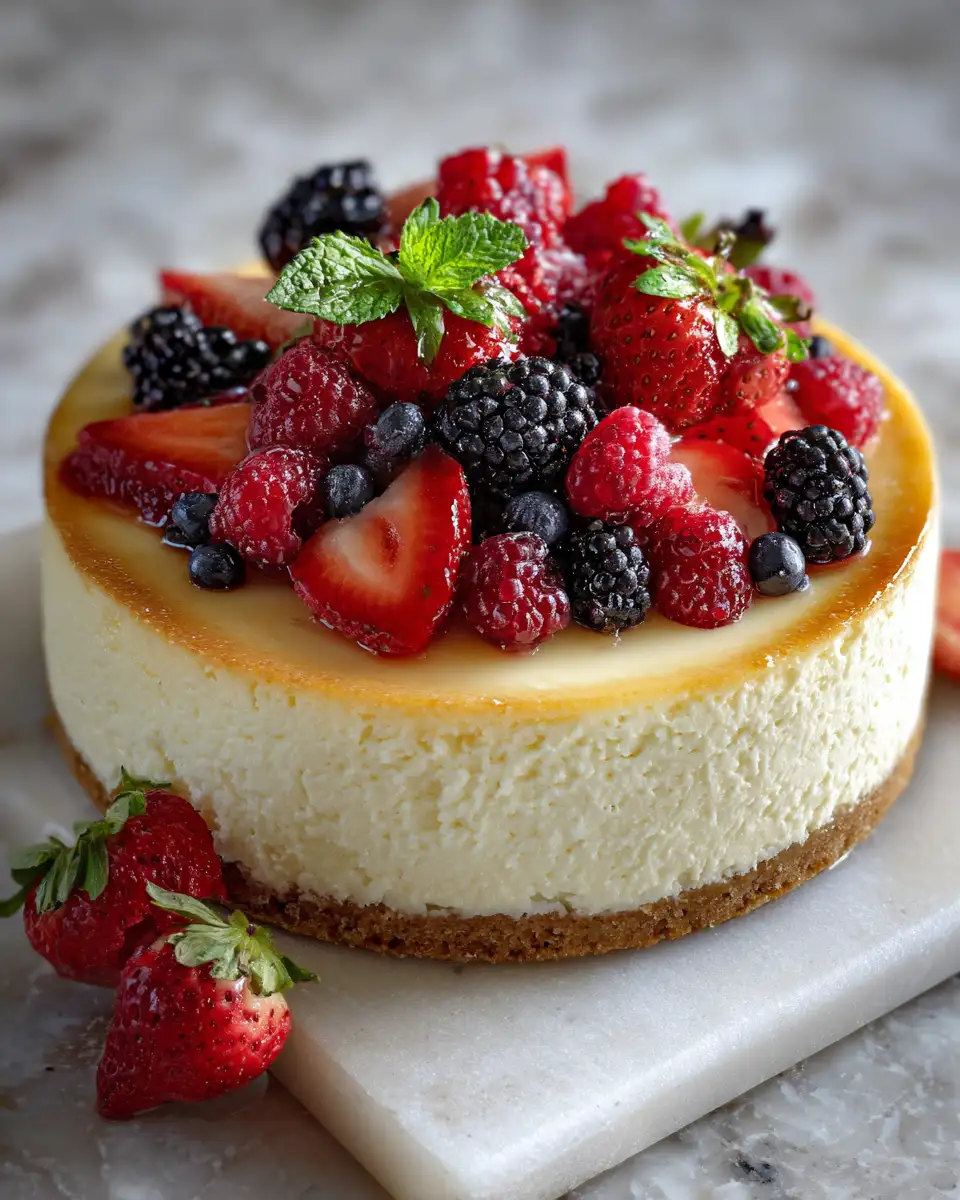
Once your cheesecake has set and you’re ready to serve, I recommend keeping it simple yet elegant. A few fresh berries—strawberries, blueberries, or raspberries—add a burst of freshness that balances the richness of the dessert. A drizzle of warm chocolate or caramel sauce can elevate it to a whole new level, especially if you’re celebrating something special.
I enjoy pairing this creamy cheesecake with a cup of good coffee or a glass of sweet dessert wine. Growing up, my grandma often served slices alongside a steaming cup of tea, which made the dessert feel even more comforting. For a lighter touch, a dollop of whipped cream or a sprinkle of powdered sugar makes the presentation pretty and inviting.
If you’re feeling adventurous, try topping your cheesecake with toasted nuts or a layer of fruit compote. The key is to keep the toppings simple so the creamy, luscious flavor of the cheesecake shines through. Sharing this dessert with family and friends feels like sharing a piece of my grandma’s love, and I hope it brings the same warmth and joy to your table.
Storage and Reheating Tips
This cheesecake keeps well in the fridge for up to 5 days, making it perfect for leftovers or make-ahead desserts. Cover it tightly with plastic wrap or store it in an airtight container to prevent it from absorbing any fridge odors. If you want it to stay as fresh and creamy as the day you made it, I recommend removing it from the fridge about 15 minutes before serving—this allows it to soften slightly and enhances the flavor.
While I don’t recommend freezing the whole cheesecake, you can freeze individual slices wrapped tightly in plastic wrap and stored in a freezer-safe bag for up to 2 months. To reheat, let the slices thaw in the fridge overnight and enjoy them cold or at room temperature. I’ve found that the texture remains wonderfully creamy even after freezing, especially if you add a fresh topping after thawing.
Frequently Asked Questions
What are the main ingredients for Creamy Cheesecake Desserts?
The main ingredients for Creamy Cheesecake Desserts include the items listed in our ingredients section above. Each ingredient plays a crucial role in achieving the perfect flavor and texture.
How long does it take to make Creamy Cheesecake Desserts?
The total time to make Creamy Cheesecake Desserts includes both preparation and cooking time. Check the recipe card above for exact timing details.
Can I make Creamy Cheesecake Desserts ahead of time?
Yes, Creamy Cheesecake Desserts can often be prepared in advance. Store it properly in an airtight container in the refrigerator and consume within the recommended timeframe.
What can I serve with Creamy Cheesecake Desserts?
Creamy Cheesecake Desserts pairs well with various sides and accompaniments. Consider the serving suggestions mentioned in the recipe for the best dining experience.
Is Creamy Cheesecake Desserts suitable for special diets?
Depending on the ingredients used, Creamy Cheesecake Desserts may be adapted for various dietary needs. Check the ingredients list and consider substitutions as needed for your dietary requirements.
Final Thoughts
This creamy cheesecake dessert is more than just a sweet treat; it’s a reminder of the love and warmth that come from a homemade dessert. Inspired by my grandma’s kitchen, I’ve poured my heart into creating a recipe that’s approachable, versatile, and most importantly, delicious. Whether you’re celebrating a special occasion or simply craving a comforting slice, I hope this cheesecake brings a little joy and a lot of flavor to your home. Remember, the best desserts are made with love—and a touch of patience. Happy baking, and enjoy every velvety, dreamy bite!

2 thoughts on “Decadent Creamy Cheesecake Desserts You Must Try Today”