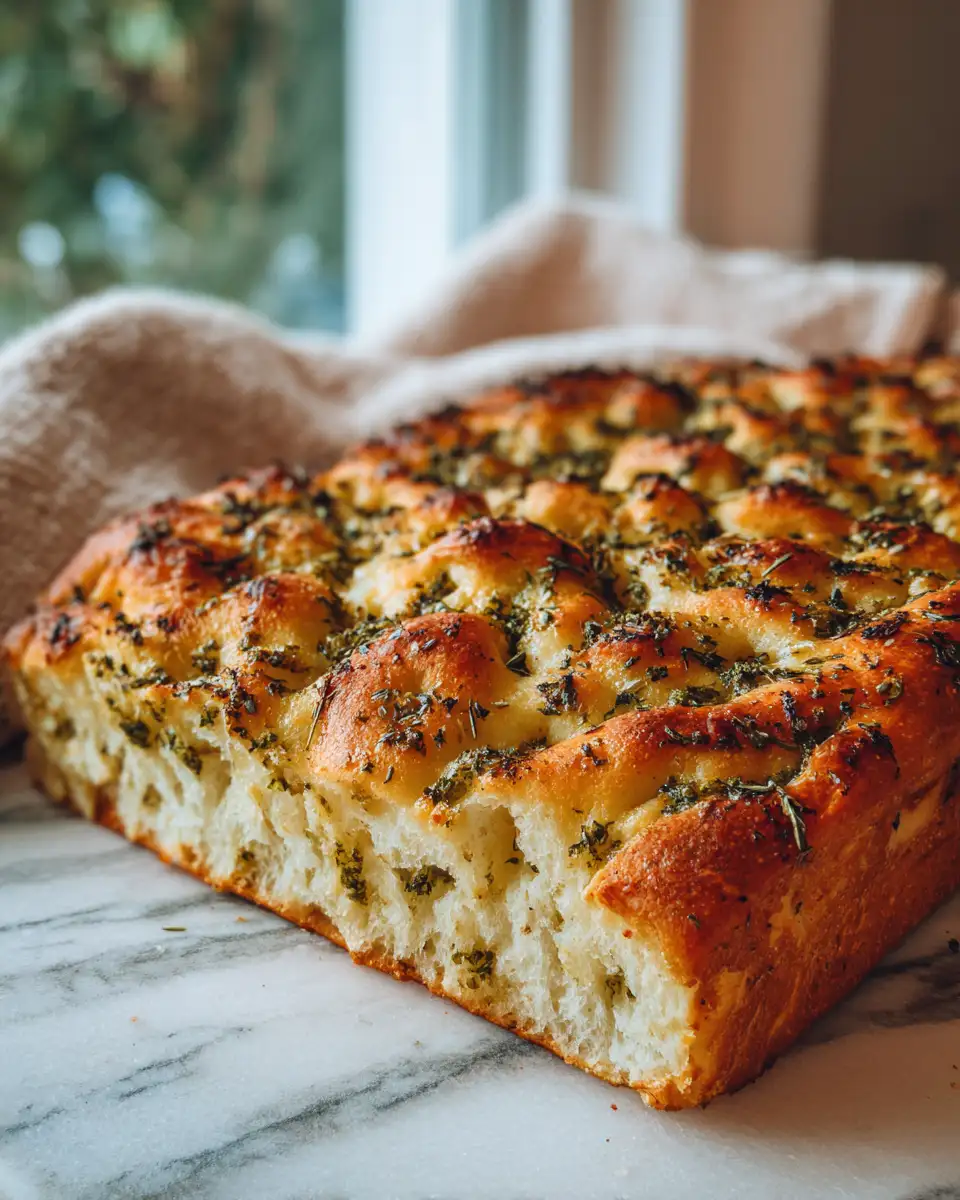
There’s something truly magical about the aroma of freshly baked bread filling a home, especially when it’s a rustic, golden No-Knead Focaccia Bread with Pesto. This recipe is close to my heart because it reminds me of lazy weekend mornings in my grandma’s kitchen, where simple ingredients came together with love and patience to create something extraordinary. Over the years, I’ve learned that making bread from scratch doesn’t have to be complicated — sometimes, all you need is a little time, a good attitude, and a handful of pantry staples. I’m excited to share this easy, no-knead recipe that delivers crispy edges, soft insides, and that vibrant burst of basil pesto in every bite. Trust me, once you try this, it’ll become a go-to for gatherings, weeknight dinners, or simply a cozy treat for yourself.
Why You’ll Love This No-Knead Focaccia Bread with Pesto
If you’re like me, you’re always on the lookout for recipes that are straightforward yet deliver big flavor. This No-Knead Focaccia with Pesto checks all those boxes. It’s incredibly simple to make — no need for kneading or lengthy rising times, thanks to the magic of the right dough that develops flavor with minimal effort. I remember the first time I made this; I was skeptical about whether a no-knead bread could truly be as fluffy and crispy as traditional versions. But the secret lies in the long fermentation, which creates a beautifully airy crumb and a slightly chewy crust. Plus, topping it with fresh pesto adds a burst of herbaceous, nutty goodness that elevates the humble focaccia into something special. It’s a warm, welcoming bread that’s perfect for sharing, and I love how versatile it is — serve it as an appetizer, alongside pasta, or just enjoy it plain with a drizzle of olive oil. Every bite feels like a warm hug, reminding me of those cozy Sunday afternoons in my grandma’s kitchen.
Ingredients You’ll Need for This No-Knead Focaccia Bread with Pesto
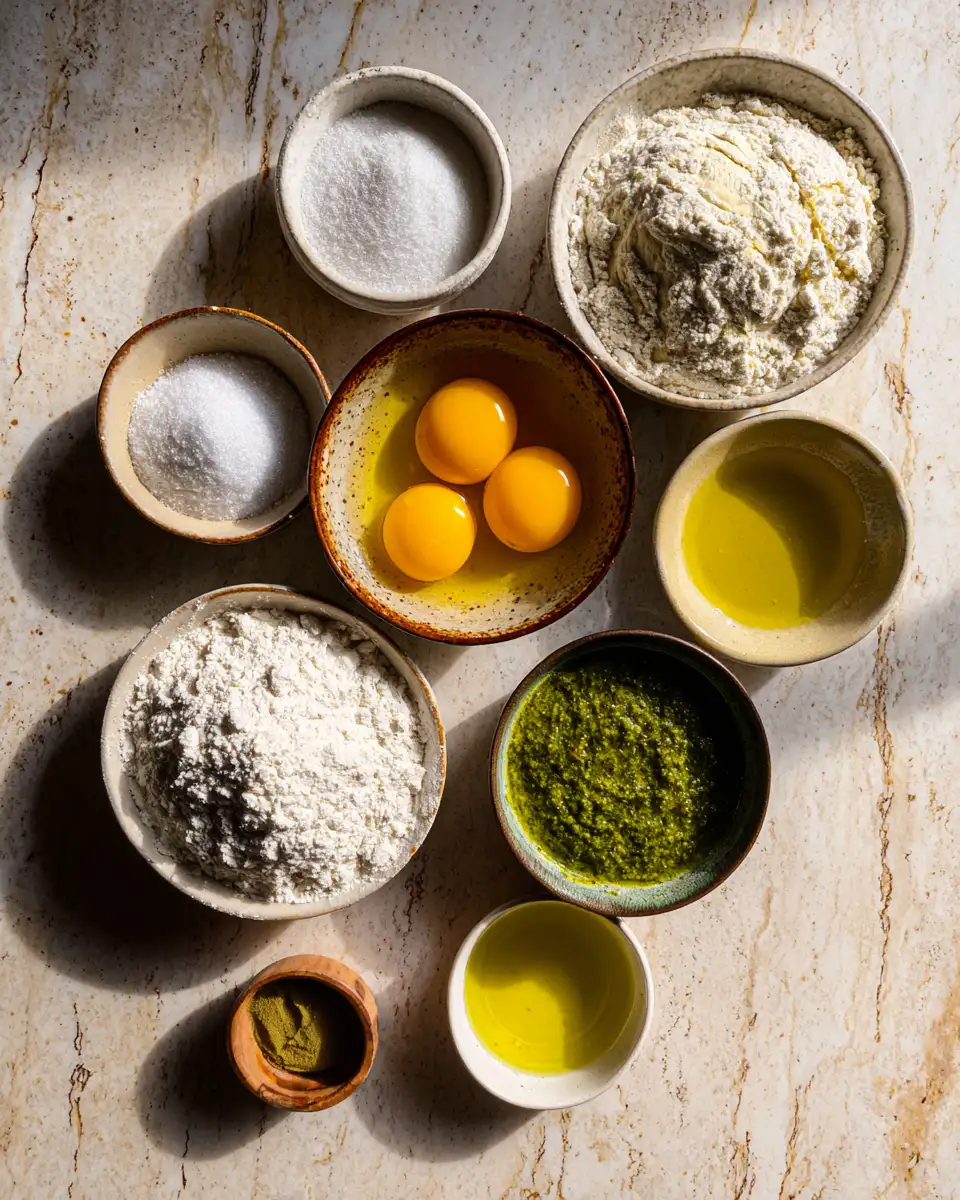
Gathering the ingredients for this recipe is like assembling a little pantry symphony. Everything comes together with minimal fuss, and I often keep these staples on hand because they’re so versatile. When I first started baking bread, I was surprised how forgiving this dough is — it’s almost impossible to mess up, which makes it perfect for beginners or anyone short on time. Here’s what you’ll need:
- 2 ½ cups all-purpose flour (you can substitute bread flour if you prefer a chewier texture)
- 1 ½ teaspoons kosher salt (regular salt works, just adjust slightly)
- 1 teaspoon sugar (a little sweetener helps with fermentation)
- 1 teaspoon active dry yeast (or instant yeast)
- 1 ¼ cups warm water (about 110°F, I usually test with my finger to be safe)
- 2 tablespoons olive oil (plus extra for drizzling)
- ½ cup basil pesto (store-bought or homemade — my grandma’s recipe is my favorite, but I’ll share my quick homemade pesto below)
If you’re feeling adventurous, you can add a handful of cherry tomatoes, olives, or even caramelized onions on top before baking. I often swap out the basil pesto for sun-dried tomato pesto or roasted red pepper spread to vary the flavor. This flexibility is one reason I love this bread — it’s a blank canvas that’s easy to customize based on what’s in your fridge or what mood you’re in.
Nutrition Facts
- Calories: Approximately 250 per slice (assuming 8 slices per loaf)
- Protein: 6g
- Fat: 8g
- Carbohydrates: 40g
- Fiber: 2g
- Sugar: 1g
- Sodium: 300mg
These numbers are approximate, but I find that focusing on fresh ingredients and homemade pesto really boosts the flavor and nutritional value. I’ve always believed that food made with love and care nourishes both body and soul — just like my grandma’s kitchen. Learn more: Tropical Bliss Hawaiian Banana Bread with Pineapple
PrintIrresistible No-Knead Focaccia Bread with Fresh Pesto
Learn how to make delicious No-Knead Focaccia Bread with Pesto. Easy recipe with step-by-step instructions.
- Prep Time: 15 minutes
- Cook Time: 30 minutes
- Total Time: 45 minutes
- Yield: 4 servings
- Category: Main Dish
- Method: Cooking
- Cuisine: International
Ingredients
Gathering the ingredients for this recipe is like assembling a little pantry symphony. Everything comes together with minimal fuss, and I often keep these staples on hand because they’re so versatile. When I first started baking bread, I was surprised how forgiving this dough is — it’s almost impossible to mess up, which makes it perfect for beginners or anyone short on time. Here’s what you’ll need:
- 2 ½ cups all-purpose flour (you can substitute bread flour if you prefer a chewier texture)
- 1 ½ teaspoons kosher salt (regular salt works, just adjust slightly)
- 1 teaspoon sugar (a little sweetener helps with fermentation)
- 1 teaspoon active dry yeast (or instant yeast)
- 1 ¼ cups warm water (about 110°F, I usually test with my finger to be safe)
- 2 tablespoons olive oil (plus extra for drizzling)
- ½ cup basil pesto (store-bought or homemade — my grandma’s recipe is my favorite, but I’ll share my quick homemade pesto below)
If you’re feeling adventurous, you can add a handful of cherry tomatoes, olives, or even caramelized onions on top before baking. I often swap out the basil pesto for sun-dried tomato pesto or roasted red pepper spread to vary the flavor. This flexibility is one reason I love this bread — it’s a blank canvas that’s easy to customize based on what’s in your fridge or what mood you’re in.
Instructions
- In a large mixing bowl, combine the warm water, sugar, and yeast. Stir gently and let it sit for about 5 minutes until it becomes foamy. This step activates the yeast, and I always find it satisfying to watch that bubbly magic happen, reminding me of my grandma’s patience while her bread dough rises slowly in the oven.
- Add the olive oil, salt, and flour to the yeast mixture. Using a wooden spoon or a sturdy spatula, stir until the ingredients are just combined. The dough will be sticky and shaggy — that’s perfect. I’ve learned to embrace this rustic texture because it’s what makes the bread so tender and airy.
- Cover the bowl with a clean kitchen towel or plastic wrap and let it rest at room temperature for 12 to 18 hours. This long fermentation is my secret to flavor — I usually prepare it in the evening and bake it the next day. It’s a little like making sourdough, but with less fuss. During this time, the dough will double in size and develop a lovely tang.
- Preheat your oven to 450°F and generously oil a baking sheet or rectangle pan. I like to use my favorite cast-iron skillet or a rimmed baking sheet lined with parchment for easy cleanup.
- Gently pour the risen dough into the prepared pan. Using oiled fingers, spread the dough out evenly, pressing it into the corners. The dough will be soft, so don’t worry if it’s a bit sticky — just give it gentle encouragement.
- Now, drizzle a little olive oil over the top and use your fingertips to create dimples all over the surface. This is my favorite step because it’s almost meditative — pressing into the dough makes it look rustic and invites that crispy crust to form during baking.
- Spread the basil pesto evenly over the dough, pressing it gently into the dimples. I love how the pesto infuses each bite with fresh, herby flavor, reminding me of summer afternoons in my grandma’s garden.
- Bake for 20-25 minutes, or until the focaccia is golden brown around the edges and the top is slightly crispy. I often check it around the 20-minute mark, because oven times can vary, and I want it just right — crispy but still soft inside.
- Remove from the oven and let it cool slightly before slicing. Drizzle with a little more olive oil if desired, and serve warm or at room temperature. This bread is best enjoyed fresh, but I’ve also stored leftovers for later — more on that in my storage tips!
Steps to Create Your No-Knead Focaccia Bread with Pesto
- In a large mixing bowl, combine the warm water, sugar, and yeast. Stir gently and let it sit for about 5 minutes until it becomes foamy. This step activates the yeast, and I always find it satisfying to watch that bubbly magic happen, reminding me of my grandma’s patience while her bread dough rises slowly in the oven.
- Add the olive oil, salt, and flour to the yeast mixture. Using a wooden spoon or a sturdy spatula, stir until the ingredients are just combined. The dough will be sticky and shaggy — that’s perfect. I’ve learned to embrace this rustic texture because it’s what makes the bread so tender and airy.
- Cover the bowl with a clean kitchen towel or plastic wrap and let it rest at room temperature for 12 to 18 hours. This long fermentation is my secret to flavor — I usually prepare it in the evening and bake it the next day. It’s a little like making sourdough, but with less fuss. During this time, the dough will double in size and develop a lovely tang.
- Preheat your oven to 450°F and generously oil a baking sheet or rectangle pan. I like to use my favorite cast-iron skillet or a rimmed baking sheet lined with parchment for easy cleanup.
- Gently pour the risen dough into the prepared pan. Using oiled fingers, spread the dough out evenly, pressing it into the corners. The dough will be soft, so don’t worry if it’s a bit sticky — just give it gentle encouragement.
- Now, drizzle a little olive oil over the top and use your fingertips to create dimples all over the surface. This is my favorite step because it’s almost meditative — pressing into the dough makes it look rustic and invites that crispy crust to form during baking.
- Spread the basil pesto evenly over the dough, pressing it gently into the dimples. I love how the pesto infuses each bite with fresh, herby flavor, reminding me of summer afternoons in my grandma’s garden.
- Bake for 20-25 minutes, or until the focaccia is golden brown around the edges and the top is slightly crispy. I often check it around the 20-minute mark, because oven times can vary, and I want it just right — crispy but still soft inside.
- Remove from the oven and let it cool slightly before slicing. Drizzle with a little more olive oil if desired, and serve warm or at room temperature. This bread is best enjoyed fresh, but I’ve also stored leftovers for later — more on that in my storage tips!
Tips for Making the Best No-Knead Focaccia Bread with Pesto
- Use good-quality olive oil — it makes a big difference in flavor. I always keep a bottle of extra virgin olive oil for baking and drizzling, and it’s worth investing in a good one.
- Don’t rush the fermentation. The longer the dough sits, the better the flavor and texture. I’ve learned that patience truly pays off, especially when you’re aiming for that perfect airy crumb and crispy crust.
- If your dough is a bit sticky, lightly flour your hands and tools, but avoid adding too much flour to the dough itself. Over-flouring can make the bread dense.
- For a more aromatic crust, brush the top with a mixture of olive oil and freshly minced garlic before baking.
- If you want extra toppings, consider adding fresh herbs like rosemary or thyme, or sprinkle coarse sea salt on top before baking for that satisfying crunch.
- Making your own pesto is surprisingly easy and adds a personal touch. I often blend fresh basil, garlic, pine nuts, Parmesan, and olive oil in my food processor — it’s a quick process that makes me feel connected to my roots.
Serving Suggestions and Pairings
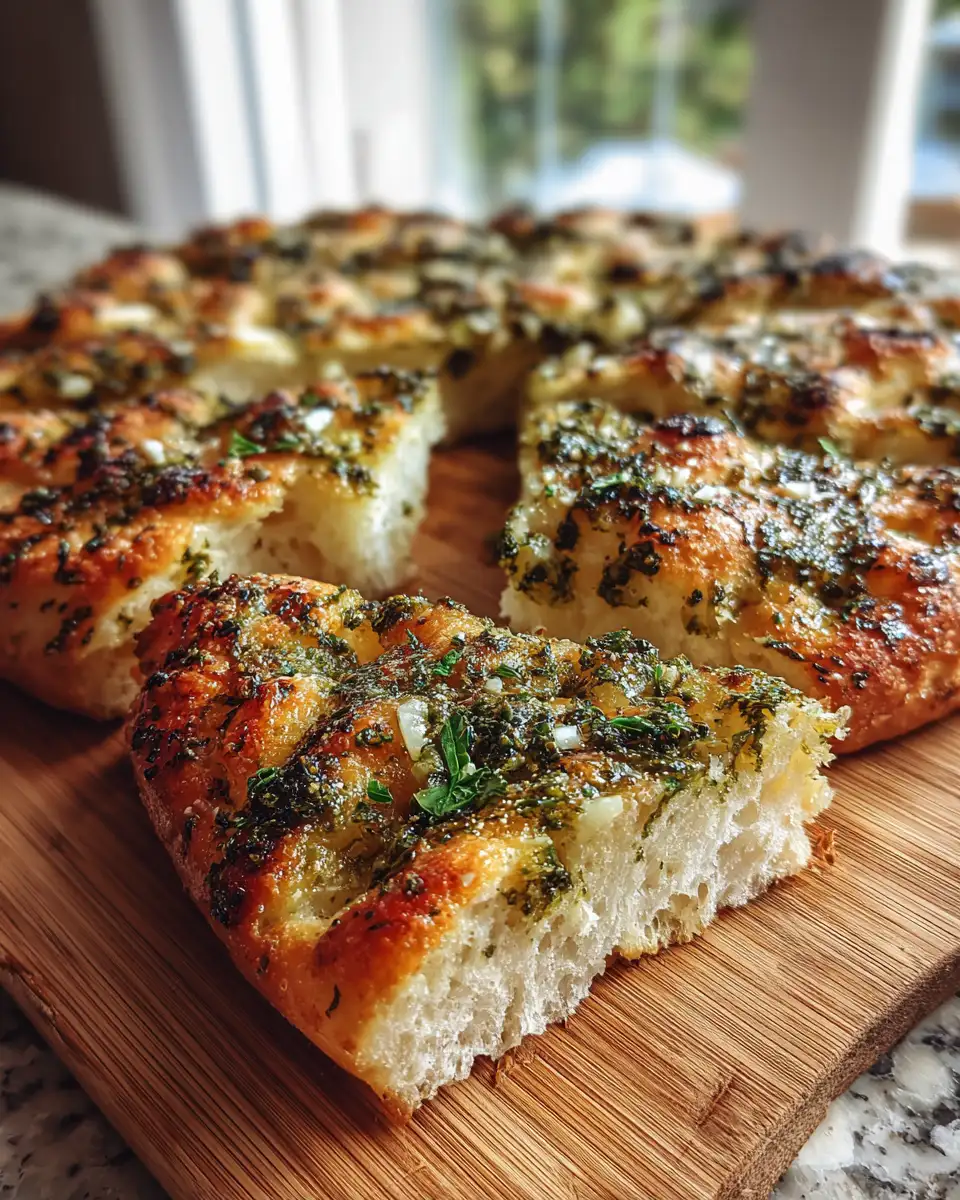
This No-Knead Focaccia Bread with Pesto is incredibly versatile. I love serving it as an appetizer by slicing it into squares and offering it with extra pesto, olive tapenade, or a simple cheese platter. It’s also fantastic alongside pasta dishes like spaghetti aglio e olio or roasted vegetable soups. When I have friends over, I like to serve it warm, still slightly crispy, with a drizzle of good olive oil and a sprinkle of flaky sea salt — it’s comfort food at its finest.
If you’re hosting a picnic or casual gathering, cut it into wedges and pack it in a basket. I’ve even used it as a base for open-faced sandwiches with tomato, fresh mozzarella, and a few basil leaves. The bread’s crispy exterior and tender inside hold up beautifully and add a rustic charm to any meal.
Storage and Reheating Tips
If you happen to have leftovers (which I doubt, because it’s so good!), store the focaccia in an airtight container or wrap it tightly with plastic wrap. It will stay fresh for about a day or two at room temperature. For longer storage, place it in the refrigerator — but be aware that it can become a little stale. To revive it, I recommend reheating in a 350°F oven for about 10 minutes until warm and crispy again. You can also toast slices in a skillet for a quick crunch. I’ve found that the flavors intensify after a day or two, especially if topped with extra pesto or a drizzle of olive oil before reheating.
Frequently Asked Questions
What are the main ingredients for No-Knead Focaccia Bread with Pesto?
The main ingredients for No-Knead Focaccia Bread with Pesto include the items listed in our ingredients section above. Each ingredient plays a crucial role in achieving the perfect flavor and texture.
How long does it take to make No-Knead Focaccia Bread with Pesto?
The total time to make No-Knead Focaccia Bread with Pesto includes both preparation and cooking time. Check the recipe card above for exact timing details.
Can I make No-Knead Focaccia Bread with Pesto ahead of time?
Yes, No-Knead Focaccia Bread with Pesto can often be prepared in advance. Store it properly in an airtight container in the refrigerator and consume within the recommended timeframe.
What can I serve with No-Knead Focaccia Bread with Pesto?
No-Knead Focaccia Bread with Pesto pairs well with various sides and accompaniments. Consider the serving suggestions mentioned in the recipe for the best dining experience.
Is No-Knead Focaccia Bread with Pesto suitable for special diets?
Depending on the ingredients used, No-Knead Focaccia Bread with Pesto may be adapted for various dietary needs. Check the ingredients list and consider substitutions as needed for your dietary requirements.
Final Thoughts
Making No-Knead Focaccia Bread with Pesto is one of those recipes that reminds me why I fell in love with cooking in the first place — it’s simple, honest, and full of flavor. This bread embodies the warmth of my grandma’s kitchen, where love and patience turned humble ingredients into something memorable. Whether you’re a seasoned baker or a complete beginner, I encourage you to give this recipe a try. It’s a wonderful way to fill your home with irresistible aromas and share a homemade touch with those you love. Remember, the best bread is the one made with joy and a little bit of patience — just like grandma used to do.