
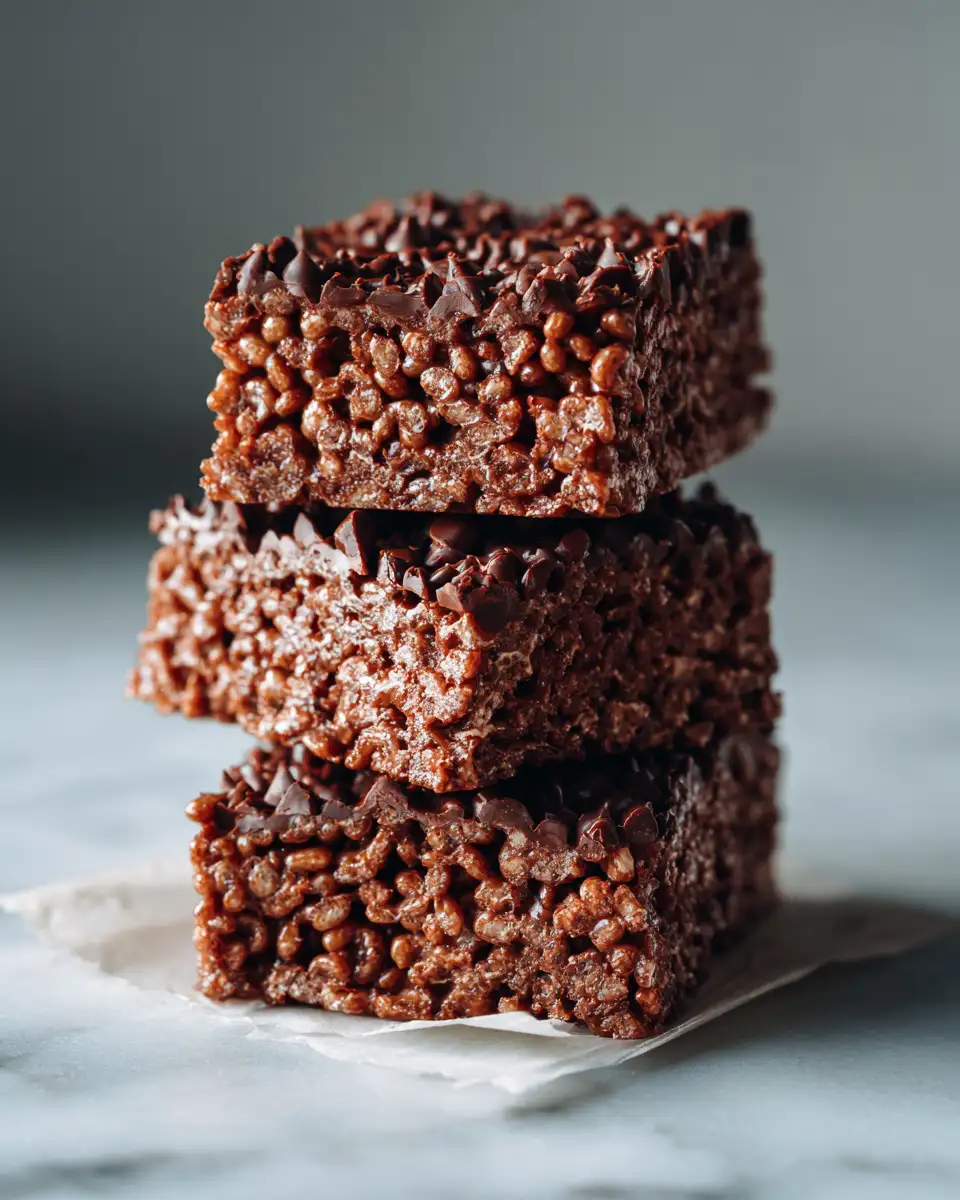
There’s something truly magical about the way simple ingredients come together to create a treat that’s both nostalgic and irresistibly delicious. Chocolate Rice Krispies hold a special place in my heart—these crispy, chocolaty bites remind me of lazy afternoons in my grandma’s kitchen, where laughter and love filled the air. Over the years, I’ve perfected my own version, inspired by those warm memories, and I can’t wait to share it with you. Whether you’re looking for a quick sweet fix or a fun project to do with kids, this recipe for Chocolate Rice Krispies is perfect. It’s easy, satisfying, and always a crowd-pleaser. So, let’s dive into the cozy world of creating these delightful bites that pack a punch of flavor and childhood charm.
Why You’ll Love This Chocolate Rice Krispies
If you’re a fan of classic treats with a twist, you’ll find yourself falling for these Chocolate Rice Krispies immediately. They’re a perfect blend of crunch and melt-in-your-mouth chocolate goodness, making them a hit at birthday parties, casual get-togethers, or even just as a special weekend indulgence. I love how quick they are to make—no complicated steps or fancy equipment needed. Plus, they’re incredibly versatile: you can add nuts, sprinkles, or even a drizzle of white chocolate for extra flair.
Growing up, I often helped my grandma in her cozy kitchen, and one of my favorite memories was pressing the cereal mixture into a pan to set. That simple act made me feel like I was creating something truly special. Now, years later, I still get that same joy when I whip up a batch of these Chocolate Rice Krispies, especially knowing how much my family and friends love them. They’re comfort food in the most authentic sense—sweet, crunchy, and filled with love.
Ingredients You’ll Need for This Chocolate Rice Krispies
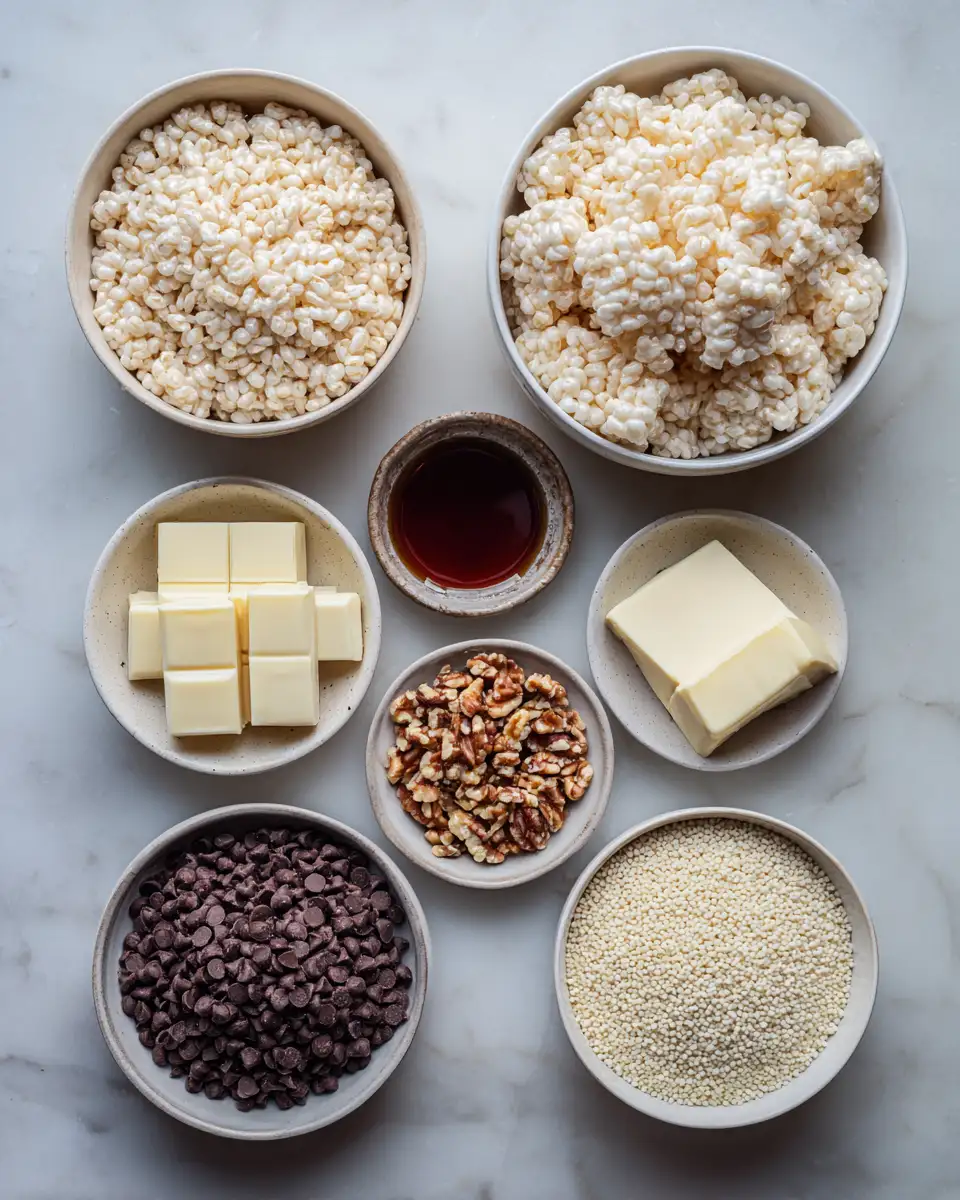
- 4 cups Rice Krispies cereal (or any puffed rice cereal of your choice)
- 1 cup semi-sweet chocolate chips (dark or milk chocolate works too)
- 1/2 cup unsalted butter
- 1/4 cup light corn syrup (or honey as a natural alternative)
- 1 teaspoon vanilla extract
- Optional: 1/2 cup chopped nuts (pecans, walnuts) or sprinkles for extra texture and color
- Optional: White chocolate for drizzling or decorating
I like to keep my ingredients simple and high quality, just like my grandma did. Sometimes, I swap out the light corn syrup for honey or maple syrup to make it a tad healthier, and it works beautifully. If you’re allergic to nuts or prefer a nut-free version, just skip the nuts—they’ll still be deliciously satisfying.
Nutrition Facts
- Calories: Approximately 150 per serving (1 piece)
- Protein: 2g
- Fat: 8g
- Carbohydrates: 20g
- Fiber: 1g
- Sugar: 10g
- Sodium: 50mg
These numbers are approximate, based on a standard serving size. I believe in enjoying treats without guilt, especially when they remind us of joyful moments. Remember, sharing these with loved ones makes them even sweeter.
PrintIrresistible Chocolate Rice Krispies Treats You Can’t Miss
Learn how to make delicious Chocolate Rice Krispies. Easy recipe with step-by-step instructions.
- Prep Time: 15 minutes
- Cook Time: 30 minutes
- Total Time: 45 minutes
- Yield: 4 servings
- Category: Main Dish
- Method: Cooking
- Cuisine: International
Ingredients
- 4 cups Rice Krispies cereal (or any puffed rice cereal of your choice)
- 1 cup semi-sweet chocolate chips (dark or milk chocolate works too)
- 1/2 cup unsalted butter
- 1/4 cup light corn syrup (or honey as a natural alternative)
- 1 teaspoon vanilla extract
- Optional: 1/2 cup chopped nuts (pecans, walnuts) or sprinkles for extra texture and color
- Optional: White chocolate for drizzling or decorating
I like to keep my ingredients simple and high quality, just like my grandma did. Sometimes, I swap out the light corn syrup for honey or maple syrup to make it a tad healthier, and it works beautifully. If you’re allergic to nuts or prefer a nut-free version, just skip the nuts—they’ll still be deliciously satisfying.
Instructions
- Start by lining a 9×13-inch baking dish with parchment paper, ensuring easy removal later. This step is one I learned from my grandma’s kitchen—truly a game-changer for clean, beautiful bars.
- In a large, heavy-bottomed saucepan, melt the butter over medium heat. Once it begins to shimmer, add the light corn syrup or honey. Stir gently until the mixture is smooth and well combined. I always keep a close eye to prevent burning—patience is key here.
- Remove the saucepan from heat and stir in the vanilla extract. Then, add the chocolate chips. Return the pan to low heat, stirring constantly until the chocolate is melted and glossy. This is my favorite part—watching the chocolate melt into the buttery syrup, creating a rich, velvety sauce that will coat every piece of cereal.
- Pour the chocolate mixture over the Rice Krispies in the large mixing bowl. Use a spatula or wooden spoon to gently fold and coat all the cereal evenly. I’ve found that a gentle hand prevents crushing the cereal—my grandma’s tip for perfect texture.
- If you’re adding nuts or sprinkles, fold them in now. For a decorative touch, I sometimes reserve a handful of sprinkles to press on top after pouring the mixture into the pan.
- Transfer the coated cereal mixture into the prepared baking dish. Use the back of a buttered spatula or wax paper to press it down evenly. This step is so satisfying—I remember helping my grandma press and smooth the mixture, feeling like I was creating a masterpiece.
- Allow the mixture to set at room temperature for about 30-60 minutes until firm. If you’re in a hurry, popping it in the fridge speeds up the process. Once set, cut into squares or rectangles with a sharp knife.
- For an extra touch, melt white chocolate and drizzle over the bars once they’ve cooled. This adds a beautiful contrast and an extra layer of sweetness, which I love for special occasions.
Steps to Create Your Chocolate Rice Krispies
- Start by lining a 9×13-inch baking dish with parchment paper, ensuring easy removal later. This step is one I learned from my grandma’s kitchen—truly a game-changer for clean, beautiful bars.
- In a large, heavy-bottomed saucepan, melt the butter over medium heat. Once it begins to shimmer, add the light corn syrup or honey. Stir gently until the mixture is smooth and well combined. I always keep a close eye to prevent burning—patience is key here.
- Remove the saucepan from heat and stir in the vanilla extract. Then, add the chocolate chips. Return the pan to low heat, stirring constantly until the chocolate is melted and glossy. This is my favorite part—watching the chocolate melt into the buttery syrup, creating a rich, velvety sauce that will coat every piece of cereal.
- Pour the chocolate mixture over the Rice Krispies in the large mixing bowl. Use a spatula or wooden spoon to gently fold and coat all the cereal evenly. I’ve found that a gentle hand prevents crushing the cereal—my grandma’s tip for perfect texture.
- If you’re adding nuts or sprinkles, fold them in now. For a decorative touch, I sometimes reserve a handful of sprinkles to press on top after pouring the mixture into the pan.
- Transfer the coated cereal mixture into the prepared baking dish. Use the back of a buttered spatula or wax paper to press it down evenly. This step is so satisfying—I remember helping my grandma press and smooth the mixture, feeling like I was creating a masterpiece.
- Allow the mixture to set at room temperature for about 30-60 minutes until firm. If you’re in a hurry, popping it in the fridge speeds up the process. Once set, cut into squares or rectangles with a sharp knife.
- For an extra touch, melt white chocolate and drizzle over the bars once they’ve cooled. This adds a beautiful contrast and an extra layer of sweetness, which I love for special occasions.
Tips for Making the Best Chocolate Rice Krispies
Every time I make these, I learn a little more—kitchen adventures are all about experimenting and finding what works best. Here are some tips from my experience: Learn more: Irresistible Dark Chocolate Pumpkin Tart Perfect for Fall Indulgence
Use fresh chocolate chips for a smooth, shiny coating. Old or stale chips won’t melt properly and can affect the texture.
- Don’t over-mix the cereal once coated; gentle folding keeps the Krispies crispy and light.
- If you prefer a firmer bar, press the mixture more firmly into the pan, but avoid pressing too hard, which can crush the cereal.
- Use a silicone spatula for gentle folding and pressing—it’s non-stick and gentle on your mixture.
- Try substituting the chocolate chips with chopped chocolate bars or chocolate melts for a different texture and flavor.
- For a fun twist, add a pinch of sea salt to the chocolate mixture—sweet and salty is a classic combo I adore.
Serving Suggestions and Pairings
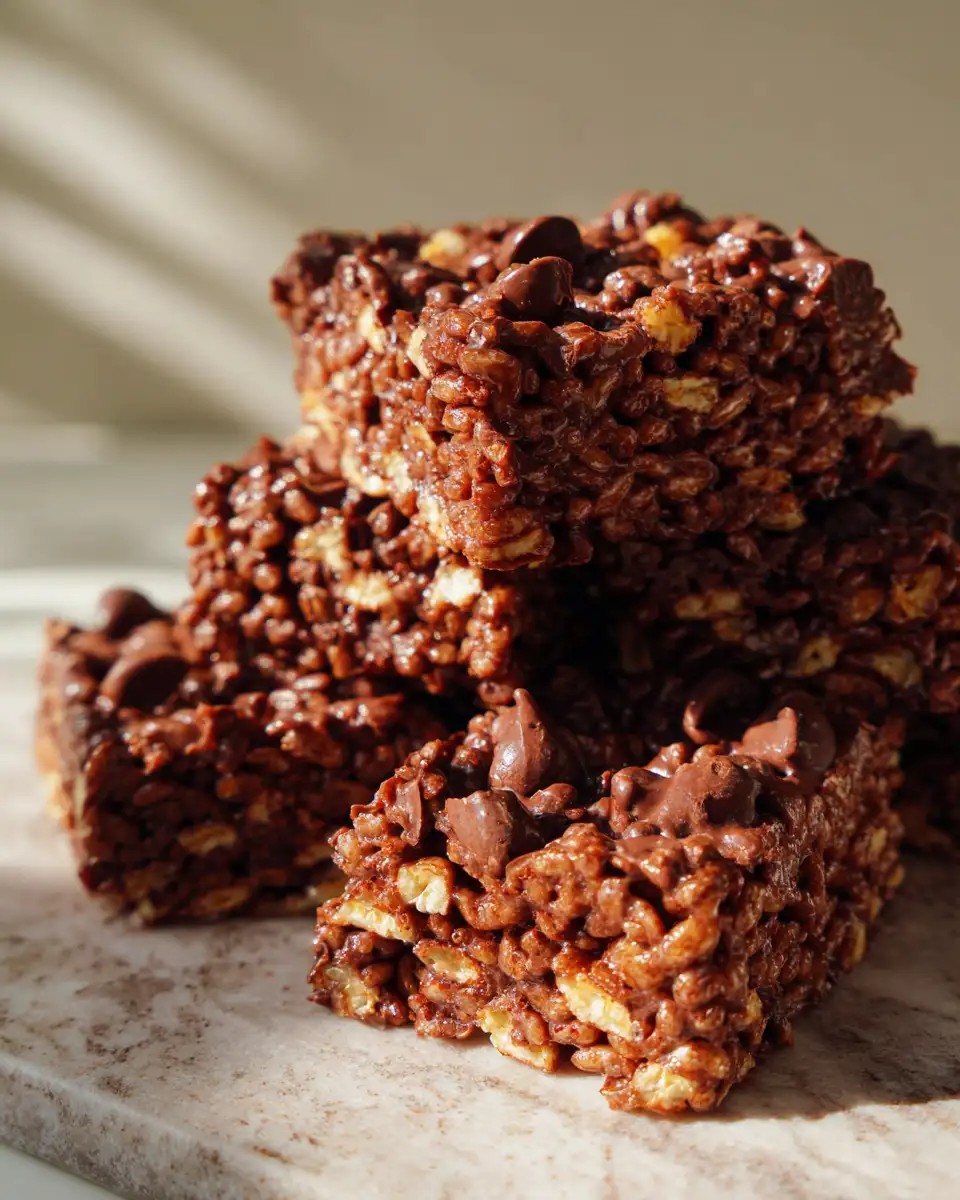
I love serving these Chocolate Rice Krispies as part of a dessert platter, alongside fresh fruit or a glass of cold milk. They also pair beautifully with a cup of coffee or tea for a cozy afternoon treat. When I make these for family gatherings, I often sprinkle extra sprinkles or drizzle white chocolate on top to make them festive and inviting.
For an even more indulgent experience, I like to serve them alongside a scoop of vanilla ice cream or a dollop of whipped cream. The creamy cold contrasts beautifully with the crispy, chocolatey bites. These treats are versatile enough to be the star at a casual picnic or a fancy dessert table—just add a little extra garnish or presentation flair.
Storage and Reheating Tips
Once cooled and cut into squares, store your Chocolate Rice Krispies in an airtight container at room temperature for up to three days. If you want to keep them fresh longer, you can refrigerate them for up to a week—just be aware that refrigeration can sometimes make them a little less crispy. To bring back some crunch, leave them out at room temperature for about 10 minutes before serving.
If you have leftovers and want to enjoy them later, you can also freeze the bars. Wrap individual pieces in plastic wrap and place them in a freezer-safe bag or container. Thaw at room temperature for a few minutes before serving. I’ve done this many times after a holiday baking spree—these treats freeze beautifully, and I love pulling them out for a quick sweet snack.
Frequently Asked Questions
What are the main ingredients for Chocolate Rice Krispies?
The main ingredients for Chocolate Rice Krispies include the items listed in our ingredients section above. Each ingredient plays a crucial role in achieving the perfect flavor and texture.
How long does it take to make Chocolate Rice Krispies?
The total time to make Chocolate Rice Krispies includes both preparation and cooking time. Check the recipe card above for exact timing details.
Can I make Chocolate Rice Krispies ahead of time?
Yes, Chocolate Rice Krispies can often be prepared in advance. Store it properly in an airtight container in the refrigerator and consume within the recommended timeframe.
What can I serve with Chocolate Rice Krispies?
Chocolate Rice Krispies pairs well with various sides and accompaniments. Consider the serving suggestions mentioned in the recipe for the best dining experience.
Is Chocolate Rice Krispies suitable for special diets?
Depending on the ingredients used, Chocolate Rice Krispies may be adapted for various dietary needs. Check the ingredients list and consider substitutions as needed for your dietary requirements.
Final Thoughts
Creating these Chocolate Rice Krispies always fills me with a warm sense of nostalgia and accomplishment. They’re a testament to the magic that simple, honest ingredients can create when paired with love and a bit of patience. I hope you enjoy making and sharing these treats as much as I do. Remember, the best part about cooking from the heart is tailoring recipes to your taste—so don’t hesitate to add your favorite mix-ins or make adjustments. In my grandma’s kitchen, the most important ingredient was always love, and I believe that shines through in every crispy, chocolaty bite of these homemade delights.

2 thoughts on “Irresistible Chocolate Rice Krispies Treats You Can’t Miss”