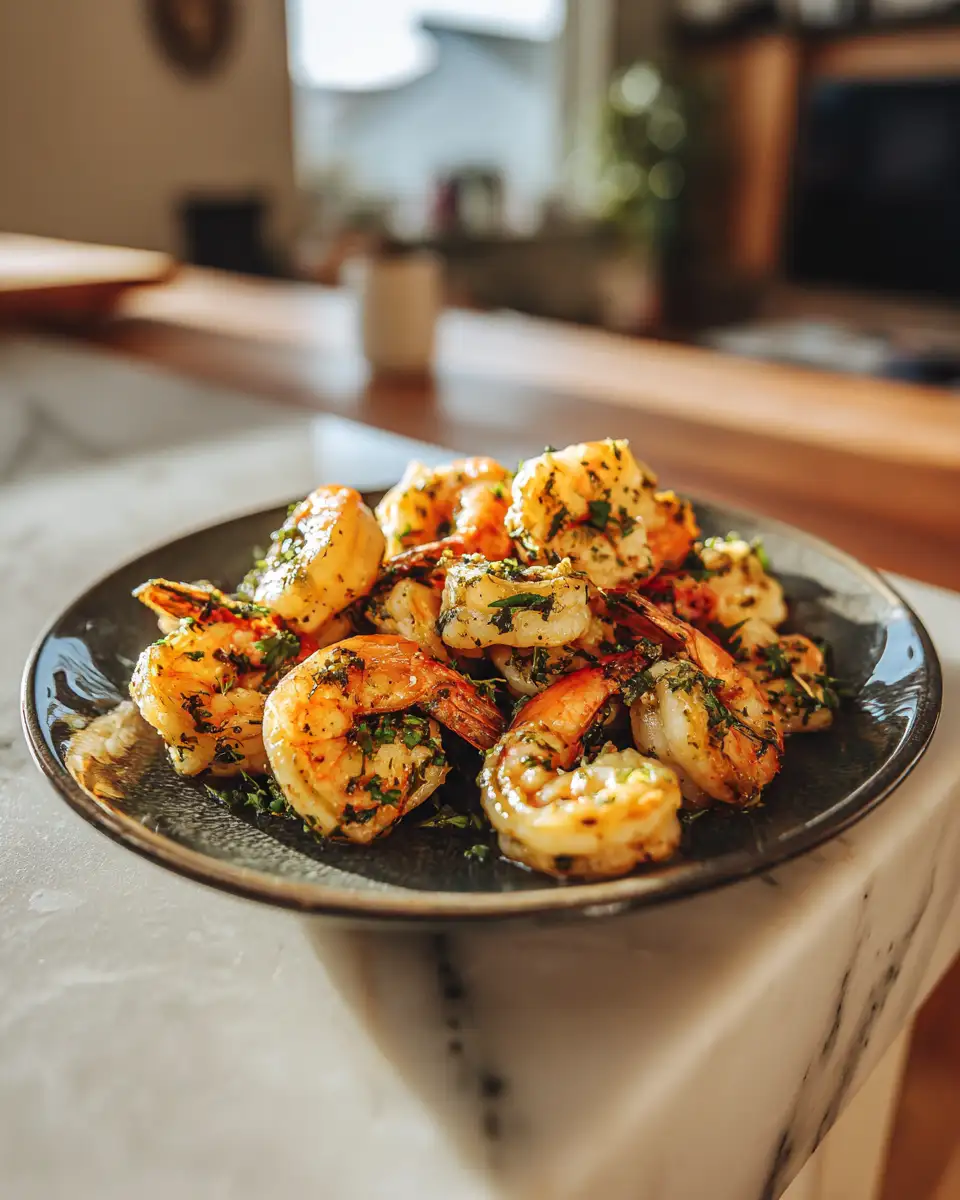
There’s something truly special about Hawaiian Garlic Shrimp—its tender, flavorful meat coated in that irresistible garlic butter sauce. I remember the first time I tried it during a trip to Oahu, sitting on a sunny lanai, the aroma of garlic and fresh shrimp filling the air. That memory has stayed with me, inspiring countless homemade versions in my own kitchen. Cooking Hawaiian Garlic Shrimp has become a way for me to bring a little of that tropical sunshine into my home, especially on busy weeknights when I need comfort food with a vibrant twist. Today, I want to share my favorite recipe, along with tips, stories, and ideas to help you create this dish with love and ease.
Why You’ll Love This Hawaiian Garlic Shrimp
If you’re a seafood lover or just looking to add a burst of flavor to your dinner routine, Hawaiian Garlic Shrimp is an absolute winner. Its bright, garlicky aroma instantly transports you to a tropical paradise, and the quick cooking process makes it perfect for busy evenings. I love how simple ingredients come together to create something so flavorful—no complicated techniques required. Plus, it’s versatile enough to serve over rice, pasta, or even as a party appetizer. From my own experience, I’ve found that this dish never fails to impress guests or satisfy a craving for something warm and hearty yet light and fresh. It’s a dish that feels like a vacation in every bite, and I bet it’ll quickly become a favorite in your home too.
Ingredients You’ll Need for This Hawaiian Garlic Shrimp
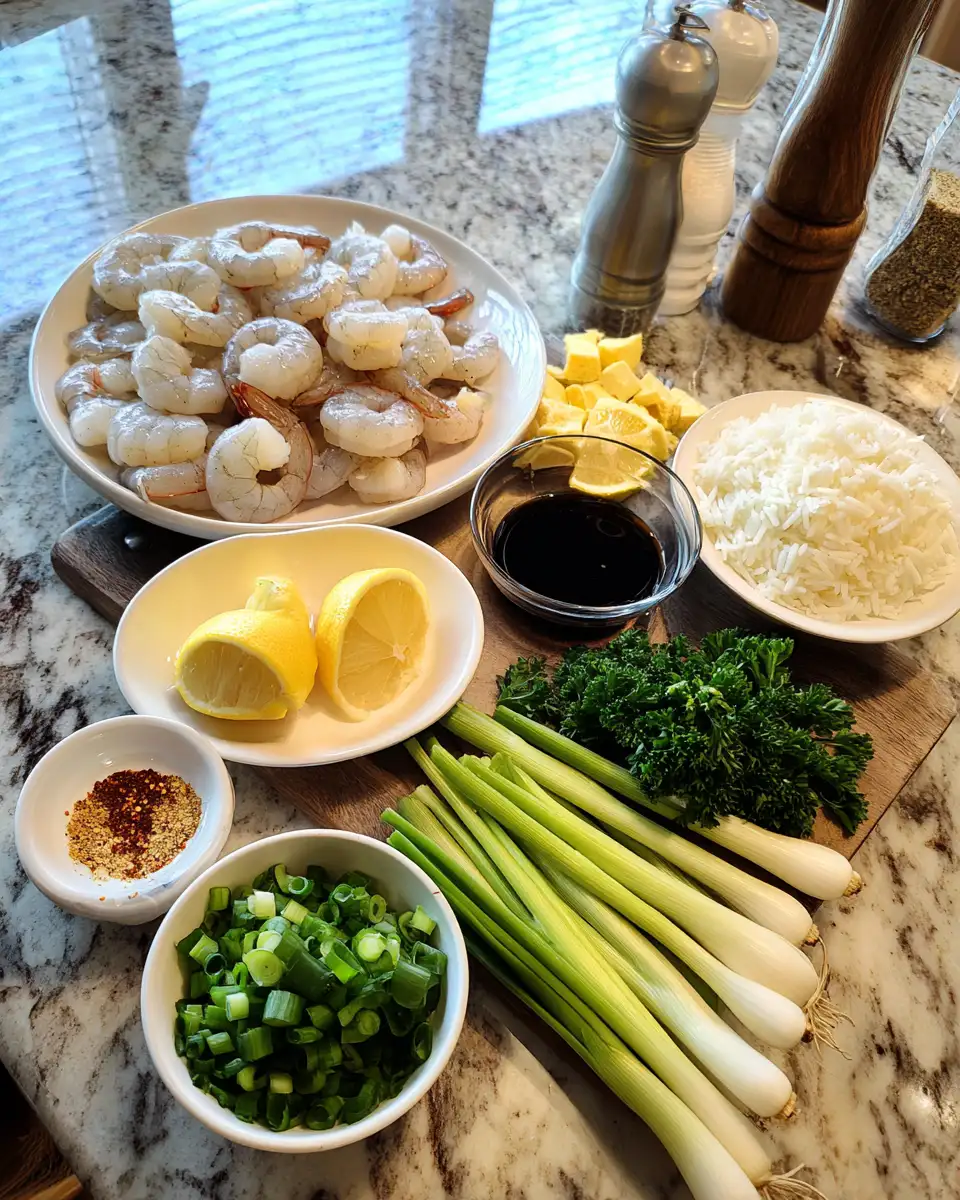
- 1 pound large shrimp, peeled and deveined (fresh or thawed frozen, but fresh is best)
- 4 tablespoons unsalted butter
- 4 cloves garlic, minced
- 2 tablespoons soy sauce (or coconut aminos for a gluten-free option)
- 1 tablespoon lemon juice (fresh squeezed)
- 1 teaspoon honey or brown sugar (for balance)
- 1 teaspoon crushed red pepper flakes (adjust to taste for heat)
- Salt and freshly ground black pepper, to taste
- Chopped fresh parsley or cilantro, for garnish
- Optional: sliced green onions, for extra flavor and color
- Cooked white rice or rice pilaf, for serving
My secret to making this dish shine is balancing the garlic and butter with a touch of sweetness and acidity. I often substitute soy sauce with coconut aminos to keep it light, and I’ve also experimented with adding a splash of orange juice for a citrusy twist. Sometimes, I toss in a dash of paprika or smoked paprika for a smoky edge, which adds depth. Whatever variations you choose, the heart of Hawaiian Garlic Shrimp is those bold, fresh flavors that remind me of a Hawaiian breeze on a busy weeknight.
Nutrition Facts
- Calories: Approximately 250 per serving
- Protein: 20g
- Fat: 15g
- Carbohydrates: 8g
- Fiber: 1g
- Sugar: 3g
- Sodium: 600mg (varies based on soy sauce and salt used)
When I first started making Hawaiian Garlic Shrimp, I was mindful of balancing flavor and keeping it wholesome. I’ve found that using fresh garlic and quality butter makes a noticeable difference in flavor and richness. For those watching sodium intake, coconut aminos and limiting added salt are good options. This dish is quite light and packed with protein, making it a satisfying yet healthy choice for most diets.
PrintSavor the Flavors of the Islands with Delicious Hawaiian Garlic Shrimp
Learn how to make delicious Hawaiian Garlic Shrimp. Easy recipe with step-by-step instructions.
- Prep Time: 15 minutes
- Cook Time: 30 minutes
- Total Time: 45 minutes
- Yield: 4 servings
- Category: Main Dish
- Method: Cooking
- Cuisine: International
Ingredients
- 1 pound large shrimp, peeled and deveined (fresh or thawed frozen, but fresh is best)
- 4 tablespoons unsalted butter
- 4 cloves garlic, minced
- 2 tablespoons soy sauce (or coconut aminos for a gluten-free option)
- 1 tablespoon lemon juice (fresh squeezed)
- 1 teaspoon honey or brown sugar (for balance)
- 1 teaspoon crushed red pepper flakes (adjust to taste for heat)
- Salt and freshly ground black pepper, to taste
- Chopped fresh parsley or cilantro, for garnish
- Optional: sliced green onions, for extra flavor and color
- Cooked white rice or rice pilaf, for serving
My secret to making this dish shine is balancing the garlic and butter with a touch of sweetness and acidity. I often substitute soy sauce with coconut aminos to keep it light, and I’ve also experimented with adding a splash of orange juice for a citrusy twist. Sometimes, I toss in a dash of paprika or smoked paprika for a smoky edge, which adds depth. Whatever variations you choose, the heart of Hawaiian Garlic Shrimp is those bold, fresh flavors that remind me of a Hawaiian breeze on a busy weeknight.
Instructions
- Start by patting your shrimp dry with paper towels. This helps them cook evenly and get that nice, slightly crispy exterior. If your shrimp are frozen, ensure they’re fully thawed and drained.
- In a large skillet over medium-high heat, melt 2 tablespoons of butter. Once melted, add the minced garlic. Cook for about 30 seconds until fragrant, but be careful not to burn it—garlic burns quickly and turns bitter.
- Add the shrimp to the skillet, arranging them in a single layer. Cook for about 2-3 minutes on each side until they turn pink and opaque. I’ve learned from experience that overcooked shrimp become rubbery, so keep an eye on them.
- While the shrimp are cooking, in a small bowl, whisk together soy sauce, lemon juice, honey, and red pepper flakes. Adjust flavors to your preference—less honey for less sweetness, more red pepper for heat.
- Once the shrimp are nearly done, pour the sauce mixture over them. Toss gently to coat evenly, and cook for another minute or two until the sauce slightly thickens. The butter will emulsify with the sauce, creating a glossy glaze.
- Turn off the heat and add the remaining 2 tablespoons of butter, stirring until melted and incorporated. This step adds richness and gives the dish that signature buttery finish I love.
- Sprinkle chopped parsley or cilantro over the top. For an extra pop of freshness, I often add sliced green onions right before serving.
- Serve immediately over warm cooked rice or your preferred grain, garnished with extra herbs if desired.
I’ve found that the key to perfect Hawaiian Garlic Shrimp is maintaining high heat during cooking, which helps develop that slightly caramelized garlic and tender shrimp. My grandma’s kitchen was always about quick, simple, and flavorful dishes—this recipe definitely fits that philosophy. It’s a dish I whip up on busy weeknights, but it’s also fancy enough to serve at a small gathering with friends.
Steps to Create Your Hawaiian Garlic Shrimp
- Start by patting your shrimp dry with paper towels. This helps them cook evenly and get that nice, slightly crispy exterior. If your shrimp are frozen, ensure they’re fully thawed and drained.
- In a large skillet over medium-high heat, melt 2 tablespoons of butter. Once melted, add the minced garlic. Cook for about 30 seconds until fragrant, but be careful not to burn it—garlic burns quickly and turns bitter.
- Add the shrimp to the skillet, arranging them in a single layer. Cook for about 2-3 minutes on each side until they turn pink and opaque. I’ve learned from experience that overcooked shrimp become rubbery, so keep an eye on them.
- While the shrimp are cooking, in a small bowl, whisk together soy sauce, lemon juice, honey, and red pepper flakes. Adjust flavors to your preference—less honey for less sweetness, more red pepper for heat.
- Once the shrimp are nearly done, pour the sauce mixture over them. Toss gently to coat evenly, and cook for another minute or two until the sauce slightly thickens. The butter will emulsify with the sauce, creating a glossy glaze.
- Turn off the heat and add the remaining 2 tablespoons of butter, stirring until melted and incorporated. This step adds richness and gives the dish that signature buttery finish I love.
- Sprinkle chopped parsley or cilantro over the top. For an extra pop of freshness, I often add sliced green onions right before serving.
- Serve immediately over warm cooked rice or your preferred grain, garnished with extra herbs if desired.
I’ve found that the key to perfect Hawaiian Garlic Shrimp is maintaining high heat during cooking, which helps develop that slightly caramelized garlic and tender shrimp. My grandma’s kitchen was always about quick, simple, and flavorful dishes—this recipe definitely fits that philosophy. It’s a dish I whip up on busy weeknights, but it’s also fancy enough to serve at a small gathering with friends. Learn more: Zesty Lemon Garlic Shrimp: Your New Go-To Summer Dish
Tips for Making the Best Hawaiian Garlic Shrimp
- Use fresh garlic whenever possible. It makes a huge difference in flavor. My grandma always said, “Good garlic is the secret to good food.”
- Don’t overcook your shrimp. Shrimp cook quickly and become rubbery if left too long. Keep an eye on their color—they should turn pink and opaque.
- Adjust the heat and spice levels. Red pepper flakes add a nice kick, but if you prefer milder dishes, start with less and add more to taste.
- Balance flavors. A little sweetness from honey and a splash of acidity from lemon juice brighten up the dish. Feel free to customize these to your liking.
- Serve immediately. This dish is best enjoyed hot, right from the skillet, to savor the garlic and buttery sauce at its peak.
- Experiment with extras. A squeeze of fresh orange juice or a sprinkle of toasted sesame seeds can add new dimensions of flavor and texture.
Serving Suggestions and Pairings
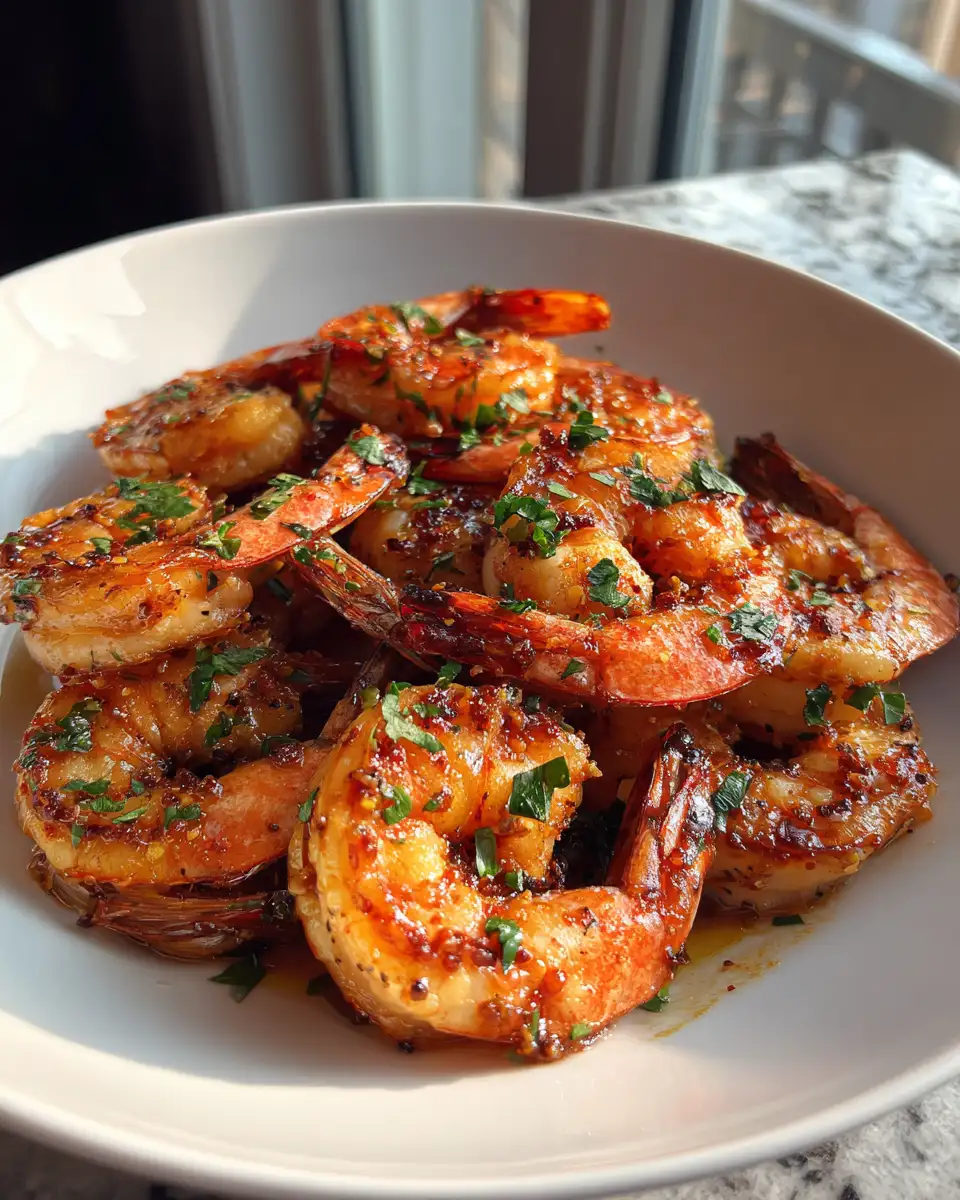
Hawaiian Garlic Shrimp is wonderfully versatile. I love serving it over steamed white rice, which soaks up that savory, garlicky sauce. For a more substantial meal, pair it with tropical fruit salads or grilled vegetables. I’ve also enjoyed it alongside a simple green salad with a tangy vinaigrette, giving a fresh contrast to the richness of the shrimp.
“One of my favorite ways to enjoy Hawaiian Garlic Shrimp is with a side of grilled pineapple and some crusty Hawaiian bread—it’s like bringing a little island vacation to my dinner table.”
If you’re entertaining, serve it with a chilled white wine or a light lager. For a non-alcoholic option, sparkling water with a splash of lime complements the flavors beautifully.
Storage and Reheating Tips
If you happen to have leftovers (which I rarely do, because it’s so good!), store the shrimp in an airtight container in the refrigerator for up to two days. Keep in mind that reheated shrimp can sometimes become a bit rubbery, so I recommend reheating gently in a skillet over low heat with a splash of butter or broth to revive moisture. Avoid microwaving for too long, as it can overcook the shrimp and diminish the flavor and texture.
Frequently Asked Questions
What are the main ingredients for Hawaiian Garlic Shrimp?
The main ingredients for Hawaiian Garlic Shrimp include the items listed in our ingredients section above. Each ingredient plays a crucial role in achieving the perfect flavor and texture.
How long does it take to make Hawaiian Garlic Shrimp?
The total time to make Hawaiian Garlic Shrimp includes both preparation and cooking time. Check the recipe card above for exact timing details.
Can I make Hawaiian Garlic Shrimp ahead of time?
Yes, Hawaiian Garlic Shrimp can often be prepared in advance. Store it properly in an airtight container in the refrigerator and consume within the recommended timeframe.
What can I serve with Hawaiian Garlic Shrimp?
Hawaiian Garlic Shrimp pairs well with various sides and accompaniments. Consider the serving suggestions mentioned in the recipe for the best dining experience.
Is Hawaiian Garlic Shrimp suitable for special diets?
Depending on the ingredients used, Hawaiian Garlic Shrimp may be adapted for various dietary needs. Check the ingredients list and consider substitutions as needed for your dietary requirements.
Final Thoughts
Hawaiian Garlic Shrimp holds a special place in my heart because it reminds me of sunny days, warm breezes, and family dinners that feel like a mini vacation. With just a handful of ingredients and a quick cook time, you can create a dish that’s bursting with flavor and packed with comfort. Whether you’re winding down after a busy day or celebrating a special occasion, this recipe is sure to bring a smile to your face and a little island magic to your table. I hope you enjoy making and sharing this dish as much as I do—remember, cooking is all about sharing love, and this dish is full of it.