
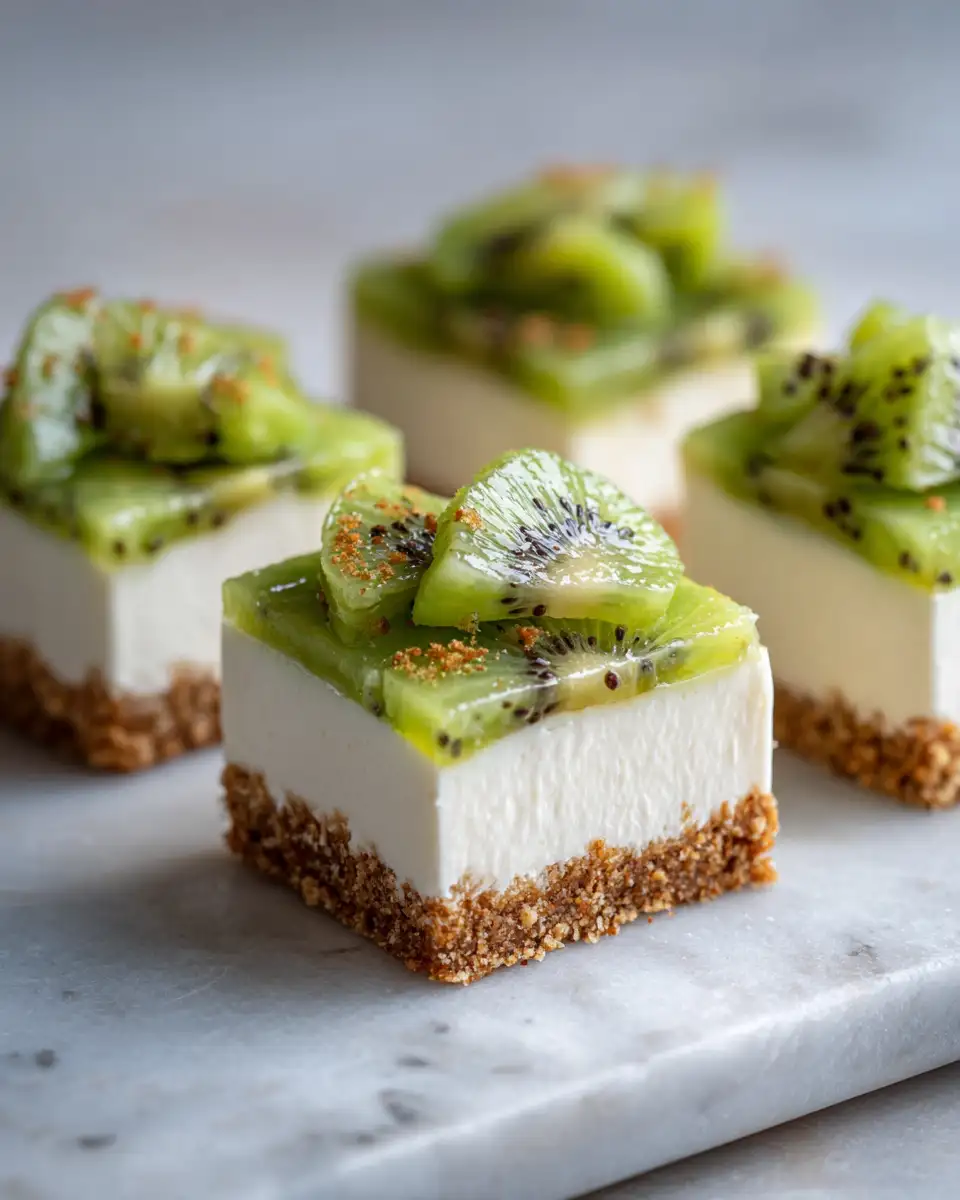
There’s something truly special about dessert recipes that come together effortlessly but still deliver a punch of flavor and visual appeal. No Bake Kiwi Cheesecake Bars are exactly that—bright, tangy, creamy, and so easy to make, I find myself reaching for this recipe whenever I want something fresh and satisfying without turning on the oven. I first discovered this delightful treat during a warm summer afternoon at my grandma’s house; her kitchen was alive with the scent of ripe fruit and sweet cream, and I knew I had to recreate that magic in my own way. Over the years, these bars have become a staple in my dessert repertoire, perfect for gatherings or a simple weekend indulgence. Let me take you through how I craft these vibrant, no-fuss bars that always remind me of home.
Why You’ll Love This No Bake Kiwi Cheesecake Bars
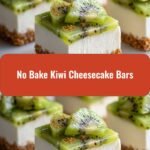
I’ve always believed that desserts should be both beautiful and effortless, and these No Bake Kiwi Cheesecake Bars hit that sweet spot. The moment I first tasted the combination of tangy kiwi with smooth, creamy cheesecake, I knew I’d found a new favorite. What makes this recipe stand out is its simplicity—no oven, no complicated techniques, just fresh ingredients layered together with love. Plus, the lively green hue and fresh slices make these bars as eye-catching as they are delicious. They’re perfect for summer parties, brunches, or a cozy night in when you want something light yet indulgent. Every time I make these, I remember my grandma’s kitchen, where fresh fruit and honest ingredients made everything taste better. That warmth and love are baked right into each bite.
Ingredients You’ll Need for This No Bake Kiwi Cheesecake Bars
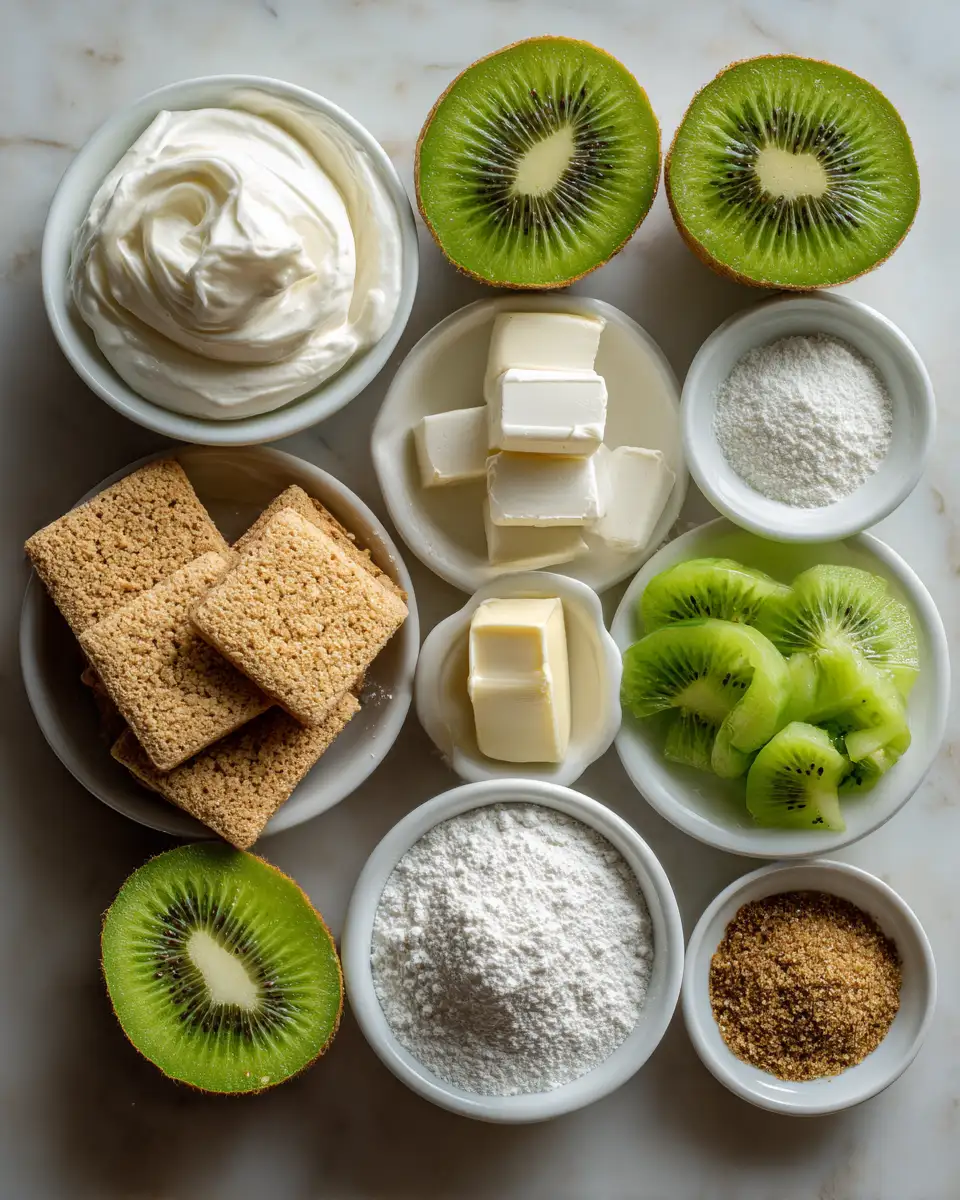
While I love experimenting in the kitchen, I always keep my ingredient list simple and familiar—just like my grandma taught me. For these vibrant bars, here’s what you’ll need:
- 1 ½ cups graham cracker crumbs (or digestive biscuits, crushed finely)
- ½ cup unsalted butter, melted (substitute with coconut oil for a dairy-free option)
- 8 oz (225g) cream cheese, softened (full-fat for the best creaminess)
- 1 cup powdered sugar (sifted for smoothness)
- 1 teaspoon vanilla extract
- 1 cup heavy cream (whipped to soft peaks)
- 3 ripe kiwis, peeled and sliced thin (or more if you love extra kiwi flavor)
- Optional: 1 tablespoon lemon juice or lime juice (to enhance the brightness)
When I make these, I like to use fresh, ripe kiwis—they’re sweet, slightly tart, and give that signature vibrant green. If kiwis aren’t in season, frozen or canned can work in a pinch, but fresh always makes a difference in flavor and texture. I also sometimes add a hint of lime zest to the crust for an extra zing, inspired by my grandma’s knack for balancing flavors. This recipe is quite forgiving, so feel free to customize the sweetness or tartness to your liking.
Nutrition Facts
- Calories: Approximately 250-300 per serving
- Protein: 4-5 grams
- Fat: 15-20 grams
- Carbohydrates: 25-35 grams
- Fiber: 2-3 grams
- Sugar: 15-20 grams
- Sodium: 60-80 milligrams
These numbers are approximate and depend on portion sizes and specific ingredient brands. I like to think of this as a treat—something that can be enjoyed in moderation while still nourishing the soul, just like my grandma’s kitchen always aimed to do. I’ve found that using full-fat cream cheese and heavy cream gives the bars that rich, satisfying texture, making each bite memorable. Learn more: Zesty Delight: Indulge in the Ultimate No-Bake Lemon Cheesecake
PrintDeliciously Fresh No Bake Kiwi Cheesecake Bars to Cool Your Summer
Learn how to make delicious No Bake Kiwi Cheesecake Bars. Easy recipe with step-by-step instructions.
- Prep Time: 15 minutes
- Cook Time: 30 minutes
- Total Time: 45 minutes
- Yield: 4 servings
- Category: Main Dish
- Method: Cooking
- Cuisine: International
Ingredients
While I love experimenting in the kitchen, I always keep my ingredient list simple and familiar—just like my grandma taught me. For these vibrant bars, here’s what you’ll need:
- 1 ½ cups graham cracker crumbs (or digestive biscuits, crushed finely)
- ½ cup unsalted butter, melted (substitute with coconut oil for a dairy-free option)
- 8 oz (225g) cream cheese, softened (full-fat for the best creaminess)
- 1 cup powdered sugar (sifted for smoothness)
- 1 teaspoon vanilla extract
- 1 cup heavy cream (whipped to soft peaks)
- 3 ripe kiwis, peeled and sliced thin (or more if you love extra kiwi flavor)
- Optional: 1 tablespoon lemon juice or lime juice (to enhance the brightness)
When I make these, I like to use fresh, ripe kiwis—they’re sweet, slightly tart, and give that signature vibrant green. If kiwis aren’t in season, frozen or canned can work in a pinch, but fresh always makes a difference in flavor and texture. I also sometimes add a hint of lime zest to the crust for an extra zing, inspired by my grandma’s knack for balancing flavors. This recipe is quite forgiving, so feel free to customize the sweetness or tartness to your liking.
Instructions
- Begin by preparing your crust. In a medium bowl, combine the graham cracker crumbs with the melted butter until the mixture resembles wet sand. If you prefer a slightly sweeter crust, sprinkle in a tablespoon of sugar. Press this mixture firmly into the bottom of a lined 9×9-inch square baking pan, creating an even layer. Chill in the refrigerator for about 15 minutes while you prepare the filling.
- In a large mixing bowl, beat the softened cream cheese with the powdered sugar and vanilla extract until smooth and creamy. I like using a hand mixer for this—my grandma always told me that good cheesecake starts with soft, well-mixed cream cheese. Make sure there are no lumps.
- In a separate bowl, whip the heavy cream until soft peaks form. Carefully fold the whipped cream into the cream cheese mixture, blending gently to keep the mixture light and airy. This step is where the magic happens—giving the bars that luscious, mousse-like texture.
- Pour the cheesecake filling over the chilled crust, spreading it evenly with a spatula. Tap the pan gently on the counter to eliminate air bubbles and ensure a smooth surface.
- Now, prepare the kiwi topping. Slice the kiwis thinly and arrange them decoratively on top of the cheesecake layer. For added flavor, toss the slices lightly with lemon or lime juice before placing them—they help prevent browning and brighten the flavor, a trick I learned from my grandma’s quick citrus fixes.
- Refrigerate the assembled bars for at least 4 hours, or preferably overnight. The longer they set, the creamier and more cohesive they become. I often prepare these in the evening and enjoy them for dessert the next day—they taste even better once the flavors meld.
- Before serving, you can add an extra kiwi slice or a sprig of mint for a finishing touch. Slice into squares and serve chilled. These bars are best enjoyed fresh but can be stored covered in the fridge for up to 2 days for optimal freshness.
Steps to Create Your No Bake Kiwi Cheesecake Bars
- Begin by preparing your crust. In a medium bowl, combine the graham cracker crumbs with the melted butter until the mixture resembles wet sand. If you prefer a slightly sweeter crust, sprinkle in a tablespoon of sugar. Press this mixture firmly into the bottom of a lined 9×9-inch square baking pan, creating an even layer. Chill in the refrigerator for about 15 minutes while you prepare the filling.
- In a large mixing bowl, beat the softened cream cheese with the powdered sugar and vanilla extract until smooth and creamy. I like using a hand mixer for this—my grandma always told me that good cheesecake starts with soft, well-mixed cream cheese. Make sure there are no lumps.
- In a separate bowl, whip the heavy cream until soft peaks form. Carefully fold the whipped cream into the cream cheese mixture, blending gently to keep the mixture light and airy. This step is where the magic happens—giving the bars that luscious, mousse-like texture.
- Pour the cheesecake filling over the chilled crust, spreading it evenly with a spatula. Tap the pan gently on the counter to eliminate air bubbles and ensure a smooth surface.
- Now, prepare the kiwi topping. Slice the kiwis thinly and arrange them decoratively on top of the cheesecake layer. For added flavor, toss the slices lightly with lemon or lime juice before placing them—they help prevent browning and brighten the flavor, a trick I learned from my grandma’s quick citrus fixes.
- Refrigerate the assembled bars for at least 4 hours, or preferably overnight. The longer they set, the creamier and more cohesive they become. I often prepare these in the evening and enjoy them for dessert the next day—they taste even better once the flavors meld.
- Before serving, you can add an extra kiwi slice or a sprig of mint for a finishing touch. Slice into squares and serve chilled. These bars are best enjoyed fresh but can be stored covered in the fridge for up to 2 days for optimal freshness.
Tips for Making the Best No Bake Kiwi Cheesecake Bars
My grandma always said, “Cooking is about love and patience,” and these bars are no exception. Here are some tips I swear by to make your creation shine:
- Use ripe kiwis—they’re sweeter and softer, making them easier to slice thin and arrange beautifully.
- If your cream cheese is too cold, it won’t blend smoothly. Let it sit at room temperature for about 30 minutes before mixing.
- For a more intense kiwi flavor, blend some of the slices into the filling for a subtle green hue and extra zing. I did this once for a fun twist, and it turned out gorgeous!
- Don’t skip chilling! The bars need time to set properly. Impatiently slicing too early can result in messy pieces.
- For a dairy-free version, substitute cream cheese with coconut cream or a dairy-free cream cheese alternative, and use coconut whipped cream instead of heavy cream.
- To make it extra special, sprinkle some crushed graham crackers or toasted coconut on top just before serving for added texture.
- If you want a more tart flavor, add a touch more lemon or lime juice to the filling. I love balancing the sweetness with a bright citrus note, just like my grandma used to do with her fruit desserts.
Serving Suggestions and Pairings
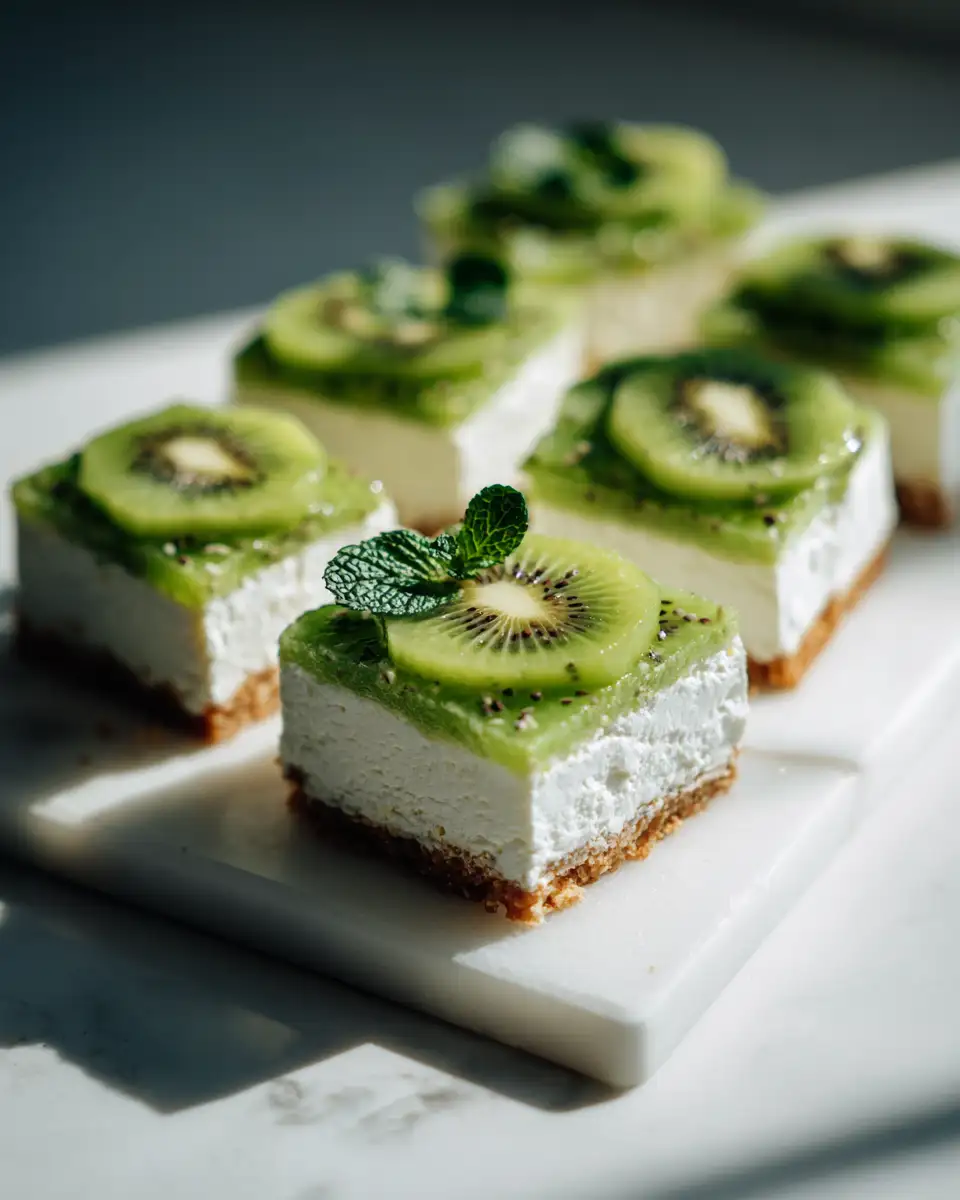
Once your No Bake Kiwi Cheesecake Bars are ready, the real fun begins with presentation. I love serving these chilled, with a sprig of fresh mint or a few extra kiwi slices on top. Their vibrant green color makes them a beautiful centerpiece for any dessert table. For a more indulgent touch, pair these bars with a dollop of whipped cream or a drizzle of honey.
If I’m hosting a brunch or a summer gathering, I like to serve these alongside other fruit-based desserts or light salads. They go especially well with a glass of sparkling wine or a chilled herbal tea—think mint or chamomile—that complements the refreshing kiwi flavor. One time, I paired these with a citrus-infused iced tea, and the combination was a hit with friends and family alike.
Storage and Reheating Tips
These bars are best enjoyed within a couple of days of making them, but they hold up quite well in the fridge. Cover the pan tightly with plastic wrap or transfer the slices to an airtight container. Keep them chilled and protected from strong odors, as the kiwi and cheesecake can absorb other flavors.
If you want to serve them slightly softened after refrigeration, just let them sit at room temperature for about 10-15 minutes before slicing. I find that they taste creamier and more decadent that way, especially on warm days when I crave something cool and luscious.
Frequently Asked Questions
What are the main ingredients for No Bake Kiwi Cheesecake Bars?
The main ingredients for No Bake Kiwi Cheesecake Bars include the items listed in our ingredients section above. Each ingredient plays a crucial role in achieving the perfect flavor and texture.
How long does it take to make No Bake Kiwi Cheesecake Bars?
The total time to make No Bake Kiwi Cheesecake Bars includes both preparation and cooking time. Check the recipe card above for exact timing details.
Can I make No Bake Kiwi Cheesecake Bars ahead of time?
Yes, No Bake Kiwi Cheesecake Bars can often be prepared in advance. Store it properly in an airtight container in the refrigerator and consume within the recommended timeframe.
What can I serve with No Bake Kiwi Cheesecake Bars?
No Bake Kiwi Cheesecake Bars pairs well with various sides and accompaniments. Consider the serving suggestions mentioned in the recipe for the best dining experience.
Is No Bake Kiwi Cheesecake Bars suitable for special diets?
Depending on the ingredients used, No Bake Kiwi Cheesecake Bars may be adapted for various dietary needs. Check the ingredients list and consider substitutions as needed for your dietary requirements.
Final Thoughts
If you’re looking for a dessert that’s as beautiful as it is delicious—and easy to make without turning on your oven—these No Bake Kiwi Cheesecake Bars are just the thing. They remind me of lazy summer afternoons in my grandma’s kitchen, where fresh fruit and simple ingredients created happiness. I hope you’ll try this recipe and infuse it with your own personal touch, whether that’s adding a splash of citrus, a crunchy topping, or a drizzle of honey. Remember, cooking is about sharing love and creating memories, and these bars are a perfect way to do just that. Happy baking—and more accurately, no baking—my friends!
1 thought on “Deliciously Fresh No Bake Kiwi Cheesecake Bars to Cool Your Summer”