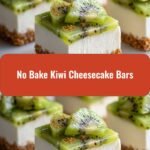
Deliciously Fresh No Bake Kiwi Cheesecake Bars to Cool Your Summer
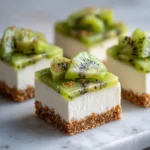
Learn how to make delicious No Bake Kiwi Cheesecake Bars. Easy recipe with step-by-step instructions.
- Prep Time: 15 minutes
- Cook Time: 30 minutes
- Total Time: 45 minutes
- Yield: 4 servings
- Category: Main Dish
- Method: Cooking
- Cuisine: International
Ingredients
While I love experimenting in the kitchen, I always keep my ingredient list simple and familiar—just like my grandma taught me. For these vibrant bars, here’s what you’ll need:
- 1 ½ cups graham cracker crumbs (or digestive biscuits, crushed finely)
- ½ cup unsalted butter, melted (substitute with coconut oil for a dairy-free option)
- 8 oz (225g) cream cheese, softened (full-fat for the best creaminess)
- 1 cup powdered sugar (sifted for smoothness)
- 1 teaspoon vanilla extract
- 1 cup heavy cream (whipped to soft peaks)
- 3 ripe kiwis, peeled and sliced thin (or more if you love extra kiwi flavor)
- Optional: 1 tablespoon lemon juice or lime juice (to enhance the brightness)
When I make these, I like to use fresh, ripe kiwis—they’re sweet, slightly tart, and give that signature vibrant green. If kiwis aren’t in season, frozen or canned can work in a pinch, but fresh always makes a difference in flavor and texture. I also sometimes add a hint of lime zest to the crust for an extra zing, inspired by my grandma’s knack for balancing flavors. This recipe is quite forgiving, so feel free to customize the sweetness or tartness to your liking.
Instructions
- Begin by preparing your crust. In a medium bowl, combine the graham cracker crumbs with the melted butter until the mixture resembles wet sand. If you prefer a slightly sweeter crust, sprinkle in a tablespoon of sugar. Press this mixture firmly into the bottom of a lined 9×9-inch square baking pan, creating an even layer. Chill in the refrigerator for about 15 minutes while you prepare the filling.
- In a large mixing bowl, beat the softened cream cheese with the powdered sugar and vanilla extract until smooth and creamy. I like using a hand mixer for this—my grandma always told me that good cheesecake starts with soft, well-mixed cream cheese. Make sure there are no lumps.
- In a separate bowl, whip the heavy cream until soft peaks form. Carefully fold the whipped cream into the cream cheese mixture, blending gently to keep the mixture light and airy. This step is where the magic happens—giving the bars that luscious, mousse-like texture.
- Pour the cheesecake filling over the chilled crust, spreading it evenly with a spatula. Tap the pan gently on the counter to eliminate air bubbles and ensure a smooth surface.
- Now, prepare the kiwi topping. Slice the kiwis thinly and arrange them decoratively on top of the cheesecake layer. For added flavor, toss the slices lightly with lemon or lime juice before placing them—they help prevent browning and brighten the flavor, a trick I learned from my grandma’s quick citrus fixes.
- Refrigerate the assembled bars for at least 4 hours, or preferably overnight. The longer they set, the creamier and more cohesive they become. I often prepare these in the evening and enjoy them for dessert the next day—they taste even better once the flavors meld.
- Before serving, you can add an extra kiwi slice or a sprig of mint for a finishing touch. Slice into squares and serve chilled. These bars are best enjoyed fresh but can be stored covered in the fridge for up to 2 days for optimal freshness.
Find it online: https://artofeasycooking.com/no-bake-kiwi-cheesecake-bars/