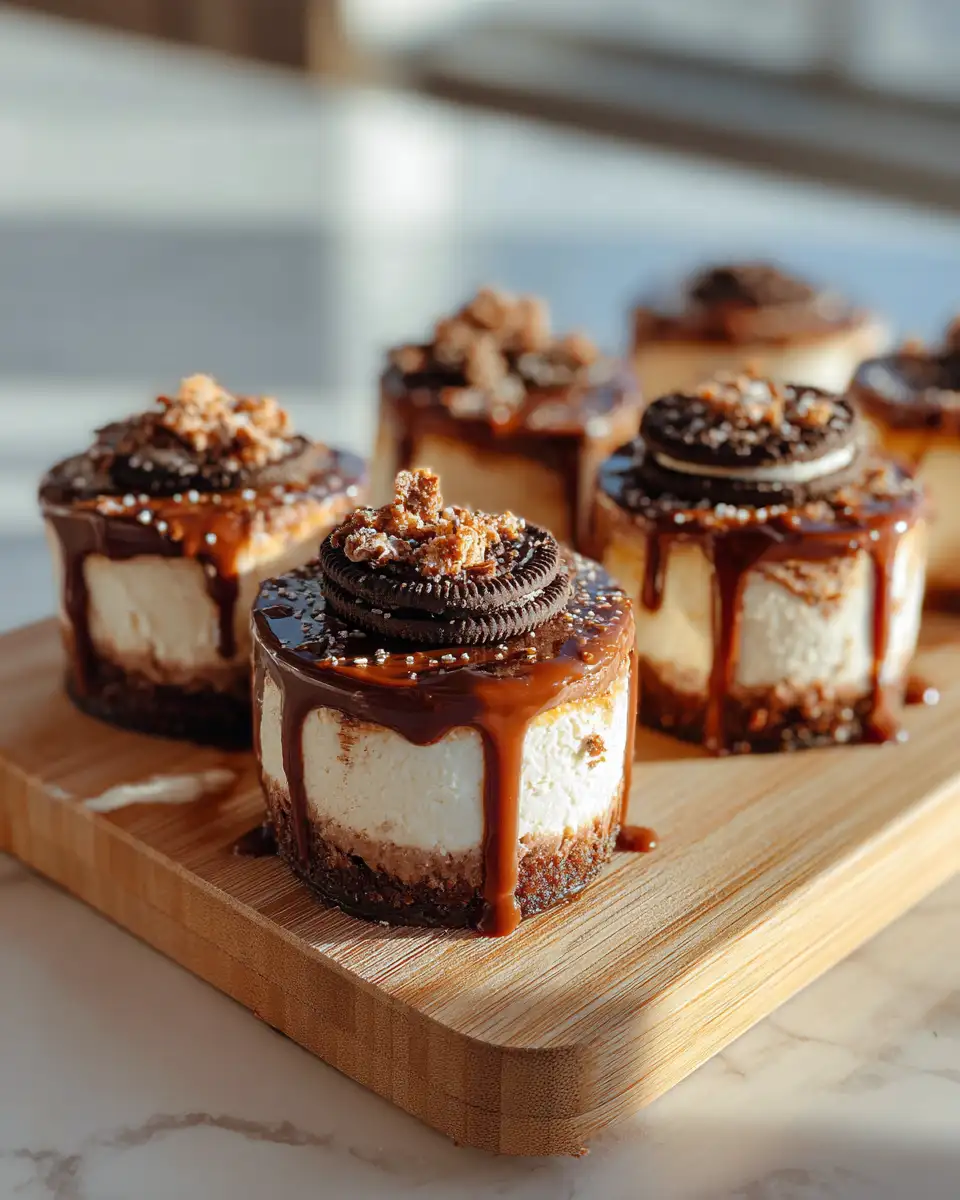
There’s something truly delightful about combining rich, creamy flavors with crunchy, chocolatey bites—enter Nutella Oreo Cheesecake Bites. These little treats have become a favorite in my kitchen, reminding me of lazy Sunday afternoons spent baking with my grandma. I remember her hands expertly crushing cookies and mixing creamy cheese with love, and now I get to share that magic with you. Whether you’re craving a sweet snack or a fancy dessert for guests, these bites are perfect—simple to make, irresistibly tasty, and packed with nostalgic charm. Let’s dive into how you can create these delectable little morsels that bring warmth and joy to every occasion.
Why You’ll Love This Nutella Oreo Cheesecake Bites
If you’re anything like me, you find comfort in small, satisfying treats that pack a punch of flavor and nostalgia. Nutella Oreo Cheesecake Bites tick all those boxes. They’re a harmonious blend of creamy cheesecake filling infused with the irresistible hazelnut-chocolate spread, nestled inside a crunchy Oreo cookie crust. The best part? No baking required—just some simple chilling and assembly. I’ve made these countless times for family gatherings, and each time they disappear faster than I can say “delicious.” Their rich taste, combined with the ease of preparation, makes them an absolute must-try for anyone who loves a decadent, no-fuss dessert. Plus, they’re versatile enough to serve at parties, potlucks, or even as a special treat just for yourself—because sometimes, you deserve a little extra sweetness in your day.
Ingredients You’ll Need for This Nutella Oreo Cheesecake Bites
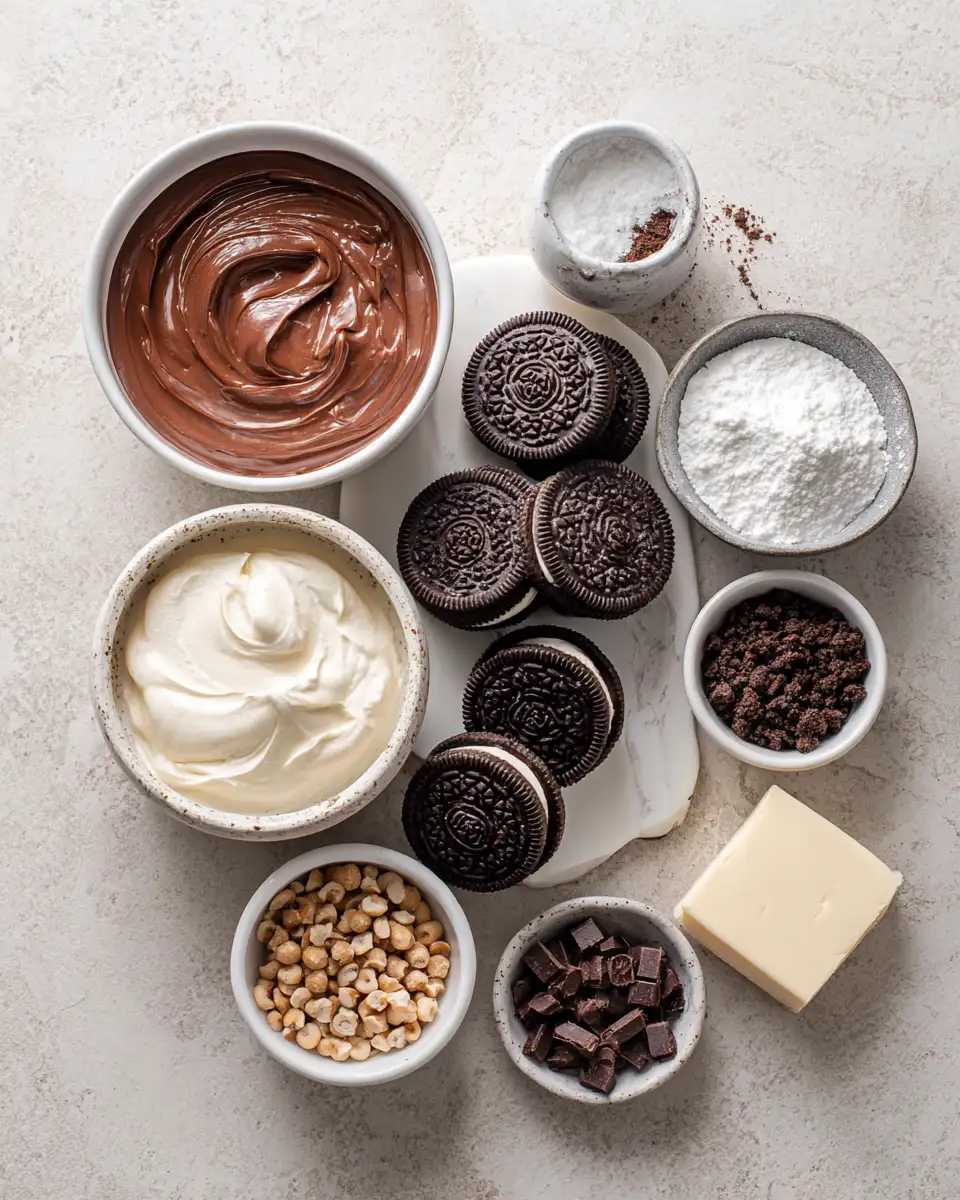
As someone who grew up helping in my grandma’s kitchen, I believe that good desserts start with good ingredients—and a little bit of love. For these Nutella Oreo Cheesecake Bites, I keep things straightforward, but feel free to get creative with substitutions if needed. Here’s what you’ll need:
- 24 Oreo cookies (regular or double-stuffed, depending on your preference)
- 8 oz (about 225g) cream cheese, softened
- 1/2 cup Nutella hazelnut spread
- 1/4 cup powdered sugar (add more if you prefer sweeter bites)
- 1 teaspoon vanilla extract
- 1 cup heavy cream, chilled
- Optional: mini chocolate chips or chopped hazelnuts for garnish
If you’re vegan or lactose-intolerant, you can substitute cream cheese with vegan cream cheese and heavy cream with coconut whipped cream. The cookie crust can also be replaced with crushed graham crackers or digestive biscuits if Oreo isn’t your thing. I often experiment with these variations, and they turn out just as delightful.
Nutrition Facts
- Calories: Approximately 150 calories per bite (assuming a standard size)
- Protein: 2g
- Fat: 9g
- Carbohydrates: 17g
- Fiber: 1g
- Sugar: 8g
- Sodium: 70mg
These numbers are approximate, but they give you a good idea of the indulgence level. Growing up in a household where desserts were made with love rather than strict calorie counting, I always say to enjoy treats mindfully—these bites are meant to bring joy, after all.
PrintIrresistible Nutella Oreo Cheesecake Bites You Can’t Stop Snacking On
Learn how to make delicious Nutella Oreo Cheesecake Bites. Easy recipe with step-by-step instructions.
- Prep Time: 15 minutes
- Cook Time: 30 minutes
- Total Time: 45 minutes
- Yield: 4 servings
- Category: Main Dish
- Method: Cooking
- Cuisine: International
Ingredients
As someone who grew up helping in my grandma’s kitchen, I believe that good desserts start with good ingredients—and a little bit of love. For these Nutella Oreo Cheesecake Bites, I keep things straightforward, but feel free to get creative with substitutions if needed. Here’s what you’ll need:
- 24 Oreo cookies (regular or double-stuffed, depending on your preference)
- 8 oz (about 225g) cream cheese, softened
- 1/2 cup Nutella hazelnut spread
- 1/4 cup powdered sugar (add more if you prefer sweeter bites)
- 1 teaspoon vanilla extract
- 1 cup heavy cream, chilled
- Optional: mini chocolate chips or chopped hazelnuts for garnish
If you’re vegan or lactose-intolerant, you can substitute cream cheese with vegan cream cheese and heavy cream with coconut whipped cream. The cookie crust can also be replaced with crushed graham crackers or digestive biscuits if Oreo isn’t your thing. I often experiment with these variations, and they turn out just as delightful.
Instructions
-
Start by preparing the cookie crust. Place the Oreo cookies in a food processor and pulse until they resemble fine crumbs. If you don’t have a food processor, you can place them in a sealed plastic bag and crush them with a rolling pin. Transfer the crumbs to a mixing bowl.
-
Add about 2 tablespoons of melted butter (or a neutral oil if you prefer) to the Oreo crumbs and mix until the mixture holds together when pressed. This step reminds me of helping my grandma press cookie bases into mini baking pans—such a simple yet satisfying process.
-
Line a mini muffin tin with paper liners or silicone molds. Spoon about a teaspoon of the Oreo crumb mixture into each cavity and press down firmly to create a sturdy crust. Chill in the refrigerator for about 15 minutes while you prepare the filling.
-
In a large mixing bowl, beat the softened cream cheese, Nutella, powdered sugar, and vanilla extract until smooth and creamy. I find that using a hand mixer makes this step quick and easy, and it reminds me of the days I’d help my grandma beat the batter till it was silky.
-
In a separate chilled bowl, whip the heavy cream until stiff peaks form. Gently fold the whipped cream into the Nutella mixture, being careful not to deflate the whipped cream. This folding method gives the bites their light, airy texture that’s just the right balance to the rich flavors.
-
Using a small spoon or piping bag, fill each prepared Oreo crust with the cheesecake mixture. Smooth the tops with the back of a spoon or an offset spatula.
-
Once filled, place the tray in the refrigerator and chill for at least 2 hours, or until the bites are firm and set. I like to make these a day ahead if I have the time—they taste even better after a night of chilling and melding flavors.
-
Before serving, garnish with mini chocolate chips or chopped hazelnuts if desired. I often sprinkle a few extra Oreo crumbs on top for that homemade, rustic look that I love—makes me feel like I’m back in my grandma’s kitchen.
Steps to Create Your Nutella Oreo Cheesecake Bites
Start by preparing the cookie crust. Place the Oreo cookies in a food processor and pulse until they resemble fine crumbs. If you don’t have a food processor, you can place them in a sealed plastic bag and crush them with a rolling pin. Transfer the crumbs to a mixing bowl.
Add about 2 tablespoons of melted butter (or a neutral oil if you prefer) to the Oreo crumbs and mix until the mixture holds together when pressed. This step reminds me of helping my grandma press cookie bases into mini baking pans—such a simple yet satisfying process.
Line a mini muffin tin with paper liners or silicone molds. Spoon about a teaspoon of the Oreo crumb mixture into each cavity and press down firmly to create a sturdy crust. Chill in the refrigerator for about 15 minutes while you prepare the filling.
In a large mixing bowl, beat the softened cream cheese, Nutella, powdered sugar, and vanilla extract until smooth and creamy. I find that using a hand mixer makes this step quick and easy, and it reminds me of the days I’d help my grandma beat the batter till it was silky.
In a separate chilled bowl, whip the heavy cream until stiff peaks form. Gently fold the whipped cream into the Nutella mixture, being careful not to deflate the whipped cream. This folding method gives the bites their light, airy texture that’s just the right balance to the rich flavors.
Using a small spoon or piping bag, fill each prepared Oreo crust with the cheesecake mixture. Smooth the tops with the back of a spoon or an offset spatula.
Once filled, place the tray in the refrigerator and chill for at least 2 hours, or until the bites are firm and set. I like to make these a day ahead if I have the time—they taste even better after a night of chilling and melding flavors.
Before serving, garnish with mini chocolate chips or chopped hazelnuts if desired. I often sprinkle a few extra Oreo crumbs on top for that homemade, rustic look that I love—makes me feel like I’m back in my grandma’s kitchen.
Tips for Making the Best Nutella Oreo Cheesecake Bites
Use room temperature cream cheese for smooth, lump-free filling. I learned this trick early on—cold cream cheese can make mixing frustrating, and I definitely prefer a silky texture.
Chill your heavy cream and mixing bowls beforehand. This helps achieve stiff peaks faster, which is essential for that light, fluffy filling.
If you want a more intense Nutella flavor, add a teaspoon more of the spread or even swirl some on top before chilling.
Don’t skip the chilling time! Patience pays off—these bites need time to set, which results in clean, bite-sized pieces that hold their shape beautifully.
For a fun twist, try adding a splash of liqueur like Frangelico or Baileys to the filling—perfect for adult gatherings and adds an extra layer of flavor.
Serving Suggestions and Pairings
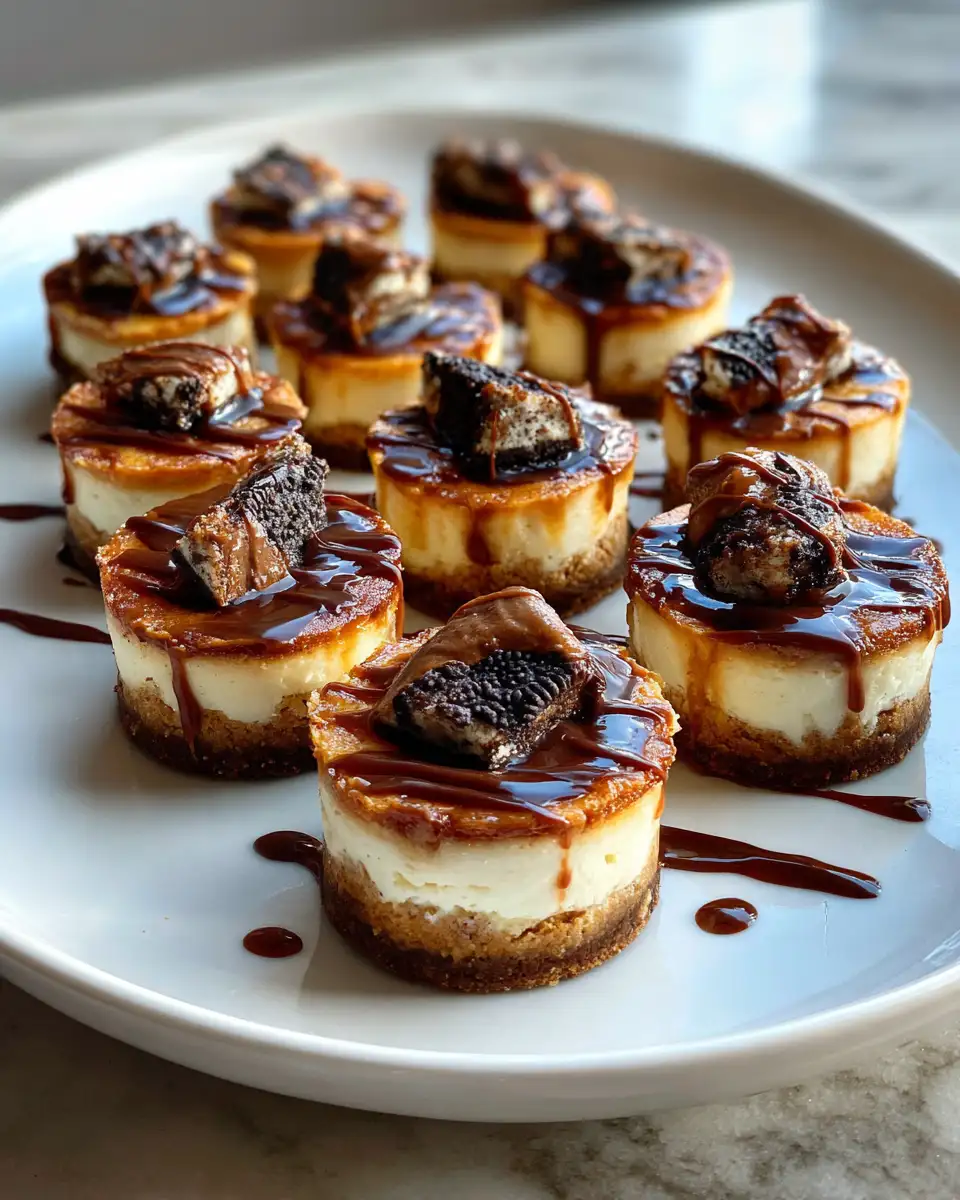
These Nutella Oreo Cheesecake Bites are a versatile treat. I love serving them on a pretty platter, arranged with fresh berries or sprigs of mint for a pop of color. They’re perfect for a cozy family movie night, a fancy dinner party, or even a casual picnic. When I make them for friends, I often pair them with a glass of cold milk, a cup of coffee, or a sweet dessert wine like Moscato. The combination of creamy, crunchy, and chocolatey makes each bite a little celebration.
In my experience, these bites are also excellent when dipped in melted chocolate or drizzled with additional Nutella for an extra indulgence. I remember my grandma’s eye for detail—she always said that the little touches make the biggest difference. So don’t hesitate to get creative with toppings and presentation. After all, food is about sharing joy and creating memories. Learn more: Irresistible Nutella Caramel Cheesecake Bites to Satisfy Your Sweet Tooth
Storage and Reheating Tips
Leftovers? Not that I expect these to last long in your house! But if you do have some, store the Nutella Oreo Cheesecake Bites in an airtight container in the refrigerator for up to 3 days. They’ll stay fresh and delicious, though I recommend bringing them to room temperature for about 10 minutes before serving—they taste even creamier that way, just like my grandma used to say about dessert.
If you want to reheat a bite or two, do so very gently in the microwave for about 10 seconds. Be careful not to overheat, as the filling can become too soft or melt. I find that these bites are best enjoyed cold or slightly warmed—either way, they’re a hit every time.
Frequently Asked Questions
What are the main ingredients for Nutella Oreo Cheesecake Bites?
The main ingredients for Nutella Oreo Cheesecake Bites include the items listed in our ingredients section above. Each ingredient plays a crucial role in achieving the perfect flavor and texture.
How long does it take to make Nutella Oreo Cheesecake Bites?
The total time to make Nutella Oreo Cheesecake Bites includes both preparation and cooking time. Check the recipe card above for exact timing details.
Can I make Nutella Oreo Cheesecake Bites ahead of time?
Yes, Nutella Oreo Cheesecake Bites can often be prepared in advance. Store it properly in an airtight container in the refrigerator and consume within the recommended timeframe.
What can I serve with Nutella Oreo Cheesecake Bites?
Nutella Oreo Cheesecake Bites pairs well with various sides and accompaniments. Consider the serving suggestions mentioned in the recipe for the best dining experience.
Is Nutella Oreo Cheesecake Bites suitable for special diets?
Depending on the ingredients used, Nutella Oreo Cheesecake Bites may be adapted for various dietary needs. Check the ingredients list and consider substitutions as needed for your dietary requirements.
Final Thoughts
Creating Nutella Oreo Cheesecake Bites is like capturing a little piece of happiness—simple ingredients, a bit of love, and a touch of patience result in something truly special. This recipe embodies everything I cherish: the warmth of my grandma’s kitchen, the joy of sharing good food, and the magic of turning everyday ingredients into memorable moments. I hope you find as much joy in making and tasting these bites as I do. Remember, the best desserts are the ones made with love—and a little bit of nostalgia. Happy baking!