
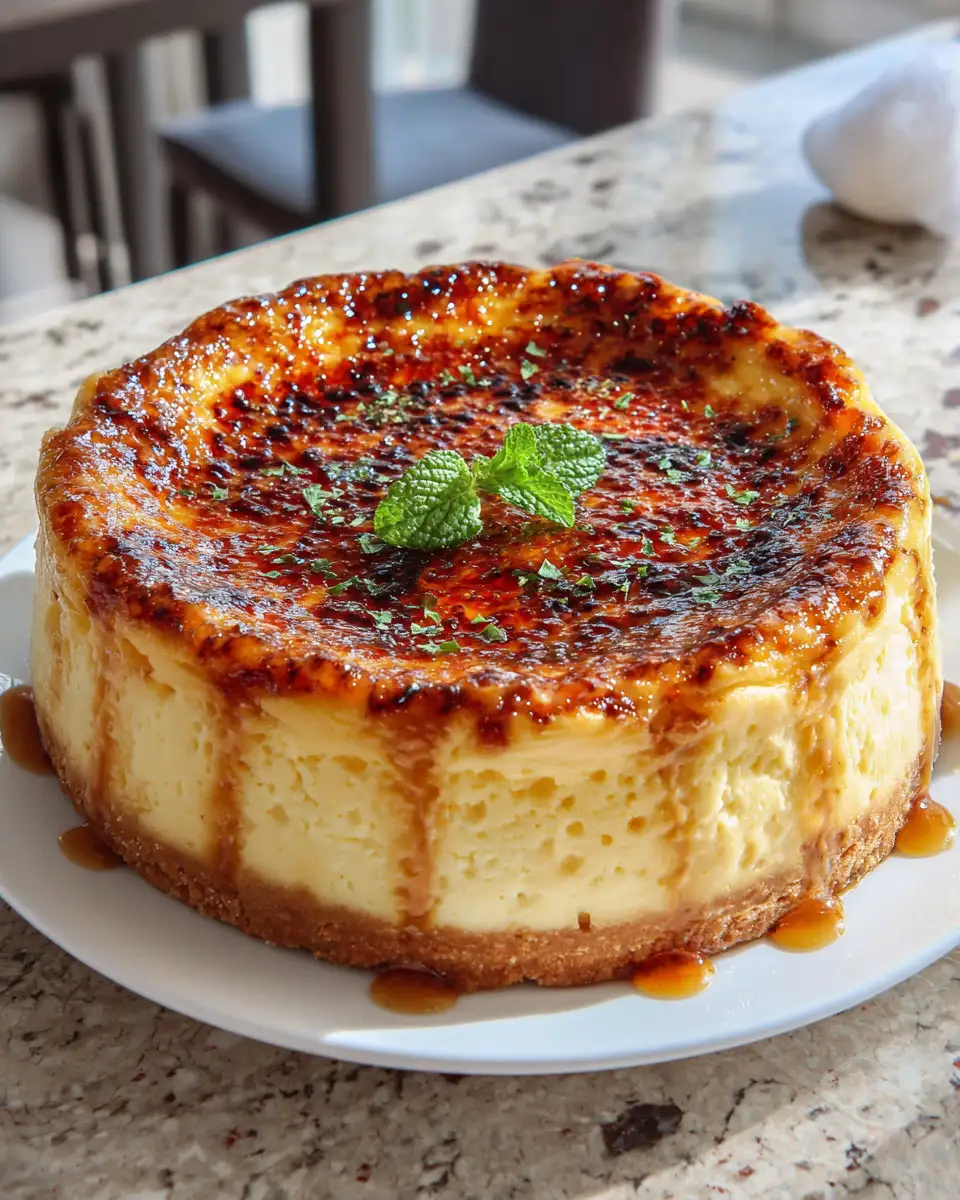
There’s something truly magical about combining two beloved desserts—creme brûlée and cheesecake—into one decadent treat. I still remember the first time I tasted a crème brûlée cheesecake; it was at a cozy bakery during a chilly autumn afternoon. The creamy custard, topped with that crisp caramelized sugar shell, all nestled within a rich, buttery cheesecake base—pure bliss. As someone who grew up in my grandma’s kitchen, where every dessert was made with love and fresh ingredients, I knew I had to create my own version that captures that warmth and elegance. This Crème Brûlée Cheesecake is not just a dessert; it’s a little piece of my heart, shared with you to bring a touch of comfort and sophistication to your table.
Why You’ll Love This Crème Brûlée Cheesecake
If you’re like me, you appreciate desserts that tell a story—ones that blend classic flavors with a modern twist. This Crème Brûlée Cheesecake checks all those boxes. It’s smooth, velvety, and indulgent, with a luscious custard-like center that melts in your mouth. The caramelized sugar topping adds that signature crunch, creating a delightful contrast to the creamy filling. Every bite reminds me of lazy Sunday afternoons at Grandma’s, where we’d gather around the table, sharing stories and laughter over something sweet. I love that this recipe is surprisingly simple to make, yet it feels elegant enough for special occasions or when you just want to treat yourself to something extraordinary. Plus, the process of caramelizing the sugar topping is almost meditative—like a little ritual that transforms the dessert into a show-stopping centerpiece.
Ingredients You’ll Need for This Crème Brûlée Cheesecake
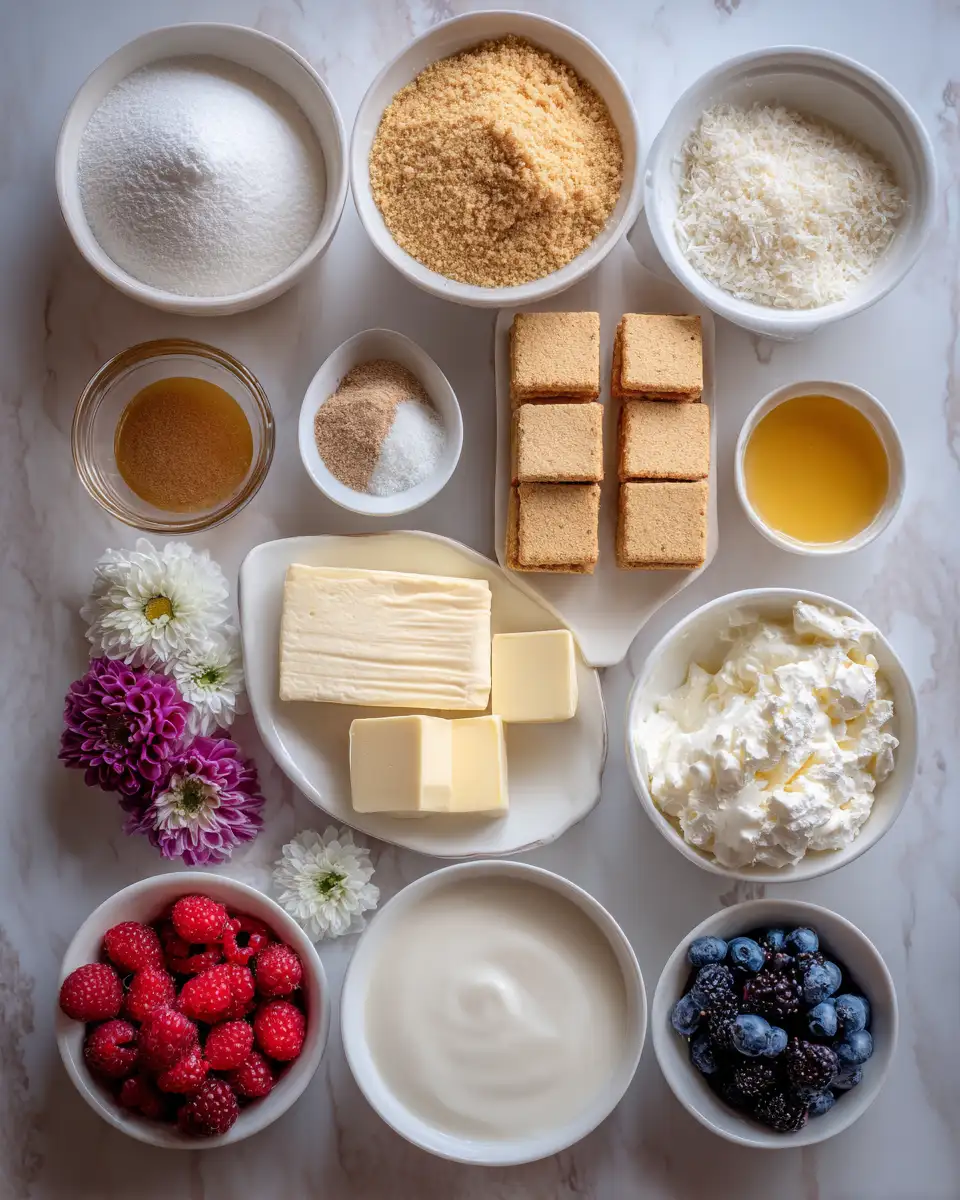
Gathering the right ingredients is the first step to creating a dessert that’s both rich and balanced. I always emphasize quality in my baking, especially when it comes to desserts that rely on simple ingredients to shine. Here’s what you’ll need:
- 1 1/2 cups graham cracker crumbs (or digestive biscuits, crushed)
- 1/4 cup granulated sugar
- 1/2 cup unsalted butter, melted
- 24 oz cream cheese, softened (preferably full-fat)
- 3/4 cup granulated sugar
- 3 large eggs
- 1 cup sour cream
- 1 tablespoon vanilla extract
- 1/4 cup all-purpose flour
- 1/2 cup heavy cream
- 1/4 cup granulated sugar (for caramelizing)
- Optional: fresh berries or edible flowers for garnish
I like to keep things simple but don’t hesitate to swap graham crackers for digestive biscuits if you prefer a slightly different flavor profile. When I was experimenting in my own kitchen, I found that using high-quality vanilla and real heavy cream really elevates the overall taste. Remember, patience is key—especially when caramelizing the sugar topping, which I’ll share tips on later!
Nutrition Facts
- Calories: Approximately 420 per slice (assuming 8 servings)
- Protein: 7g
- Fat: 30g
- Carbohydrates: 35g
- Fiber: 1g
- Sugar: 20g
- Sodium: 150mg
This is a rich, indulgent dessert, so I recommend enjoying it in moderation. Its creamy texture makes every calorie worth it, especially when served with fresh berries or a drizzle of honey. I find that sharing a slice with loved ones amplifies the joy, making it even more special—just like the desserts my grandma used to make for family gatherings.
PrintDecadent Crème Brûlée Cheesecake Recipes to Satisfy Your Sweet Tooth
Learn how to make delicious Crème Brûlée Cheesecake. Easy recipe with step-by-step instructions.
- Prep Time: 15 minutes
- Cook Time: 30 minutes
- Total Time: 45 minutes
- Yield: 4 servings
- Category: Main Dish
- Method: Cooking
- Cuisine: International
Ingredients
Gathering the right ingredients is the first step to creating a dessert that’s both rich and balanced. I always emphasize quality in my baking, especially when it comes to desserts that rely on simple ingredients to shine. Here’s what you’ll need:
- 1 1/2 cups graham cracker crumbs (or digestive biscuits, crushed)
- 1/4 cup granulated sugar
- 1/2 cup unsalted butter, melted
- 24 oz cream cheese, softened (preferably full-fat)
- 3/4 cup granulated sugar
- 3 large eggs
- 1 cup sour cream
- 1 tablespoon vanilla extract
- 1/4 cup all-purpose flour
- 1/2 cup heavy cream
- 1/4 cup granulated sugar (for caramelizing)
- Optional: fresh berries or edible flowers for garnish
I like to keep things simple but don’t hesitate to swap graham crackers for digestive biscuits if you prefer a slightly different flavor profile. When I was experimenting in my own kitchen, I found that using high-quality vanilla and real heavy cream really elevates the overall taste. Remember, patience is key—especially when caramelizing the sugar topping, which I’ll share tips on later!
Instructions
- Prepare the crust: Preheat your oven to 350°F (175°C). In a bowl, combine the graham cracker crumbs and 1/4 cup sugar. Pour in the melted butter and mix until the crumbs are evenly coated. Press this mixture firmly into the bottom of a 9-inch springform pan. Bake for 10 minutes to set the crust, then remove and let cool slightly.
- Make the filling: In a large mixing bowl, beat the softened cream cheese until smooth and creamy—this is where my grandma’s old hand-held mixer comes in handy. Add the sugar and continue to beat until fluffy. One at a time, add the eggs, mixing well after each addition. Stir in the sour cream, vanilla extract, and flour until just combined. Be careful not to overmix; I’ve learned that gentle folding keeps the filling silky.
- Bake the cheesecake: Pour the batter over the cooled crust. Smooth the top with a spatula. Bake in the preheated oven for about 55-60 minutes, or until the edges are set but the center still jiggles slightly when shaken. I like to place a baking dish filled with hot water on the rack below to keep the cheesecake moist and prevent cracks—this trick came from my grandma’s old baking tips.
- Cool and chill: Once baked, turn off the oven and leave the cheesecake inside for about 1 hour to slowly cool. Then, transfer it to the refrigerator and chill for at least 4 hours or overnight—this really helps develop that smooth texture.
- Caramelize the sugar topping: Before serving, sprinkle the 1/4 cup sugar evenly over the chilled cheesecake. Use a kitchen torch to carefully caramelize the sugar until it turns a deep amber and forms a crisp shell. If you don’t have a torch, you can place the cheesecake under a broiler for 1-2 minutes, but watch closely to prevent burning. I love that moment—watching the sugar melt and bubble into that beautiful golden shell, just like the one from my childhood bakery adventures.
- Serve and enjoy: Slice with a sharp knife, and for that authentic crème brûlée experience, serve immediately to enjoy the crackling topping. Garnish with fresh berries or edible flowers if desired, and savor each luxurious bite.
Steps to Create Your Crème Brûlée Cheesecake
- Prepare the crust: Preheat your oven to 350°F (175°C). In a bowl, combine the graham cracker crumbs and 1/4 cup sugar. Pour in the melted butter and mix until the crumbs are evenly coated. Press this mixture firmly into the bottom of a 9-inch springform pan. Bake for 10 minutes to set the crust, then remove and let cool slightly.
- Make the filling: In a large mixing bowl, beat the softened cream cheese until smooth and creamy—this is where my grandma’s old hand-held mixer comes in handy. Add the sugar and continue to beat until fluffy. One at a time, add the eggs, mixing well after each addition. Stir in the sour cream, vanilla extract, and flour until just combined. Be careful not to overmix; I’ve learned that gentle folding keeps the filling silky.
- Bake the cheesecake: Pour the batter over the cooled crust. Smooth the top with a spatula. Bake in the preheated oven for about 55-60 minutes, or until the edges are set but the center still jiggles slightly when shaken. I like to place a baking dish filled with hot water on the rack below to keep the cheesecake moist and prevent cracks—this trick came from my grandma’s old baking tips.
- Cool and chill: Once baked, turn off the oven and leave the cheesecake inside for about 1 hour to slowly cool. Then, transfer it to the refrigerator and chill for at least 4 hours or overnight—this really helps develop that smooth texture.
- Caramelize the sugar topping: Before serving, sprinkle the 1/4 cup sugar evenly over the chilled cheesecake. Use a kitchen torch to carefully caramelize the sugar until it turns a deep amber and forms a crisp shell. If you don’t have a torch, you can place the cheesecake under a broiler for 1-2 minutes, but watch closely to prevent burning. I love that moment—watching the sugar melt and bubble into that beautiful golden shell, just like the one from my childhood bakery adventures.
- Serve and enjoy: Slice with a sharp knife, and for that authentic crème brûlée experience, serve immediately to enjoy the crackling topping. Garnish with fresh berries or edible flowers if desired, and savor each luxurious bite.
Tips for Making the Best Crème Brûlée Cheesecake
- Room temperature ingredients: Always make sure your cream cheese, eggs, and sour cream are at room temperature. This ensures a smooth, lump-free batter—trust me, I’ve learned this the hard way after a few lumpy cheesecakes!
- Prevent cracks: Baking in a water bath and avoiding overmixing are key. My grandma used to say, “Patience in baking yields perfection.” I’ve found that slow, gentle mixing preserves the creamy texture.
- Caramelizing tips: Use a high-quality kitchen torch for the best results. Keep the flame moving to avoid burning the sugar. If broiling, stay close and watch closely—they can go from perfect to burnt in seconds.
- Chill thoroughly: Don’t skip the refrigeration step. The cheesecake’s texture improves dramatically after chilling overnight. Plus, it makes slicing easier and cleaner.
- Experiment with toppings: While the caramelized sugar shell is classic, try adding a dusting of cocoa powder, chopped nuts, or even a drizzle of caramel sauce for added flair. My favorite is a handful of fresh raspberries—they add a tart contrast that balances the sweetness beautifully.
Serving Suggestions and Pairings
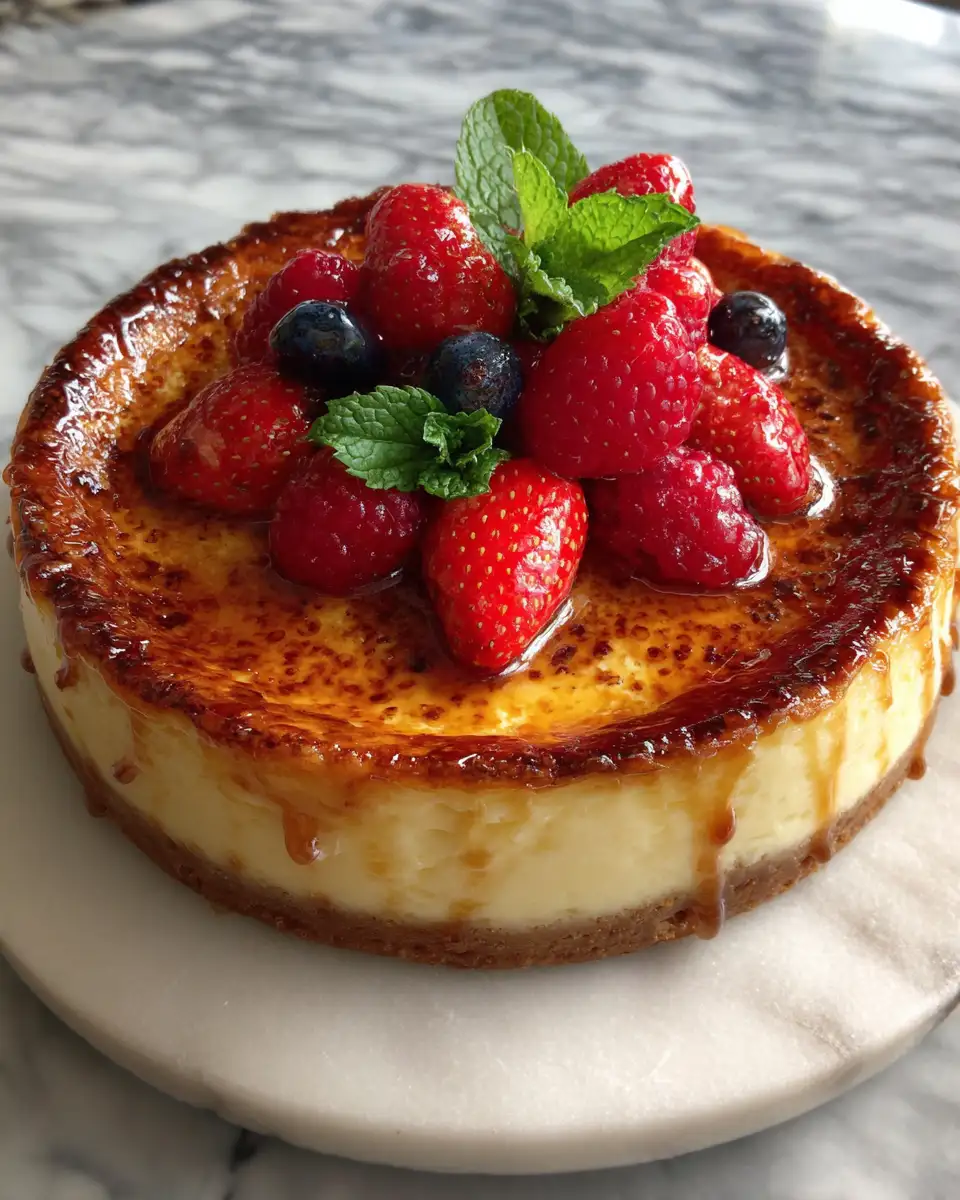
This Crème Brûlée Cheesecake is versatile and elegant enough to serve at any celebration. For a special dinner, pair it with a glass of sweet dessert wine like Moscato d’Asti or a light sparkling champagne to elevate the experience. I also love serving it with a dollop of whipped cream or a scoop of vanilla bean ice cream for extra indulgence. Learn more: Indulge Your Sweet Tooth with the Ultimate Chocolate Berry Swirl Waffle Cone Bowl Lover Delight
If you’re hosting a brunch, consider adding fresh fruit like strawberries, kiwis, or blueberries on top. A sprig of mint adds a refreshing touch. For an extra touch of sophistication, a drizzle of caramel or honey over the top can make it look as beautiful as it tastes.
One of my favorite memories is sharing this cheesecake with friends during a cozy holiday gathering. The combination of creamy, crunchy, and sweet flavors always earns compliments—and it’s a guaranteed crowd-pleaser.
Storage and Reheating Tips
Leftovers are rare in my house because everyone wants seconds! But if you do have leftovers, cover the cheesecake tightly with plastic wrap or store it in an airtight container. Keep it refrigerated for up to 3 days—though I recommend enjoying it sooner for the best texture and flavor.
If the caramelized shell softens after refrigeration, you can re-crystallize it by briefly torching the top again just before serving. Alternatively, you can gently reheat slices in a low-temperature oven (around 300°F) for a few minutes to bring back some of that fresh-baked warmth, but be careful not to melt the topping or over-soften the filling.
For the most authentic experience, serve chilled but not ice-cold. Allow the cheesecake to sit at room temperature for about 10 minutes before slicing—this enhances the flavors and makes each bite even more luscious.
Frequently Asked Questions
What are the main ingredients for Crème Brûlée Cheesecake?
The main ingredients for Crème Brûlée Cheesecake include the items listed in our ingredients section above. Each ingredient plays a crucial role in achieving the perfect flavor and texture.
How long does it take to make Crème Brûlée Cheesecake?
The total time to make Crème Brûlée Cheesecake includes both preparation and cooking time. Check the recipe card above for exact timing details.
Can I make Crème Brûlée Cheesecake ahead of time?
Yes, Crème Brûlée Cheesecake can often be prepared in advance. Store it properly in an airtight container in the refrigerator and consume within the recommended timeframe.
What can I serve with Crème Brûlée Cheesecake?
Crème Brûlée Cheesecake pairs well with various sides and accompaniments. Consider the serving suggestions mentioned in the recipe for the best dining experience.
Is Crème Brûlée Cheesecake suitable for special diets?
Depending on the ingredients used, Crème Brûlée Cheesecake may be adapted for various dietary needs. Check the ingredients list and consider substitutions as needed for your dietary requirements.
Final Thoughts
This Crème Brûlée Cheesecake is more than just a dessert; it’s a reflection of everything I cherish about baking—love, patience, and the joy of sharing something truly special. Each step in making it reminds me of my grandma’s kitchen, where simple ingredients came together to create magic. Whether you’re celebrating a milestone or simply craving a sweet escape, I hope this recipe brings comfort, elegance, and a touch of nostalgia to your home. Don’t be afraid to make it your own, experiment with toppings, or serve it with your favorite beverages. After all, desserts are about creating memories—and I believe this one will become a treasured favorite in your culinary repertoire, just like it has in mine.

2 thoughts on “Decadent Crème Brûlée Cheesecake Recipes to Satisfy Your Sweet Tooth”